Video Clean-up
The Video Clean-Up effect can enhance your video quality and fix common issues.
Go to the Controls panel and then click on the + icon next to Effects.
Using the Auto Stabilizer
Camera footage can sometimes be shaky or jittery, especially if the camera is handheld. The Auto Stabilizer effect can smooth out unwanted shaky camera motion automatically.
1. The Auto Stabilizer effect is found in the Video Clean-up folder within the Effects panel.
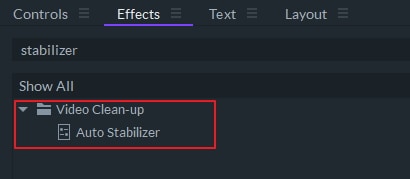
2. Click and drag Auto Stabilizer onto a video in the timeline to apply it.
Video Stabilization
Once you have added the Auto Stabilizer effect to a clip, an analysis of the motion in the footage will automatically start.
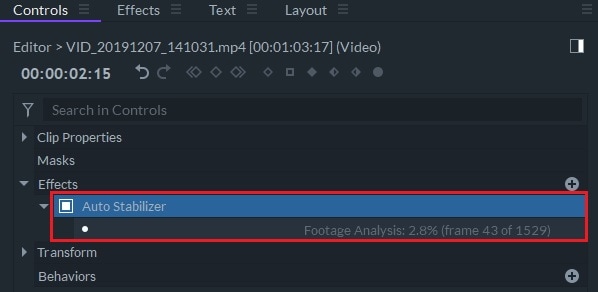
This is a background task, and you may continue editing during this analysis. You may add Auto Stabilizer to multiple clips on the timeline. Only one clip will be analyzed at a time, while the other clips’ analysis will queue up and start automatically after completion of previous tasks.
When the footage analysis finishes for a clip, its video will be automatically stabilized.
Auto Stabilizer Settings
In the clip’s Controls panel, click Auto Stabilizer to open the folder of settings. Selecting the Auto Stabilizer folder will also show the tracked motion points in the Viewer. The effect settings and the tracker points let you customize the result of the video stabilization.
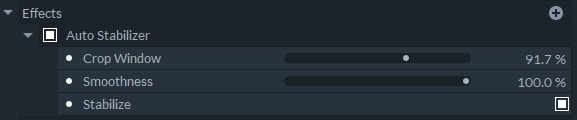
Crop Window: Usually, the process of negating camera shake requires the original video to be repositioned and/or rotated. The resulting image may no longer fit the image frame so the software crops, or rescales, the original video to hide missing areas. You may adjust the amount of cropping as desired.
Smoothness: Adjusting this setting will mix the stabilized result back with the original camera motion. 0% smoothness returns all the original camera shake, 100% is the automatic stabilized result, and an intermediate value will blend between the original shake and fully smoothed motion.
Stabilize: Unchecking the Stabilize box will disable the stabilization and uncrop the video while continuing to show the tracker points. This may be helpful while adjusting the effect settings or tracker points. Re-check this box to turn back on stabilization after completing your adjustments.
Replace, Add and Remove at Viewer window
When the footage analysis is completed, and the Auto Stabilizer folder is selected, the Viewer will overlay motion-tracked points over the stabilized video.
These points indicate the pixels of the footage used in the stabilization calculation, with green points being high-value pixels and red points being low-value pixels but still used in the calculation.
Pixels of objects and features with high contrast are considered high-value, but they are not always the correct points that should be used for your footage.
![]()
You may change the stabilization calculation if you want to try to improve the stabilized result or to limit the regions in the video to be stabilized.
For example, the tracker points may follow people or cars moving in the video that wouldn’t represent the camera’s motion. Other examples include stabilizing around a particular person or feature in the video or to level the horizon in the footage.
To change the stabilization result, change which tracker points are used with the controls displayed at the bottom of the Viewer.
Remove
With this button enabled, click and drag an area around the unwanted tracker points. These points will turn to a grey color to indicate they are disabled for the stabilization calculation.
If the result of the automatic stabilization can be improved, it is usually helpful to remove tracker points that do not match the actual camera motion, such as objects moving in a different direction from the camera or objects swaying in the wind.
![]()
Replace
With this button enabled, click and drag an area around only wanted tracker points. All points outside of this area will be disabled.
For specific footage, this may be the quickest way to stabilize a single feature.
![]()
Add
With this button enabled, click and drag and area around disabled tracker points to re-enable them.
![]()
Deinterlace
When you are using an interlaced video or footage in your project, then using the Deinterlace effect will hlep avoid any interlace visibility.
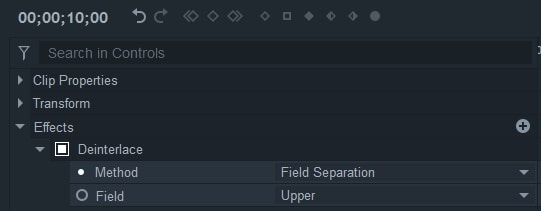
Field separation: Discards a field to create a half-resolution image. You can also separate the fields which will increase your frame rate. To keep maintain normal playback, the frame rate of composite shot should be set to twice that of the footage.
Field displacement: Analyses movement within the fields using optical flow techniques to create a new full resolution frame that merges the two fields together. Although it creates full-resolution frame, artefacts may be visible if the merge isn’t totally successful.
Field: Choose which field you wish to deinterlace .