Motion Track
Motion tracking analyzes movements within a video and allows you to automatically apply the motion onto another clip composited over this video. This produces the effect of a graphic element or a text element following either the general camera motion of the video, or the motion of a specific object or region within the video.
The graphic or text element needs to be on a video track in the timeline above the background clip that contains the motion to be followed.
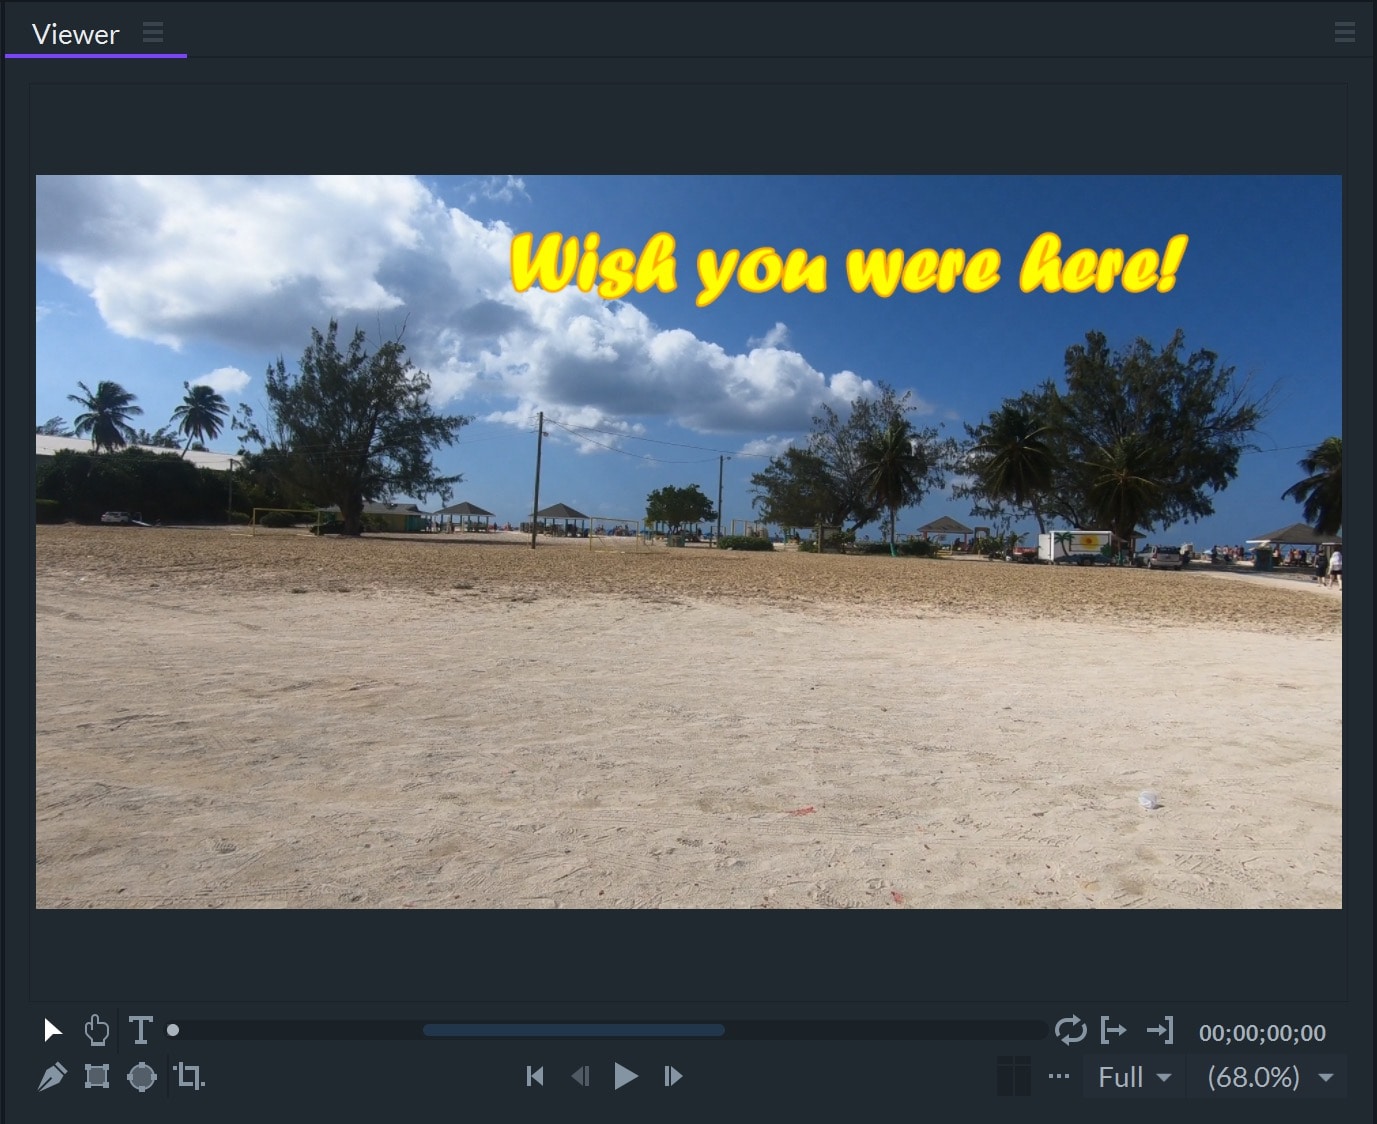
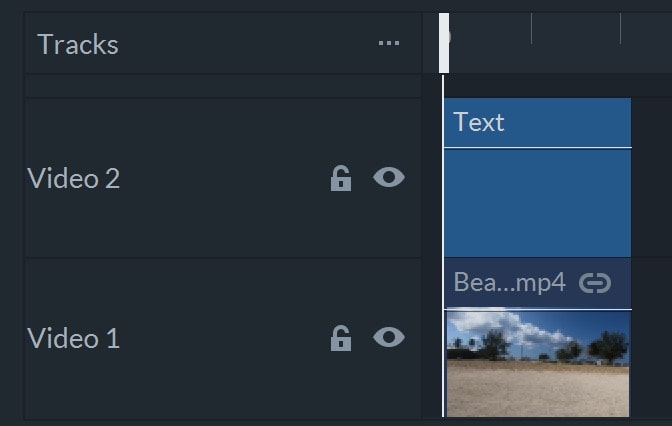
In this example, the beach clip contains camera motion, and the text element above it will follow along.
Using Motion Track
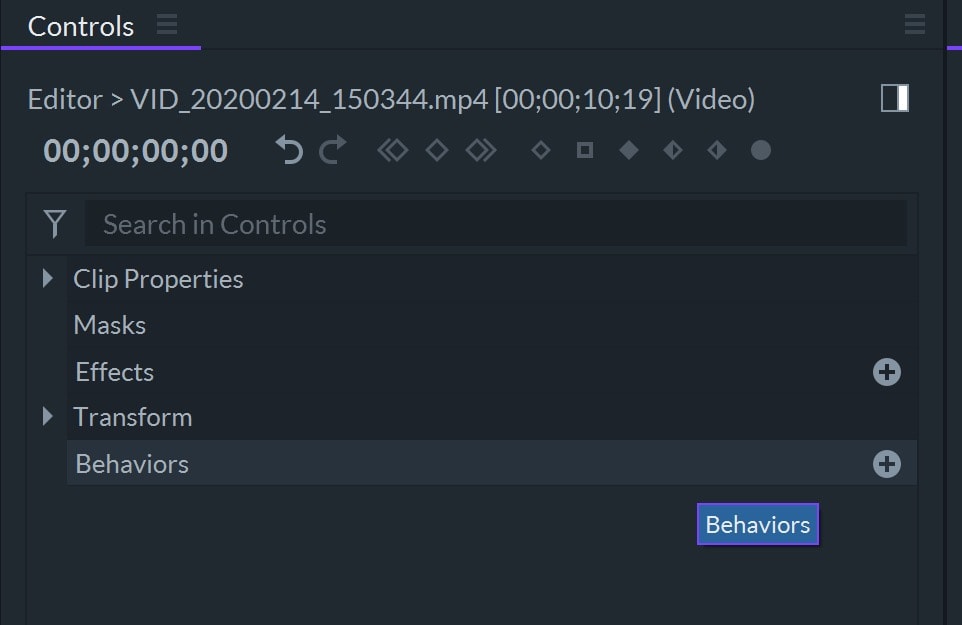
- The Motion Track effect is found in Behaviors within the Controls panel. In the timeline, select the top clip, such as the text clip, and click on the + icon beside Behaviors.
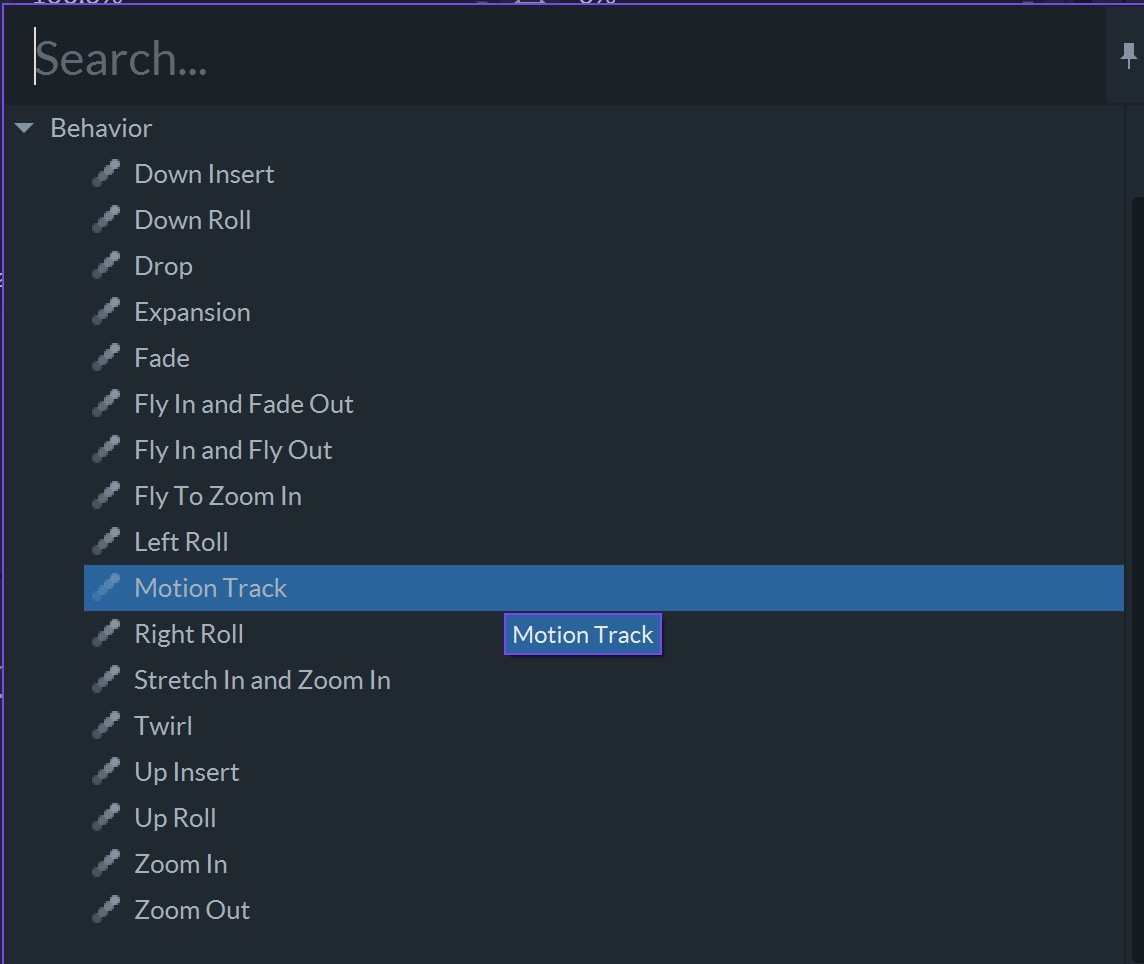
- Select Motion Track from the pop-up list of behaviors.
- Open the Motion Track folder and select the video clip to track.
- When the analysis is completed, the image in the viewer will fill with grey tracker points and you will be prompted to draw around the area that you wish to follow the motion.
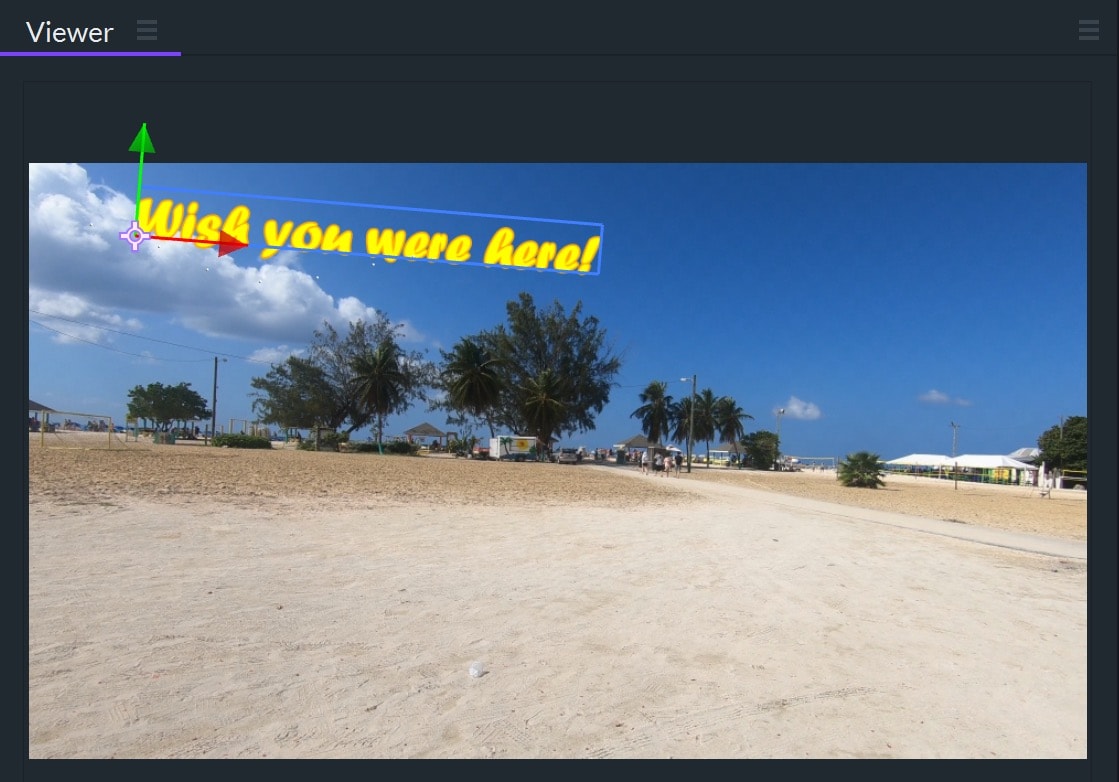
- The motion of the tree will now be automatically applied to the text object. Play the clip to preview the result.
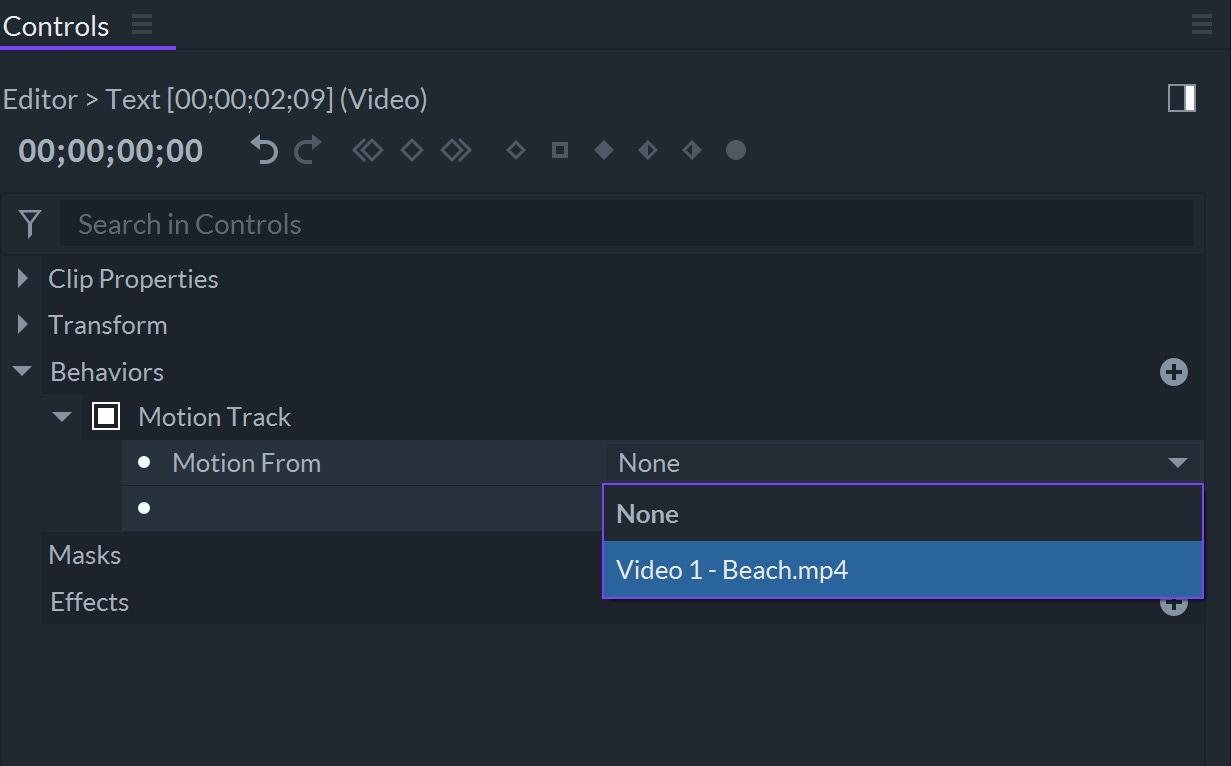
Once you have selected the clip, an analysis of the motion in the footage will automatically start.
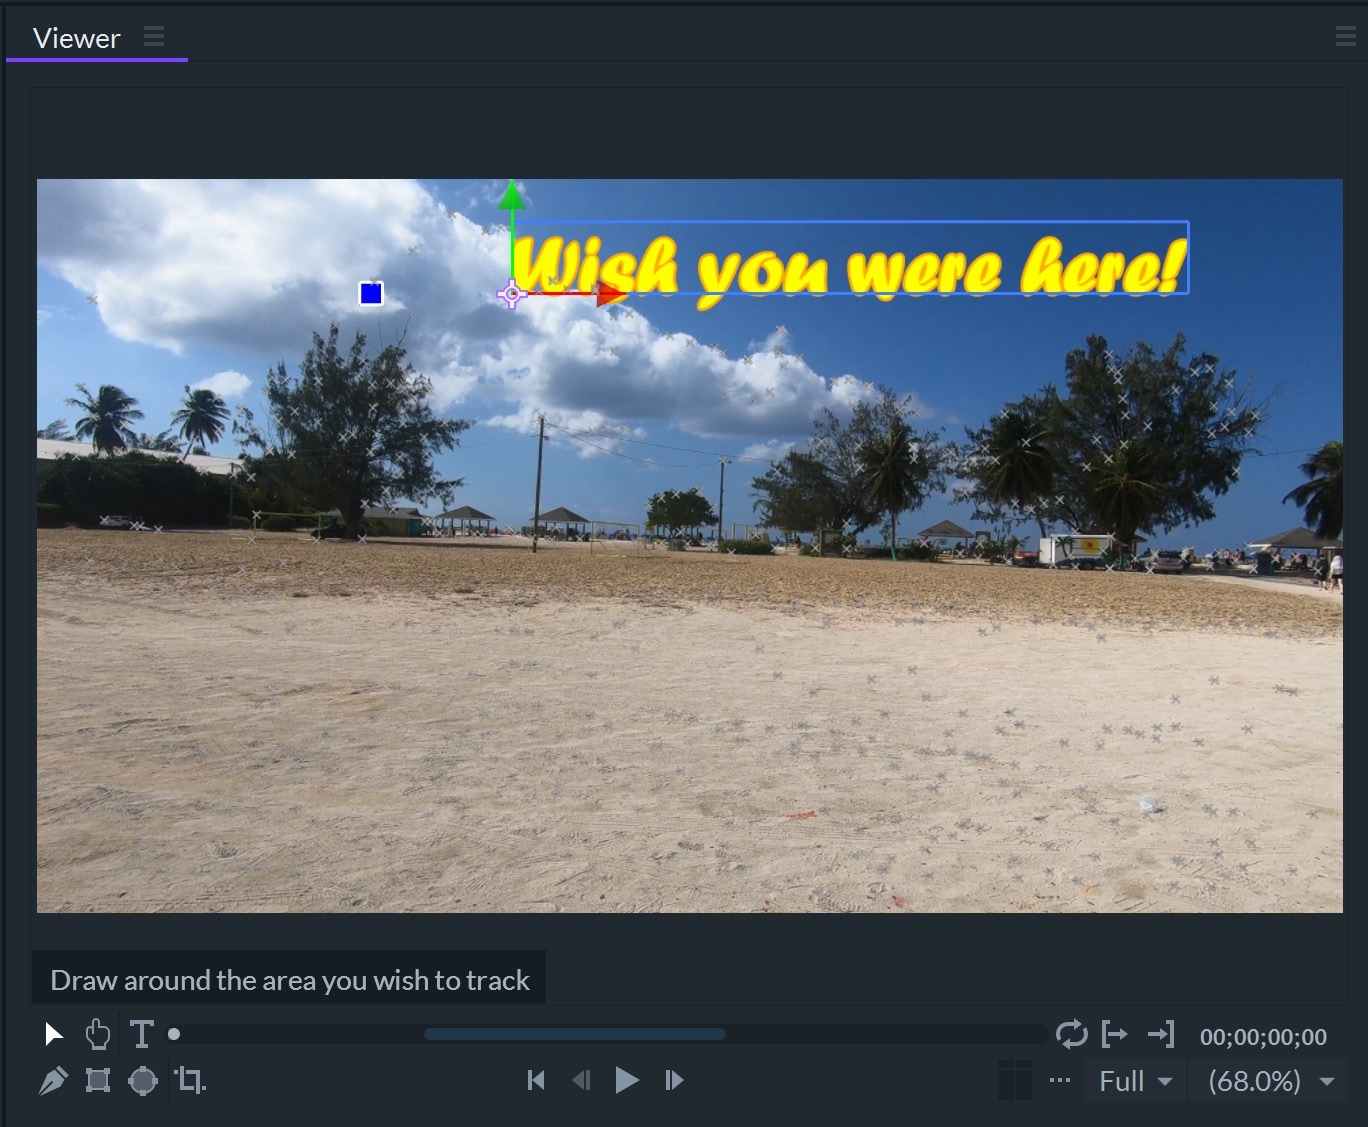
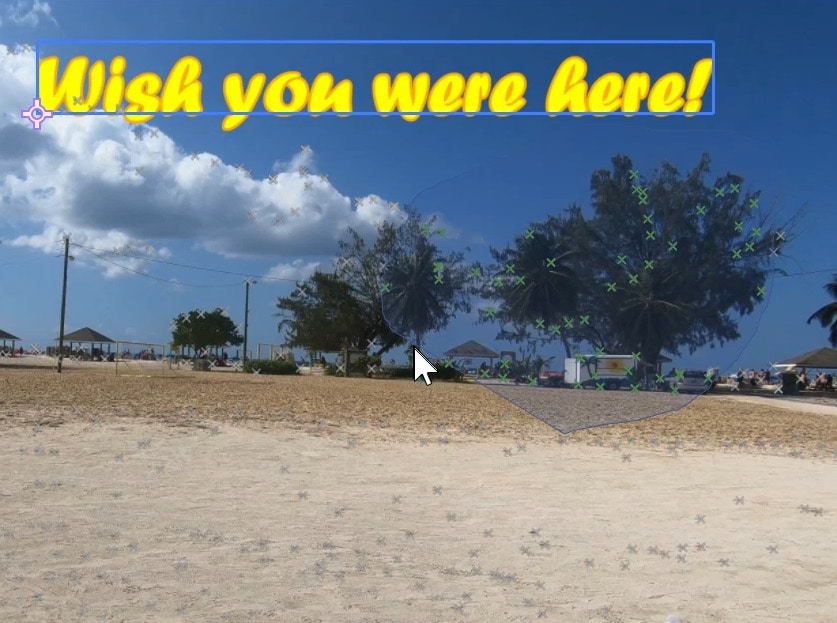
For example, click and drag around the big tree on the right side of the screen so that the text will follow it.
Motion Track Settings
By default, the motion track will copy the position, rotation, and scale information of the tracked region and apply it to the new clip.
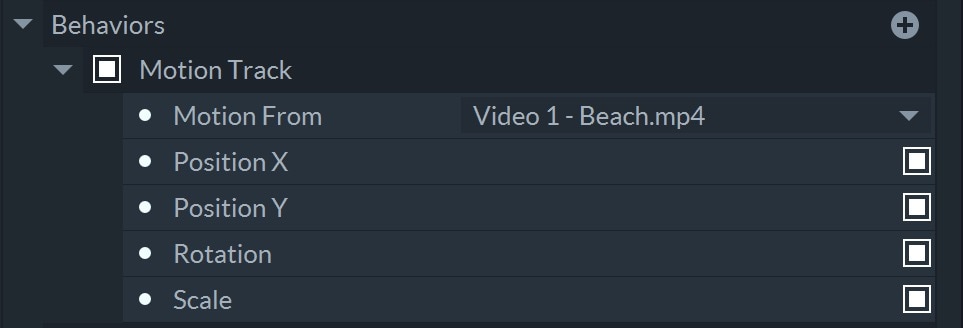
Toggle off any of the checkboxes if you don’t want to apply all the transforms. For example, toggle off Rotation and Scale so that the text in our example moves with the background video but without rotating and scaling.
Replace Add and Remove at Viewer window
When the footage analysis is completed, and the Motion Track folder is selected, the Viewer will overlay motion-tracked points over the tracked video.
These points indicate the pixels of the footage used in the motion calculation, with green points being high-value pixels and red points being low-value pixels but still used in the calculation.
Pixels of objects and features with high contrast are considered high-value, but they are not always the correct points that should be used for your footage.
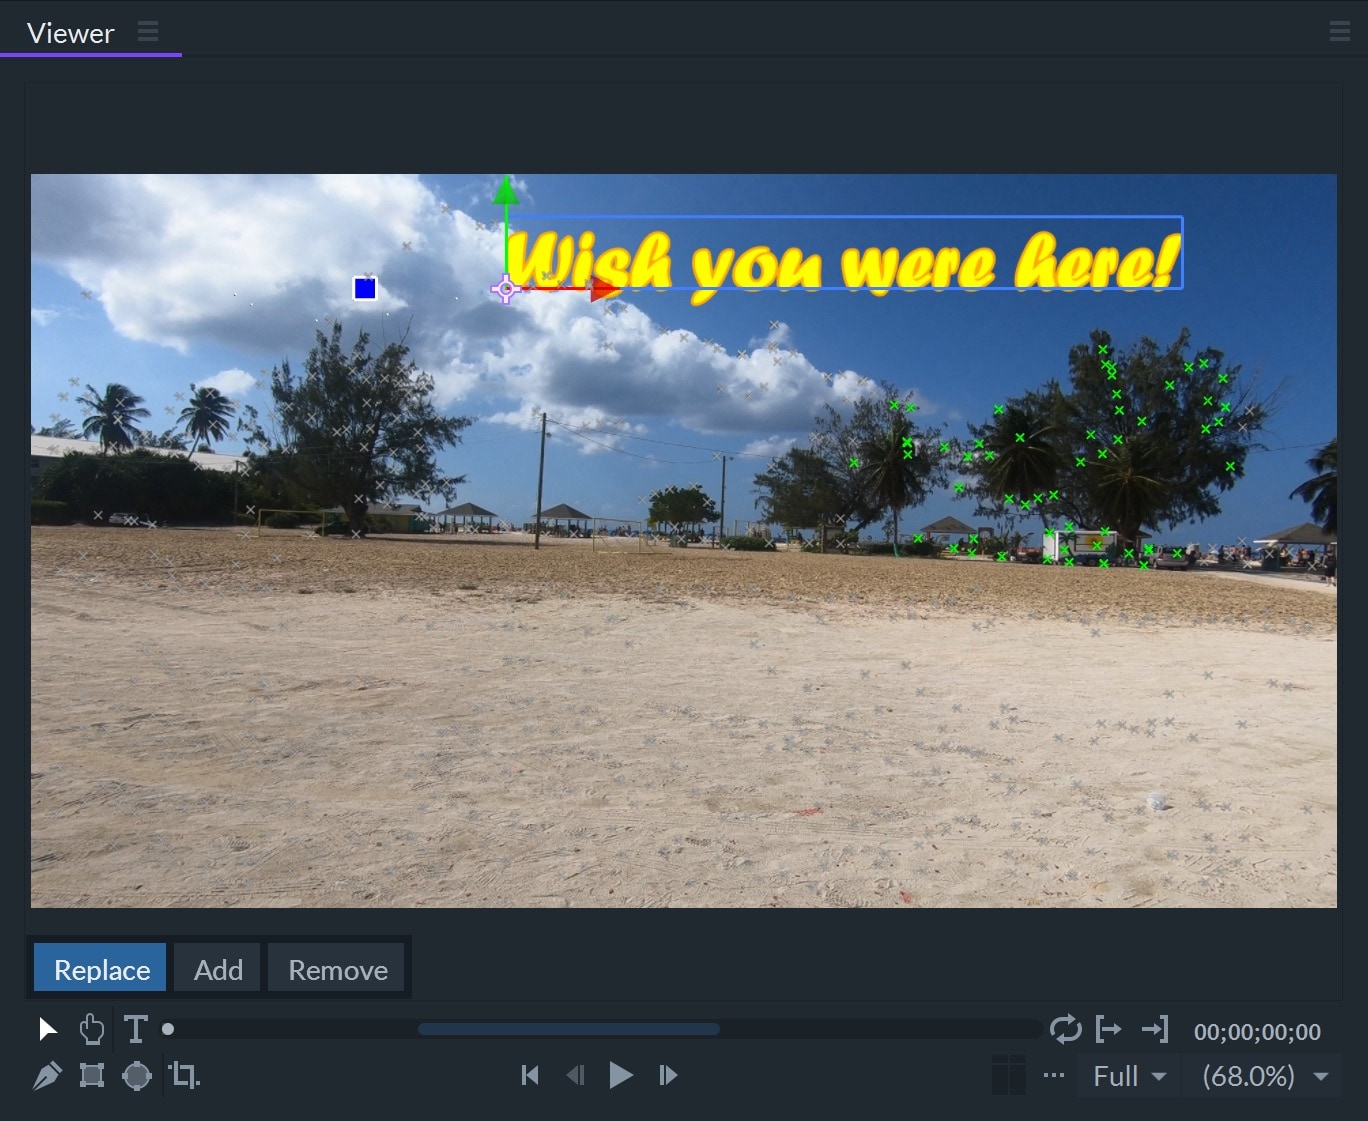
You may change the motion calculation if you want to try to improve the tracking result.
To change the tracking result, change which tracker points are used with the controls displayed at the bottom of the Viewer.
Remove
With this button enabled, click and drag an area around the unwanted tracker points. These points will turn to a grey color to indicate they are disabled for the track calculation.
If there are multiple objects in the footage with independent motion, you should ensure that the tracker points are following only your target object.
Replace
With this button enabled, click and drag an area around only wanted tracker points. All points outside of this area will be disabled.
Add
With this button enabled, click and drag and area around disabled tracker points to enable them.
TIP: The more tracker points that are used will generally produce better results.
Some footage may be difficult to track a specific region or a target object within the shot. You may try pre-processing the video by increasing the contrast, and/or use pan&zoom around the target with autozoom disabled. Export this processed clip and import it to use for tracking by placing it in the timeline in a new track just above the original background. After applying motion track, hide the track with the processed clip to continue using the original footage as the normal background clip.