- for Windows
- for Mac
Editing Image
It's a great way to tell a story with images. In Filmora9 (Latest Filmora version 9), adding, managing and editing images is easy. Easy-to-use editing features and dozens of filters and overlay effects can enhance your images a lot.
In this guide, learn how to:
1. Add Image to Video Track
To add an image to a video track, position the Playhead at the location the image is to be inserted, right-click on the image in the media library, and select Insert. If you want to add the image to the end of the video, then you can select Append (add to the end).
You could also click on the image in your media library, drag it to where you want it in the timeline, and drop it in.
If there are black bars around your image in the preview, here's how to remove them:
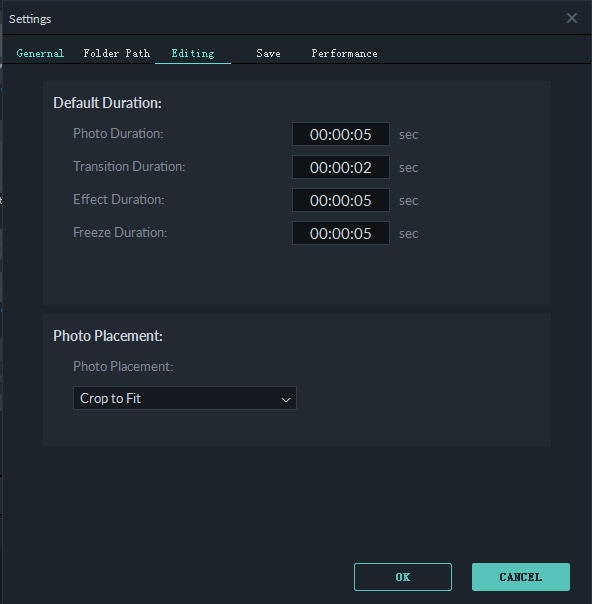
Go to File and select Settings. In the Settings panel, switch to the Editing tab and then go to Photo Placement and select Crop to Fit or Pan & Zoom. This will apply the Crop to Fit or Pan & Zoom effect to all of your images.

Note:if you want to insert an image into the middle of a video clip, you need to split the clip where you want to add the image so the image can be placed between the two separated portions of the clip.
2. Add Image as overlays
Drag your image to a video track above the track with your video clip in it.
Note: Video track 1 is the bottom layer of your video. Anything you add to video tracks above it (video tracks 2 and up) will be displayed on top of any media inside video track 1, or any other video tracks with lower numbers (i.e. an image in video track 4 will be layered over top of media in video tracks 1-3). You can add up to 100 video tracks.
3. Edit Image
To Change Image Duration
When an image is added to the timeline it has a default duration of 5 seconds, but you may want it to stay on screen for more or less time.
There are two ways to change the duration of an image:
- Drag the left or right edges of the image on the timeline (not the image in the preview) to change the duration.
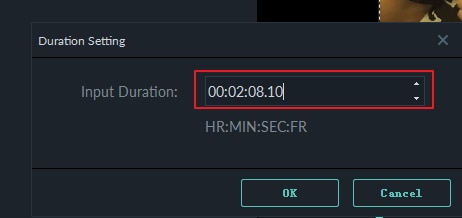
- Right click on the target image and select Duration to open the Duration Setting panel and input a new duration.

To Change the Position of an Image
Drag the image in the Preview window to move it around. To resize the image, drag the small circles and squares at its edges.
To Rotate or Flip an Image
Double click on the image in the timeline to open the Image panel. Go to Transform and move the slider next to Rotate to rotate the image.

To flip the image, click the Horizontal Flip icon to reverse the image from left to right or the Vertical Flip icon to turn the image upside down.
To Composite Images and Videos
After adding the image as an overlay, you can also choose to adjust the opacity (transparency) and add a blending mode (i.e. have the video you can see through the image be darkened or tinted behind it).

Double click the image to enter the Image settings section and then go to Compositing. Choose a blending mode from the drop-down menu (your options include Screen, Darken, Multiply and more). You can also move the Opacity slider to adjust the transparency of the image.
To Adjust Image Color
Double click the image and then switch to the Color Tab. In the Color section you can adjust the image temperature, tint, contrast, saturation, and brightness. You can also apply 3D LUT effects. For more advanced color correction, click the Advanced button. Press OK button to save your changes.

To Apply Motion Effects to Images
Motion effects add animations to your images.
To add a motion effect, double click on the image in the timeline and then switch to the Motion Tab. Double click on any motion effect to apply it to the image.
