- for Windows
- for Mac
Insert Transition
Adding transitions to your video helps to improve its flow. You can apply transitions to single clips or in between all of the clips on the timeline in Filmora9 for Mac (Latest Filmora version 9).
1. Add a transition
Click into the Transitions tab to see the available transitions. Double click on transitions you'd like to preview.

To add transitions to video clips
- Once you find a transition you want to use in your project, drag and drop it to the desired location on the timeline.
- Instead of dragging and dropping a transition you can also place the playhead at the exact spot on the timeline where you want to add a transition, right-click on a transition you want to add, and select Apply.
- You can also use the Apply to all option if you would like to add the same transition to all video clips in your project. To add a random transition to all video clips, choose Random to All.

Keep in mind that if you are applying a transition at the begging of your timeline you first need to make sure that you've placed a video clip on the timeline. You can add a transition to the start (prefix transition) or the end (postfix transition) of any video or image on the timeline, or add transitions between clips.
2. Customize a preset transition
Once you've added a transition to the timeline you can alter its duration by dragging one of its edges in the timeline.
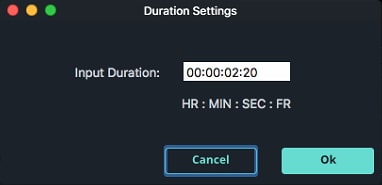
Alternatively, you can right click on the transition you've added and select Duration from the menu. Change the duration in the pop up Duration Settings window and Click OK to apply the change.

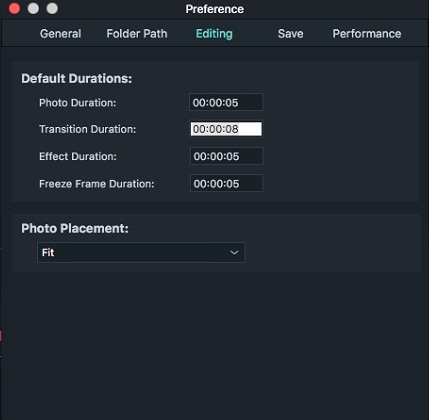
The default duration of all Transitions is 2 seconds. To change the default duration, select Preferences under the Wondershare Filmora menu and switch to the Editing Tab. Find Transition Duration and enter the new duration. This will become the new default duration for all transitions in your project.

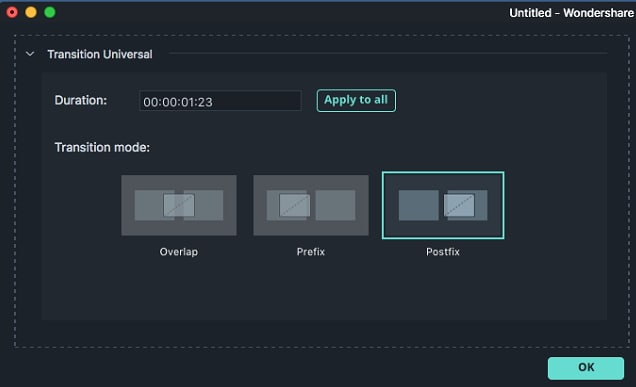
You can also change a transition’s duration by right clicking on the transition in the timeline, selecting Show properties, and entering a new duration. in this menu you can also select a Transition Mode to determine how your transition will sit between the clips. You can choose from Overlap, Prefix, and Postfix.

Click the OK button to confirm your adjustments
3. Save as Favorite / Delete Transitions
You can save transitions you use often in the Favorite in the Transitions tab.
If you want to remove a transition from the timeline you can either select it and press the Delete key on your keyboard or right click on it and select the Delete option from the menu.