- for Windows
- for Mac
Edit Images
Images are a great way to tell a story. In this guide we will show you how to add still images to your videos, add images as overlays on top of your videos, and manipulate images using all the tools Filmora9 for Mac (Latest Filmora version 9) has to offer.
- Adding Images to a Video Track
- Adding Images as Overlays
- Editing Images
- Adding Motion Effects to Images
1. Adding Images to a Video Track
To add an image to a video track, position the playhead at the location the image is to be inserted, right-click on the image in the media library, and select Insert. If you want to add the image to the end of the video, then you can select Append (add to the end).
You could also click on the image in your media library, drag it to where you want it in the timeline, and drop it in.
Some photos may have black bars around them in the preview window. This is because they have different aspect ratios than your video. To remove the black bars, go to Preferences, switch to the Editing tab, and choose Crop to Fit or Pan & Zoom from the Photo Placement drop-down menu.
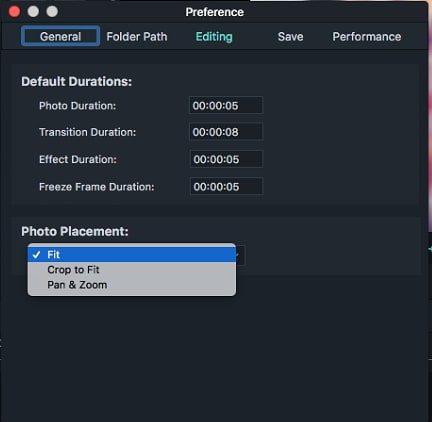
The Crop to Fit feature crops a photo automatically to fit the project's aspect ratio, and the Pan & Zoom tool will allow you to zoom into your photo and add movement.
2. Adding an Image as an Overlay
If you would like to overlay an image over a video clip, drag and drop it into a video track located above the track on which a video clip is positioned. Make sure that the image is located directly above the video clip so that it can overlay on the clip. By default, there is only one video track on the timeline, but dragging and dropping a picture above the track 1 will automatically create track 2.
3. Image Editing
Changing Image Duration
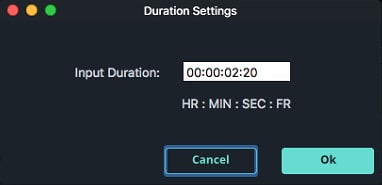
When an image is added to the Timeline it has default duration of 5 seconds. There are two ways to change the duration of the image.
- Drag either of the image's edges left or right.
- Right-click on the image and choose Duration. The Duration Settings window will appear. Enter the new duration of the image in the Input Duration
Changing Image Position
Once an image is placed on a track in the timeline, you can see it in the video preview.
To change the position of the image, click on it and drag it in the preview window.
To change its size, click and drag the small circles surrounding the image in the preview window.
Rotate or Flip an Image
To rotate or flip an image, double-click on the picture in the timeline to bring up the editing menu and drag the Rotate slider under Transform (make sure the box next to Transform is checked first).
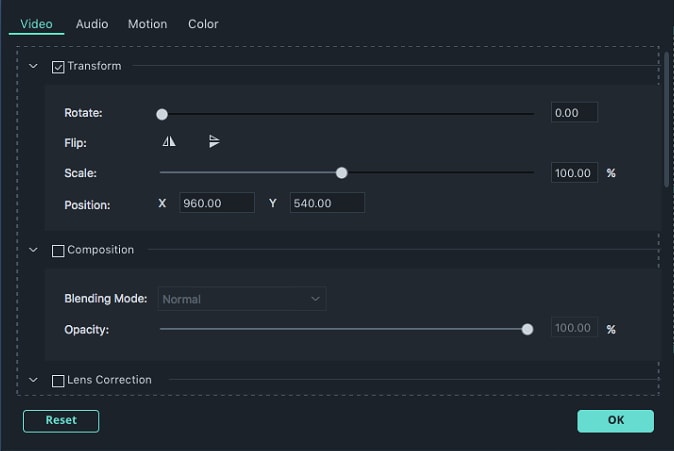
Directly below the Rotate slider, you'll see the Flip options. You can Flip Horizontally or Vertically.
Creating Composite Images and Videos
The Composition feature allows you to adjust the way your image looks on top of your video. Instead of just having it sit there you can choose a blending mode and make your image transparent.

In the Composition menu, select a Blending Mode. Blending modes determine how your image is blended with the clip below it. Test different modes in order to determine which one is the best fit for your project.
Directly below the Blending Mode drop-down menu is the Opacity slider. Use this to change the transparency of the image you're editing.

Adjusting Image Color
To adjust the colors of an image in Filmora9 for Mac:
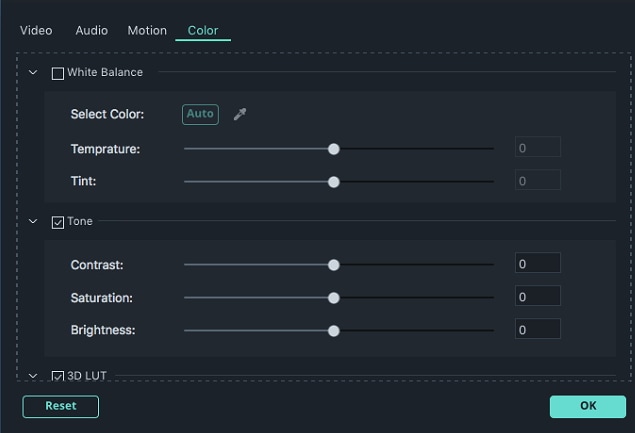
- Double click on the picture you'd like to edit and then switch to the Color tab to access the color adjustment tools. You can change the brightness, contrast, or You can also access 3D LUTS, color tuning presets that enhance the colors of your images according to predetermined settings. Many of Filmora’s 3D LUTs were inspired by Hollywood movies or TV shows.
- You can also click the color icon in the toolbar or right click the image and select Color from the submenu to enter the advanced color tuning panel.
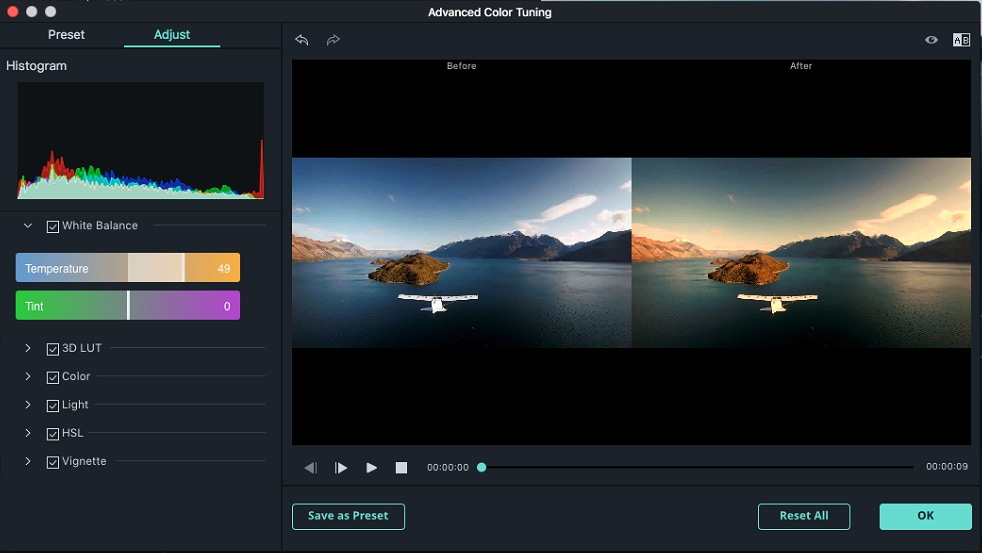
4. Applying Motion Effects
Motion effects add animations to your images.
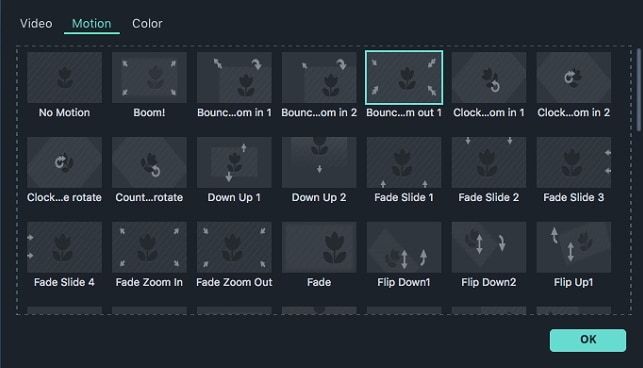
To add a motion effect, double click on the image in the timeline and then switch to the Motion Tab. Double click on any motion effect to apply it to the image.