- iMovie Complete Tutorial
How to Reverse Video in iMovie
Jan 24,2019• Proven solutions
Often vloggers and video artists use the reversing technique to give a more artistic tone to their videos. The effect is also used sometimes to give a comical effect to the action on the video. To create the reverse effect, you will need a capable video editor tool like the iMovie software. In this article, we will show you how to reverse video clips with iMovie and iMovie alternative.
- Part 1: How to Reverse Video with iMovie Alternative - Wondershare Filmora
- Part 2: How to Reverse Video in iMovie
Part 1: How to Reverse Video with iMovie Alternative
While the iMovie software is a highly effective editing tool for Mac users, the interface can be a little confusing for amateurs or beginners simply looking to try the reverse effect on a video for the first time. It will be a waste of time to try to learn the entire interface rules to create such a simple effect. So, we recommend you to try Filmora to achieve the reverse video effect on a really simple interface. Watch the tutorial below and download Filmora now to try.
Note: Filmora is available for both Mac and Windows versions. The tutorial above is shot with Windows system, but the reverse process is similar.
Related: Best iMovie Alternatives for Windows
Related: Get Best iMovie Alternatives for Mac
Step 1: Import Video to Filmora
You can directly drag and drop the files to the Media Library panel or click Import Media under File Menu to import your media to Filmora.
Step 2: Add Video to Timeline
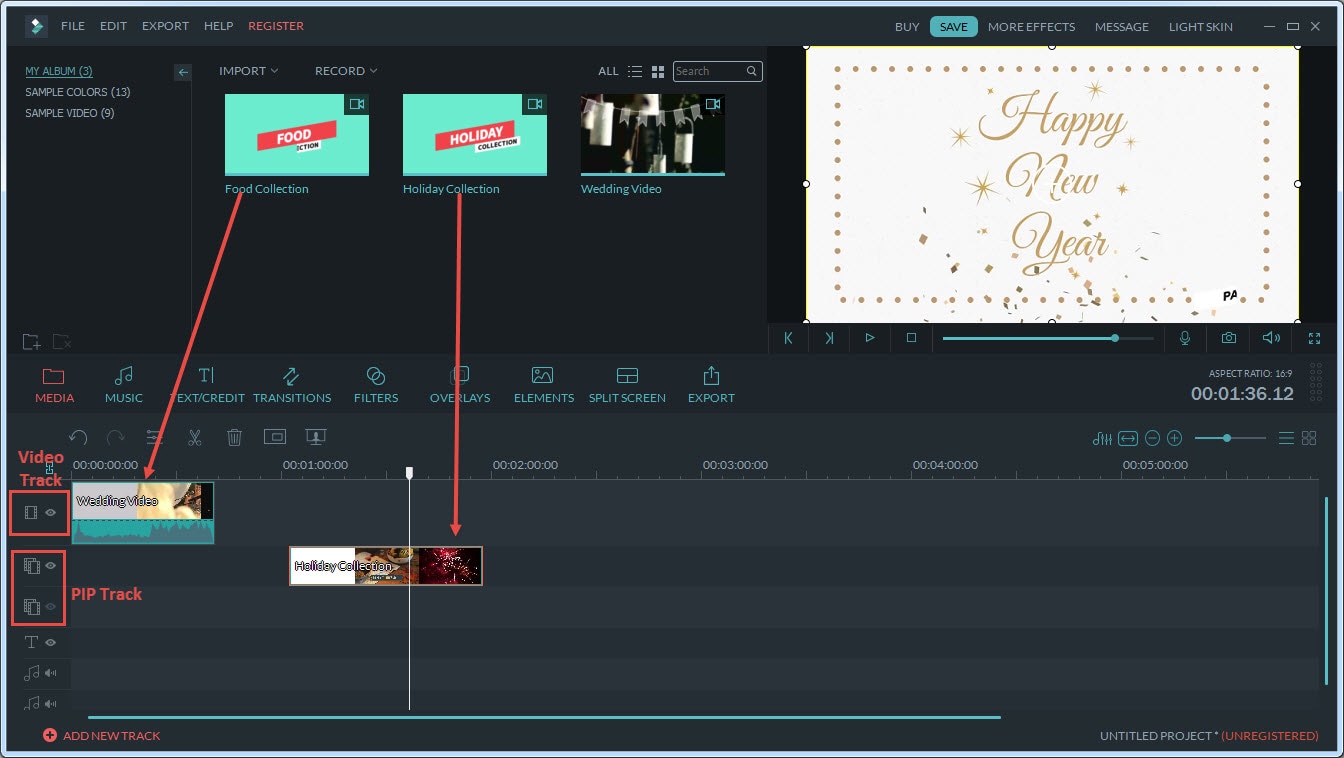
It is so easy to add video to timeline. Just drag and drop the thumbnail of the media file in the media library panel to the Timeline.

Step 3: Play Video in Reverse
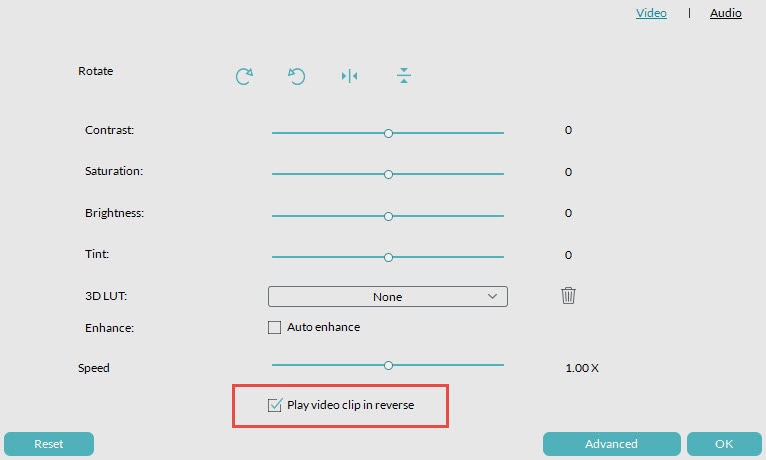
Double click the video clips (or right click to choose Edit), tick the option of Play Video in reverse. Press Space or Play button to start creating preview renders. It will play the video in reverse after rendering.

You may also interest: How to Speed Up and Slow Down Video Clips in iMovie
Step 4: Export
Once you are satisfied with the changes, click on export to save the file with the reverse effect in a new file format.
Learn the detailed information about how to reverse video.
Part 2: How to Reverse Video in iMovie
Step 1: Add video to iMovie
Open the iMovie interface and let the program automatically find all the legible videos from your main project browser. You can also manually add the videos or text transition clips that you want to put the reverse effect on, to the project browser panel.
Step 2: Drag video to iMovie
Drag your video to the timeline first, and then click to select the video you want to edit and let it open on to the clip inspector window. Double clicking on any of the videos on the project browser panel will open up the clip inspector for that video clip.
Note: It is recommended to mute the audio or detach the audio file before reversing your video footage. Here is the guide to mute audio from video
Step 3: Start reversing video
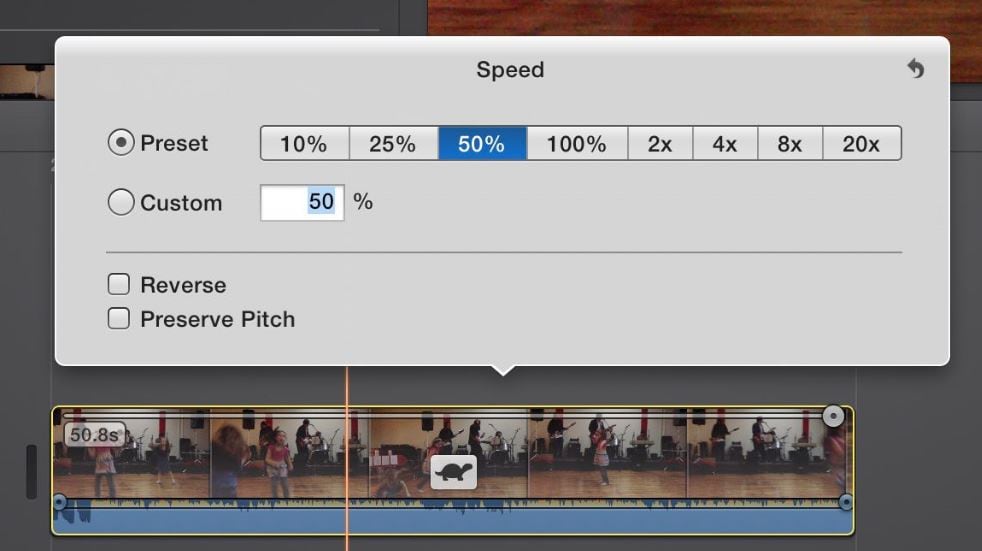
Then go to Modify > Rewind. From here, you can choose the rewind speed. You will see three sliders appeared in the timeline. Just drag one of the sliders to adjust the playback speed.

Note: Reversing the video will not have any effect on the duration of the clip. If you want to put in a speed effect, you will need to change the speed presets for the video to add to the reverse effect.
Related: How to Add Subtitles to Videos and Movies in iMovie
Bring up your video to a professional level with straightforward tools.
Try It Free Try It Free


Liza Brown
chief Editor
0 Comment(s)