


- iMovie Complete Tutorial
How to Blur Faces in iMovie

Jan 24,2019• Proven solutions
Often many people are prone to identity theft or sometimes by showing faces of rape victims you disclose their true identity to the world which is to be kept confidential. Often when videos are aired on televisions they make use of various tools that can blur faces and hence protect the identity of a person. This blurring feature is also useful for hiding the sensitive details like car number plates, financial data and other related things which are not to be disclosed in public domain.
Related: How to add mosaic/ censor effect in iMovie
-
Part 1: How to blur face using iMovie alternative -- Wondershare Filmora
-
Part 2: How to blur faces in iMovie
Part 1: How to blur face using iMovie alternative -- Wondershare Filmora


No version of iMovie is available for Windows till now by which you can blur the face in your video but you can get it done with the help of Wondershare Filmora. This software has a face-off function that will blur out face in your image without requiring much effort. The steps that you need to follow for blurring face are the following:
1. Importing video to the program
The first step is to run the Wondershare Filmora and tap “Import” button for browsing file folder on your PC and loading it to the program or you can also drag and drop your clip straight away to primary video. Once you are finished with file loading, drag and drop your required file to Video Timeline.

If you have any question about importing media to Filmora, please check Importing Media.
2. Blurring face in video
The next step is to highlight the desired video clip on the timeline. Now right click and choose "Power Tool". After this, click the "Face Off" submenu in the pop-up window and select "Apply Face Off to the clip". Now you have to pick the first Mosaic effect so that program can instantly put the effect on the detected face. You can also add more fun by picking up other funny marks of your own choice. After completing this task, you can hit Play button to preview the video, and then click OK so that editing can be saved. After saving, return to the main interface.
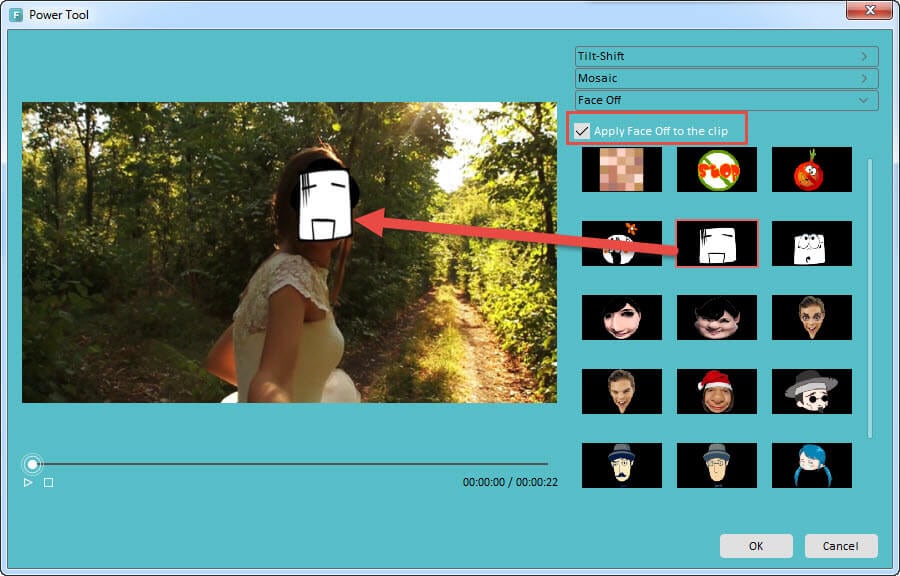
For more detailed information, you can check Add Funny Face off effect to your video.
3. Saving the video
The face will be blurred out successfully in your image. Now tap “Export” button to export your finished video clip. You can publish it directly to social media or can save it to desktop.
The detailed steps of bluring faces in Filmora Mac may be a little different from that of Filmora Windows. In Filmora Mac, you should click Mosaic and then check "Apply Mosaic to the clip". Click on "Add" button to add a mosaic area. You can asjust the mosaic area and size by dragging the border.
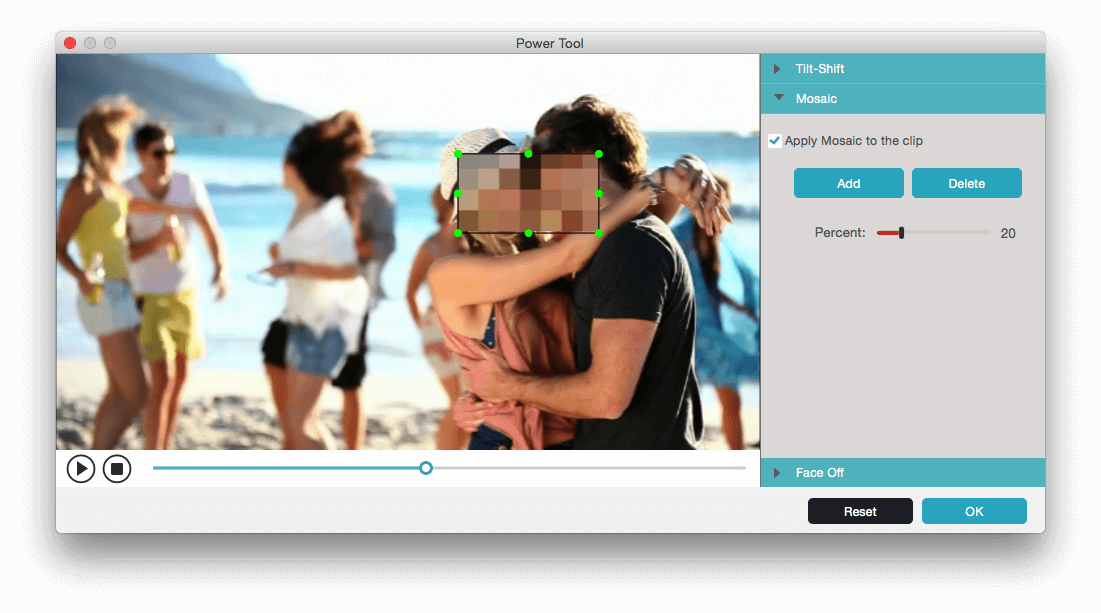
Learn more about how to use the PowerTool to add mosaic effect in Filmora Mac
Learn more about how to blur face in video
Part 2: How to blur faces in iMovie
Blur face in iMovie is difficult, but we will try our best to describe it in the following section. To blur face, you will need to use the picture-in-piecutre features. Below are the steps for you to follow:
Related: How to Use Picture in Picture Effect in iMovie
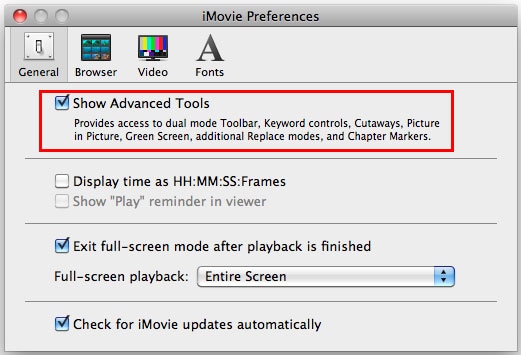
- Firstly you have to launch iMovie software by selecting iMovie> preferences. After this, choose the general preference and enable Show Advanced Tools and then close the preferences of iMovie.
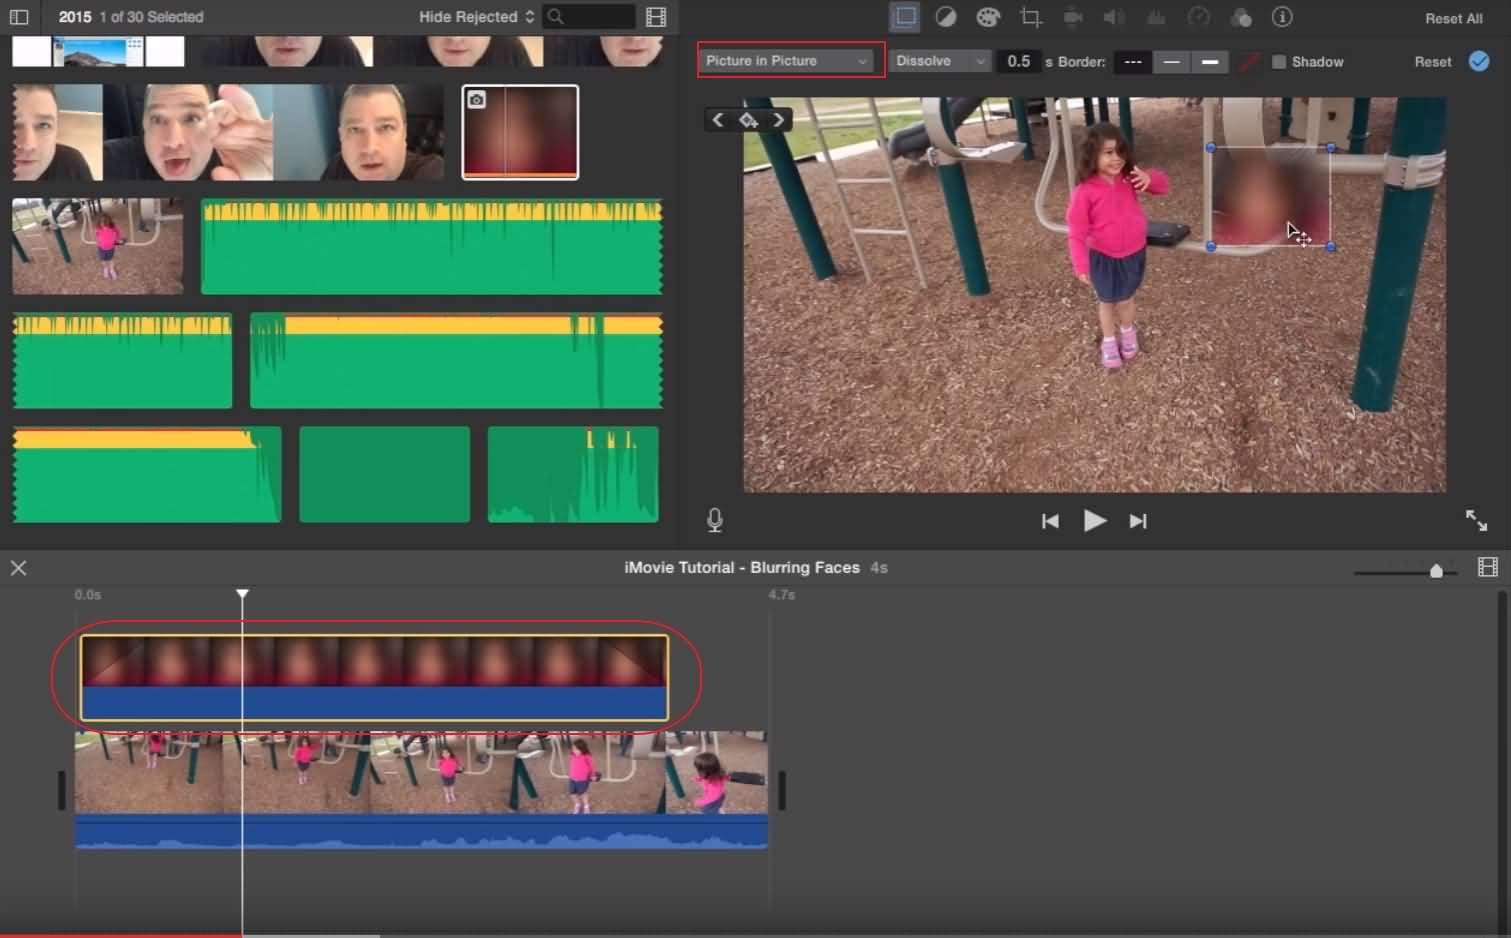
- The second step begins with choosing the video clip that can be displayed on the license plate. After that, the clip will be shown in iMovie’s viewer.
- Take a screenshot of the face by pressing Shift-Command-4. Once you are done with it, release the mouse button. You will hear a shutter sound which will indicate that the screenshot has been captured and saved on your desktop.
- Now you have to open it in any of the image editors, like Photoshop and Gaussian, which have ability to blur your image. You can make any change in it that you want to do. After doing changes, save your image to desktop.
- Drag it over your iMovie clip and select Picture in Picture from the menu that appears. When you will complete this task, the blurred image will be appeared as a still in the viewer as well as iMovie’s project pane.
- Now adjust the length of the clip in order to cover the license plate for the duration of clip.
- The last step is resizing the image and placing it on your desired location.
If the above step is not clear for you, you can watch the tutorial below to check how it works.
Related: How to Zoom in/out Videos in iMovie
Related: How to Get Ken Burns Effect in Your Photo and Video
Bring up your video to a professional level with straightforward tools.
Try It Free Try It Free
Liza Brown
chief Editor
0 Comment(s)