How to Add Mosaic/Censor Effect in iMovie

Jan 24,2019• Proven solutions
The mosaic of video helps to replace the memory consuming videos with still images that contain complete information with less bandwidth and small saving time as well as size. One of the best software to create such mosaics is iMovie platform as it consists of all easy to use tools. In this article, we will show you how to add mosaic effect or the censor effect to your video footage with iMovie.
Part 1: How to add mosaic using iMovie alternative for Windows and Mac?
If you are not able to use iMovie due to its complicated interface and compatibility issues then here is one more useful software tool for you. Wondershare Filmora can help you in creation of beautiful mosaics within very less time due to its easy to use interface. The best thing to know about Wondershare Filmora is that it can support all major video file formats and users can download trial version of this software for free from the official website. Wondershare Filmora is best solution for beginners and can produce wonderful results within less time. Let's check the tutorial below to find out how to add mosaic effect with the Power Tool in Filmora.


Related: Why Should You Use Filmora to Edit Videos?
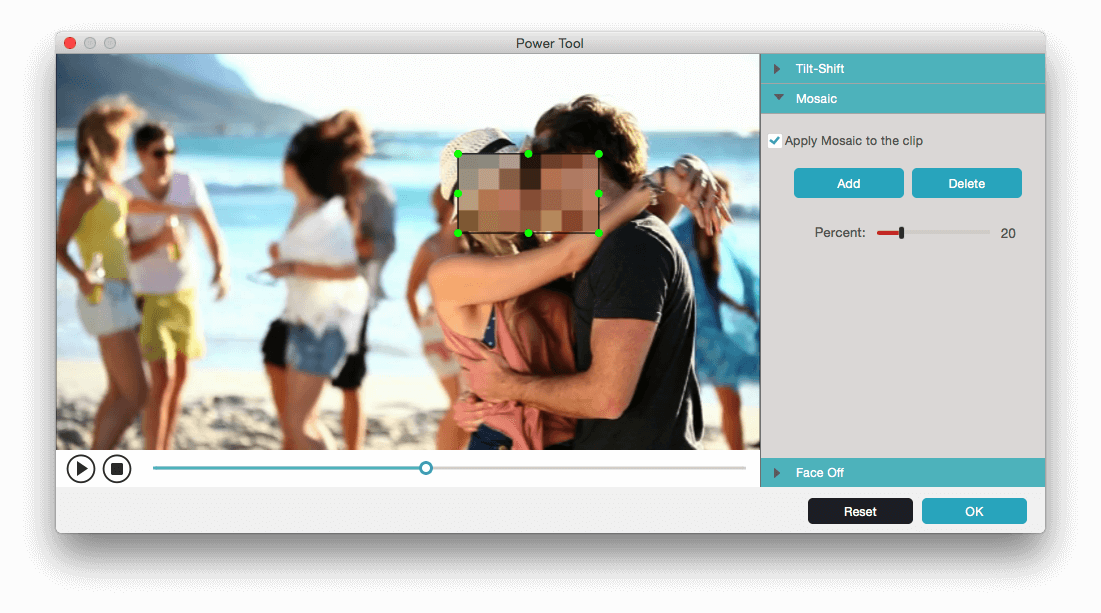
So, if you are a Mac user, you can add mosaic effect to your video easily with Filmora. After importing your video clips to the timeline, right click it and select Power Tool option.
In the Power Tool window, click Mosaic and select the Apply Mosaic to the clip checkbox, and then click Add to add the mosaic effect to the clip. Move the mosaic area to the desired position or adjust the frame border to adjust size.
That's it. And you can also add Faceoff effects to get more interesting effects. If you are looking for more alternatives to iMovie, then you should not miss Best iMovie Alternatives for Windows and Get Best iMovie Alternatives for Mac.
Part 2: How to add mosaic (blur objects) in iMovie?
We have explained How to Blur Faces in iMovie previous, and you can learn the detailed information at Here. While in this article, we will show you how to add mosaic or the censor effect with iMovie in ways.
1. Basic Mosaic Effects
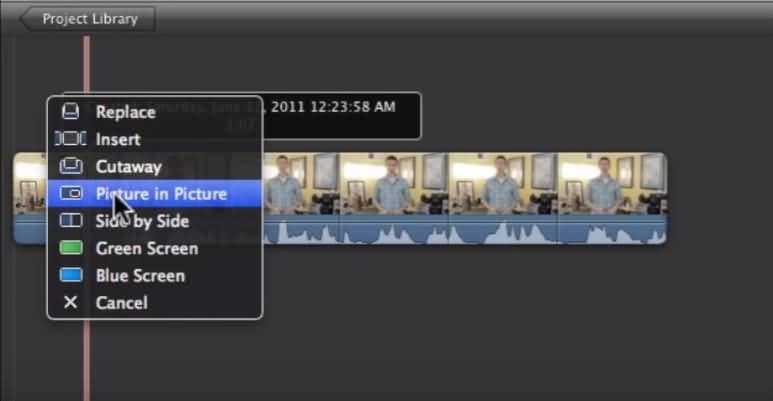
If you want to add basic mosaic effect, you can drag a black bar image onto your footage and merge it anywhere on your timeline. As soon as you place it to the timeline and select "Picture in Picture", the black bar will start appearing on your video screen, and you can drag it anywhere as well as can resize it as per need. This is all about basic mosaic addition but if you are thinking to use advanced tricks then you have to follow process in Section 2.
Related: How to Use Picture in Picture Effect in iMovie
2. Advanced Mosaic Effects
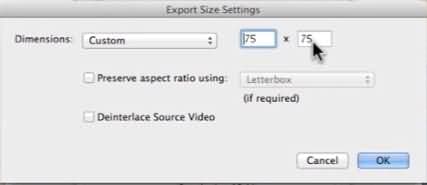
- Another way to add a mosaic effect in iMovie is to use a low resolution video exported from original one through the "Export using QuickTime" option in Share menu. In order to get a better mosaic effect, you can adjust the size for pixels in "Export Size Settings" to smaller scale manually.
- Now import this low resolution file to iMovie and create a low range copy for your original video; once you drag the low pixel clip to the timeline and select “Picture in Picture”, it will start appearing on your preview window.
- Crop the low pixel added movie and then place the cropped part anywhere on your project as per need. It can be applied on movie clip of any size and resolution level without any trouble.
Related: How to Crop and Rotate Videos iMovie
Bring up your video to a professional level with straightforward tools.
Try It Free Try It Free
Liza Brown
chief Editor
0 Comment(s)