- Adobe Rush Editing Tips
- 1. Adobe Rush Introduction
- 4. Adobe Rush VS iMovie
- 5.Adobe Rush VS LumaFusion
How to Record Your PC Screen with Adobe Rush
Mar 05,2020• Proven solutions
Screen recorders have gone from being something used by a handful of geeky YouTubers to a function that the majority of us can see the value in.
One of the biggest uses of screen recorders is in the process of building tutorials. Software developers, for example, are reliant on-screen recordings to walk users through the process of using their program. Others may be YouTubers building a library of 'how to' videos for different, popular software packages.
Gamers of all types, regardless of platform or genre, love to share their gaming prowess with the world, and the world loves to watch. It's no great secret that some of the world's top earning YouTubers are gamers, which has led millions to follow in their footsteps, recording and uploading footage of their PC gameplay using screen recorders.
Sometimes it's not even for something as glamorous as YouTube that we want a screen recorder. If you're trying to explain to a colleague or trainee how to do something, or perhaps reporting a problem to your IT support, having a visual record of the process can make these explanations much easier to manage.
Whatever the reason, having the ability to record what we see on our screens and, even better, to then edit it into the important bits is something that's pretty crucial in our modern environment.
Recoding your screen in Adobe Rush
As much as Adobe Rush has attempted to be a video editor for the YouTube generation, there are some glaringly obvious mistakes being made here. Not only is it slow and clunky to use, it also lacks some basic editing functions that modern video makers have come to rely on. This includes the fact that a screen recorder is completely absent.
In a nutshell, if you want to learn how to record your PC screen with Adobe Rush, the answer is you can't. If you're a gamer or an online tutorial maker, this software is not going to do what you need. However, all is not lost, because there is another way.
Wondershare Filmora is an alternative video editing tool which does a whole lot more than Adobe Rush. As well as being able to record from your screen, you can also record from your webcam, record voiceovers, slow down and speed up videos and much more.
Not only that, but it works out cheaper than Adobe Rush for non CC subscribers, and thanks to its intuitive user interface, it's simple to learn too. It's easy to fall in love with Wondershare Filmora9 (Latest version 9); here's what you need to know.
How to use the Filmora screen recorder
Using Filmora's in built screen recorder, you can record streams from your PC screen directly. You can then use the powerful editing tools in the Filmora software to edit and perfect your videos, whether they're tutorials, gaming feeds or something else.
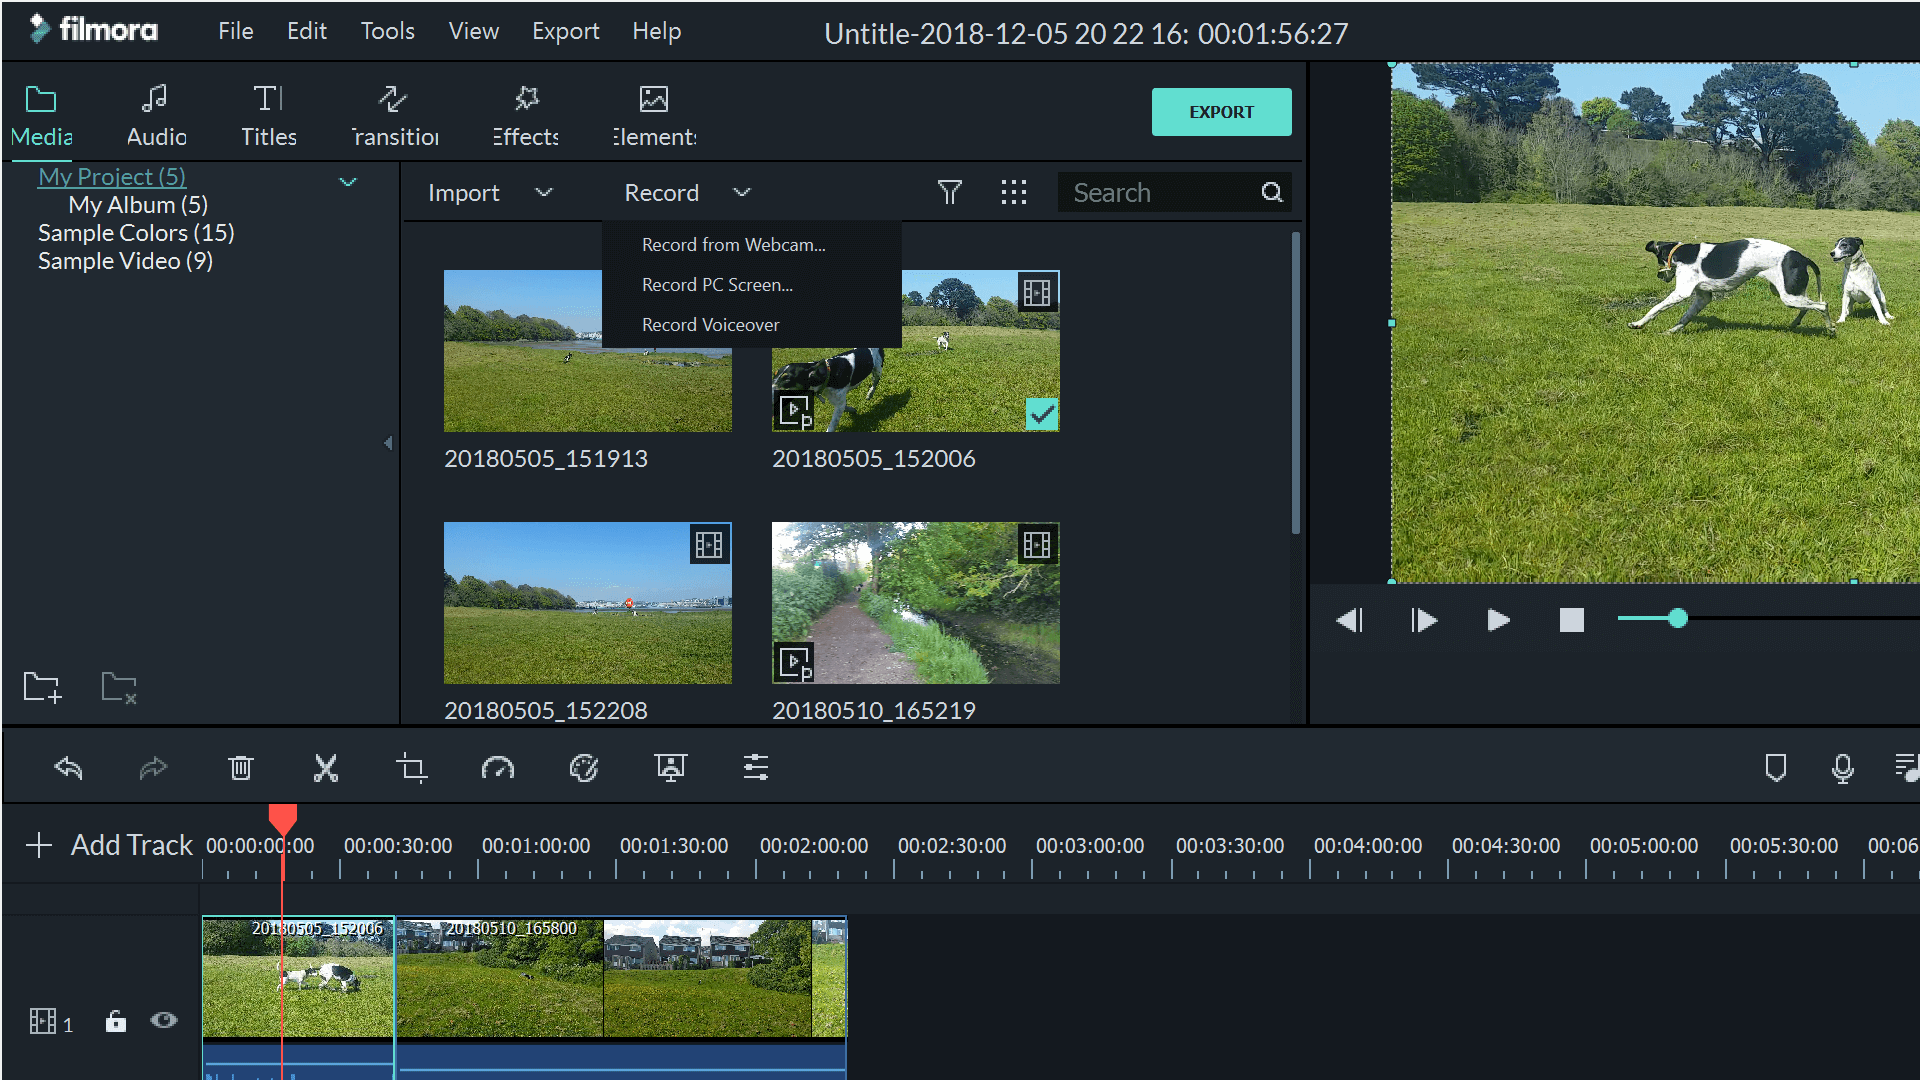
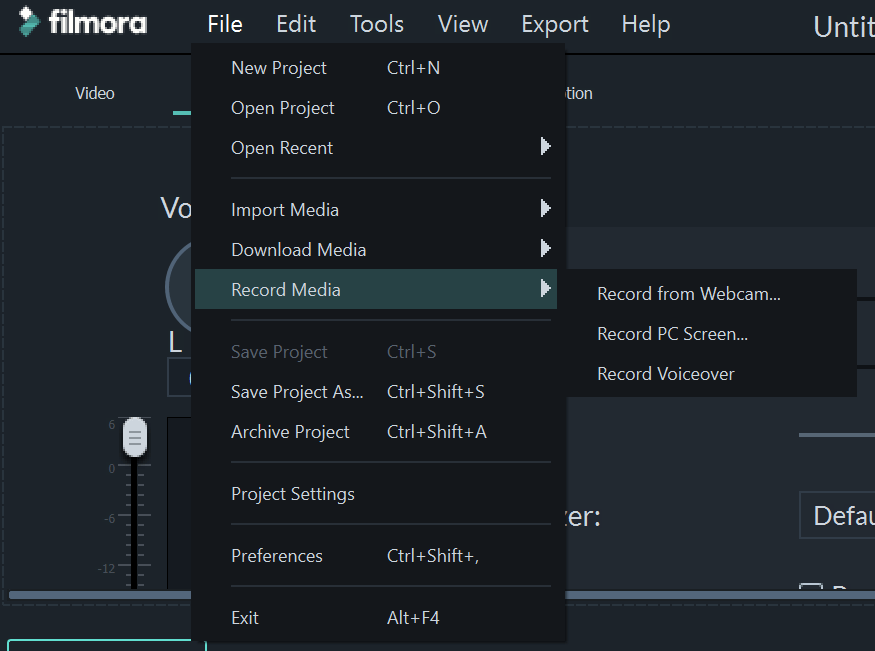
The Filmora screen recorder is super easy to use. You can open it up either from the 'Record' button above your media collection, or by using File>Record Media. Choose 'Record PC Screen' to start the screen recorder tool.
The screen recorder allows you to adjust which microphone and speakers you want to use, as well as the size of the film you want to create. This is particularly useful if you're planning to upload to YouTube or other social sites, so you can eliminate any black bars around your movie by recording in the right screen size.
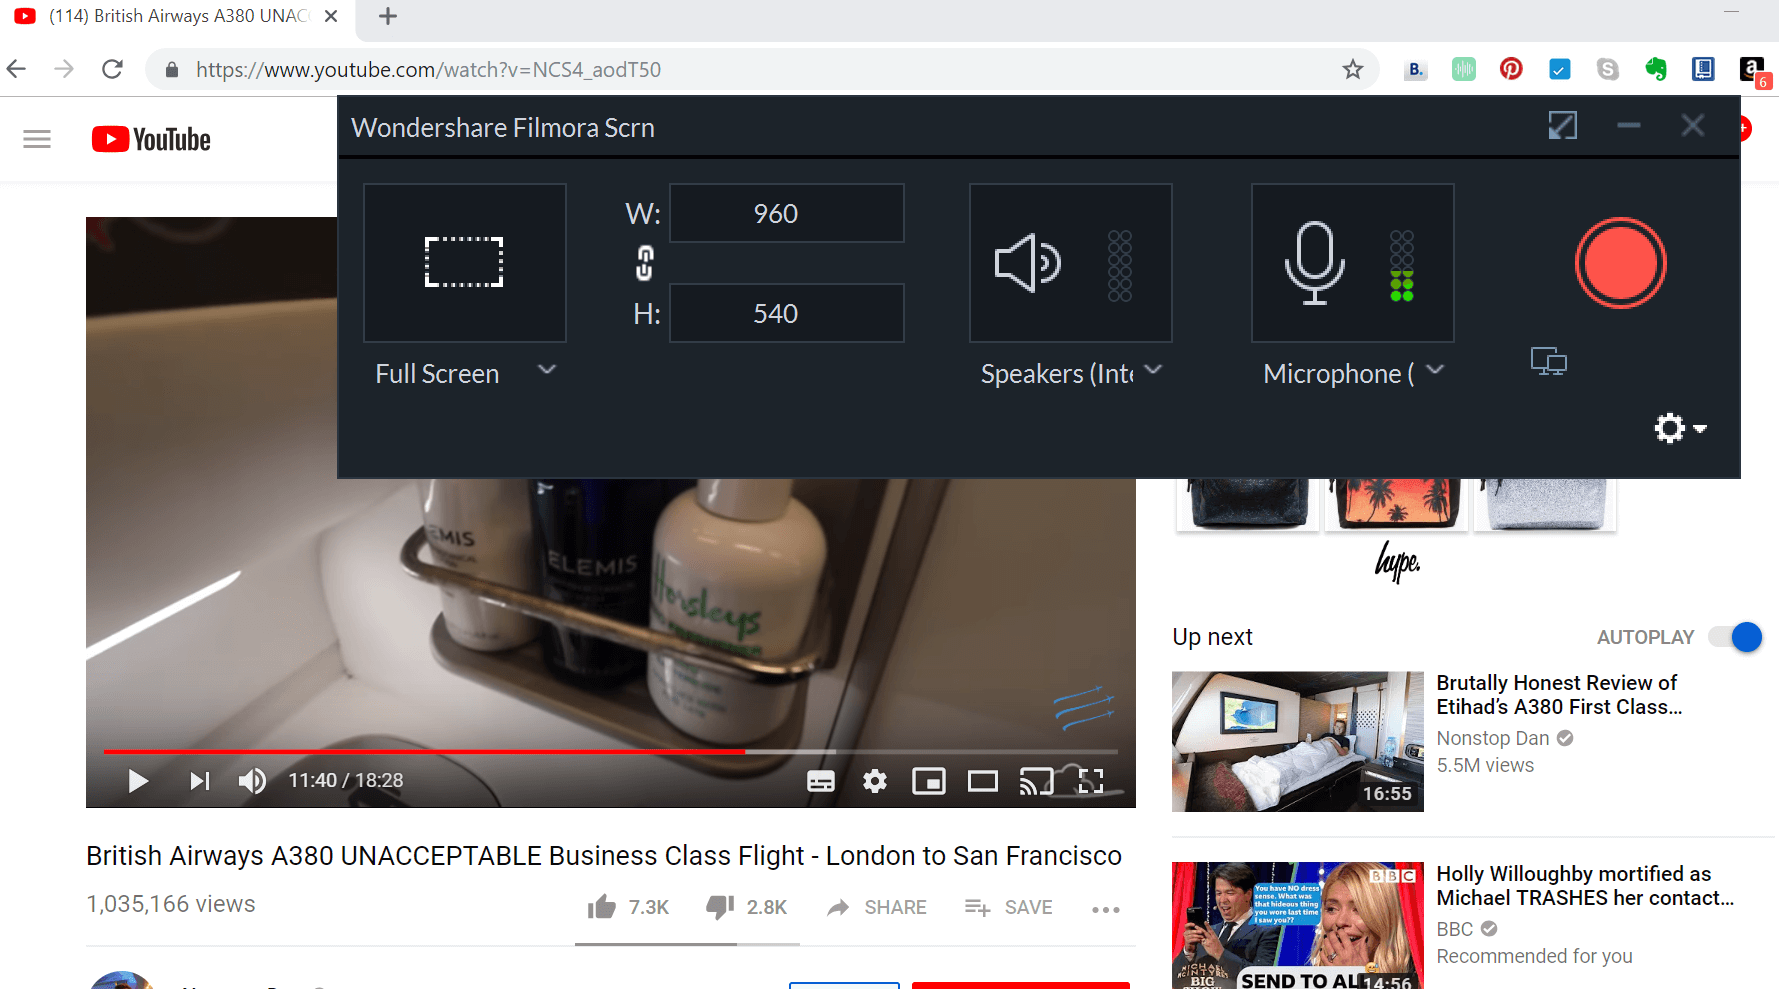
You can also select to record in full screen, which helpfully gets rid of all your navigation bars, clocks and other distractions so all your viewer sees is what you want them to see.
Clicking the cog will bring up the more extensive settings menu. Here you can pick where to save your recording, as well as the frame rate, quality and can even set a timer. You can choose to show or hide mouse clicks, as well as giving the mouse a click color of your choice. If you wish, you can also change which keys work to pause and resume your recording.
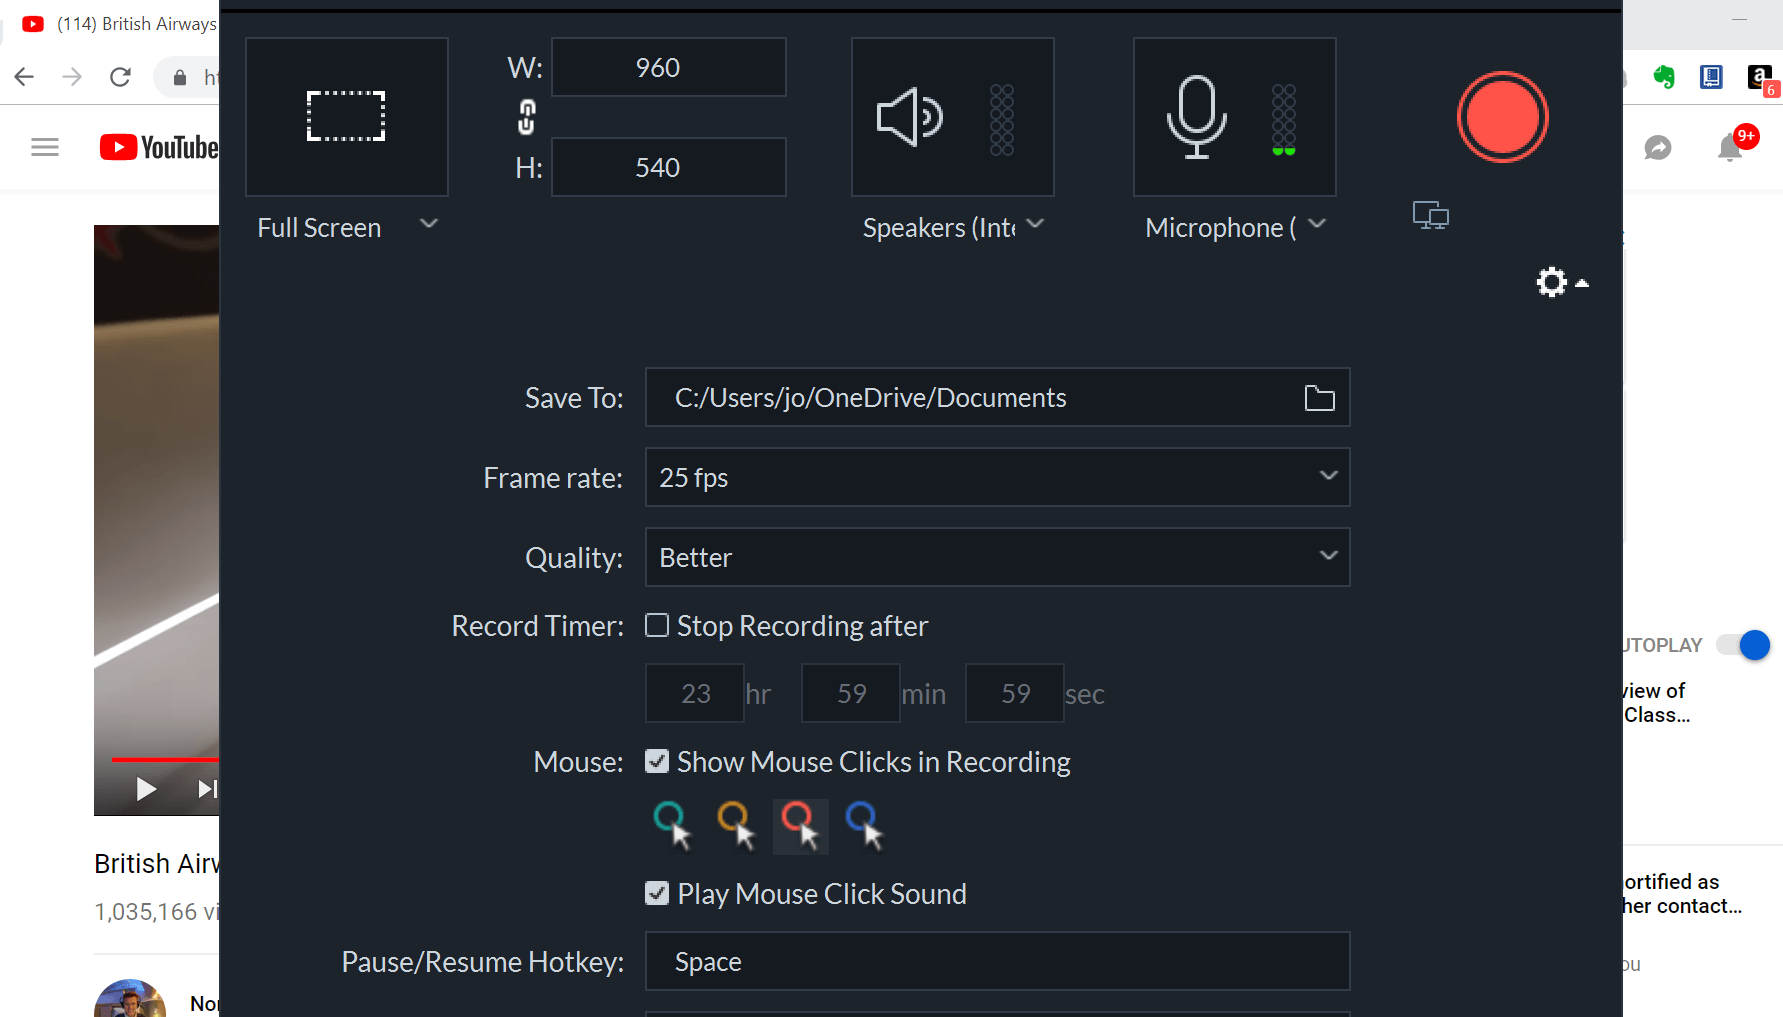
Once you're ready to record, you can minimize the recorder interface using the two screens button. This takes the recorder to a small, unobtrusive location in the corner of your screen. Once you're ready to start recording, simply click the red button.
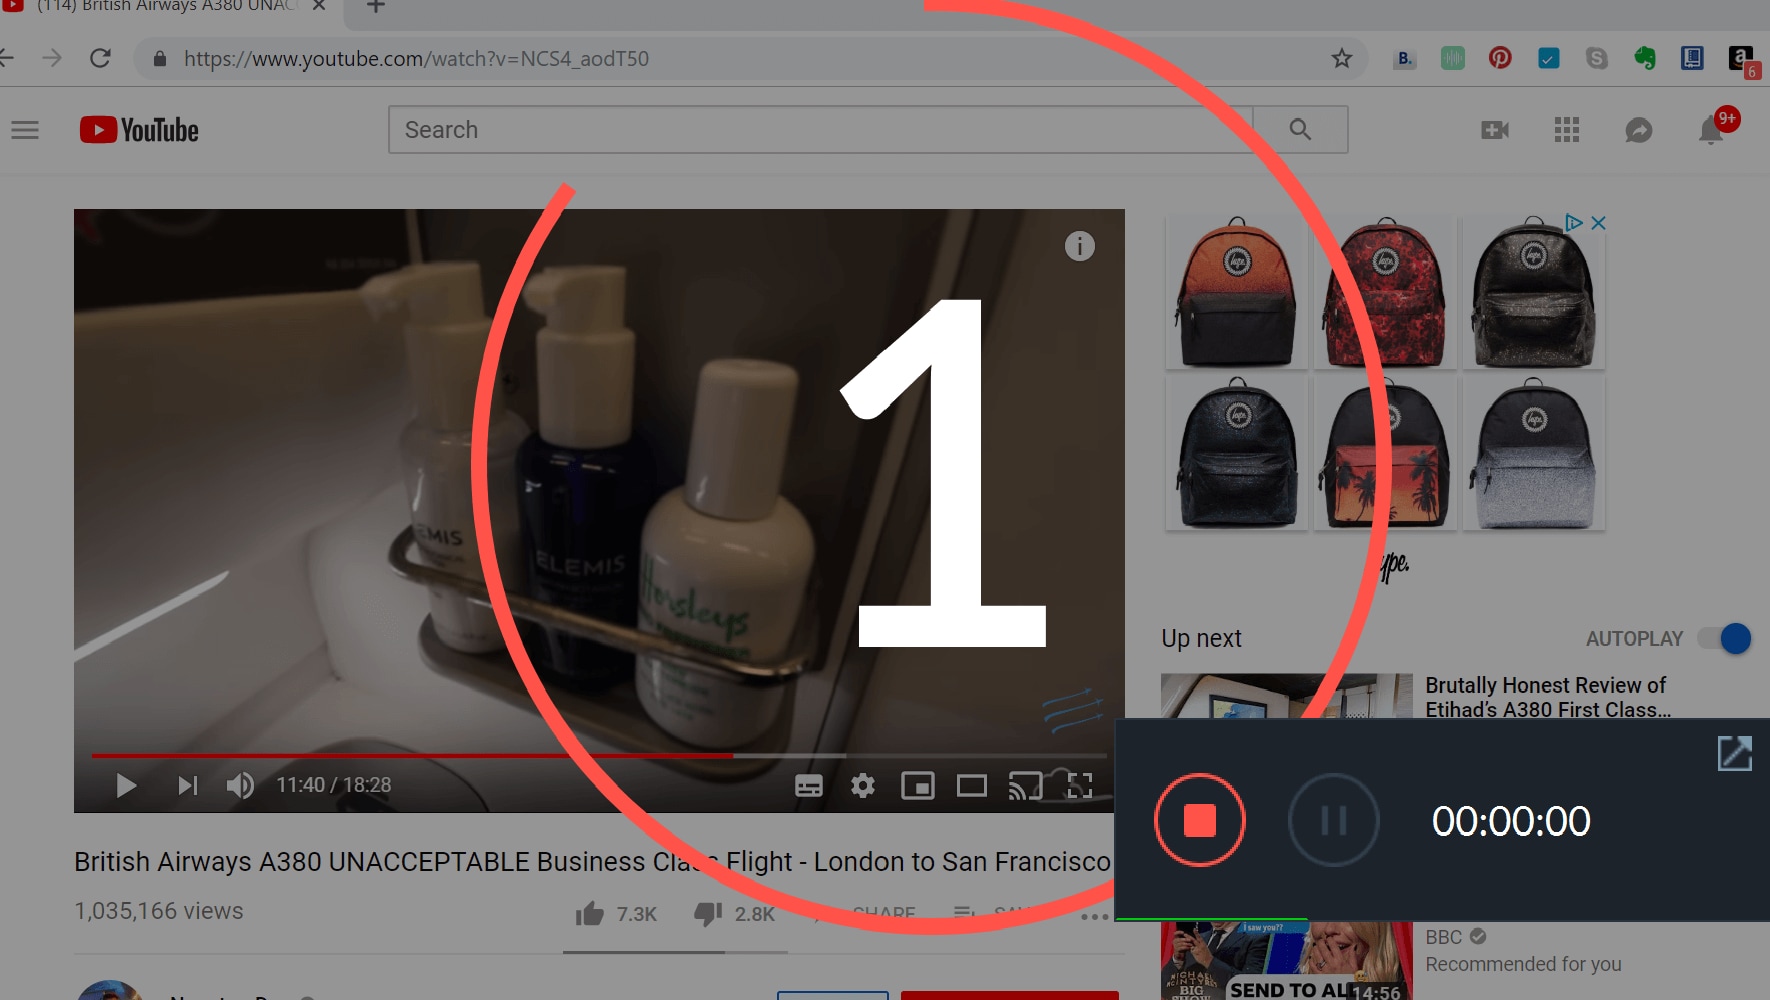
You'll get a countdown before recording starts, but as soon as it begins, the small control panel will disappear, so you're not inconvenienced during production. To stop the video, you'll need to use your hotkey, so it's a good idea to set it to something you're not going to need to use during your video.
Once you finish the recording, the film will automatically appear in your media collection within Filmora. From here, you can drop it into your timeline and then edit it as much as you wish for a perfect finish.
It's a shame Adobe didn't think to include a screen recorder in the Rush software, as it's pretty essential to video making in the modern world. Thankfully Wondershare are here to fill this gap. Have a go at making a screen recording with Filmora today and see if you fall in love with this software too.
Bring up your video to a professional level with straightforward tools.
Try It Free Try It Free



Liza Brown
chief Editor
0 Comment(s)