How to Do the Color Correction/Grading in Adobe Rush
Jan 04,2019• Proven solutions
Even the videos captured with high-resolution cameras can benefit from color adjustments, as raw footage can often be too dark or its colors are simply not vivid enough. Most video editing software offers basic color correction tools that enable you to adjust the brightness, contrast or saturation, but having more control over the color correction process can be beneficial to the project you're working on for a lot of different reasons. Read on, If you would like to learn how to do color correction in Adobe Rush.
Using the Color Correction Tools in Adobe Rush
Social media videos are growing in popularity at an astounding rate, which is the reason why Adobe's latest app is designed to help video content creators save time on performing complicated video editing tasks. Adobe Rush offers a number of preset and manual color correction options that can help you enhance the colors in your videos.
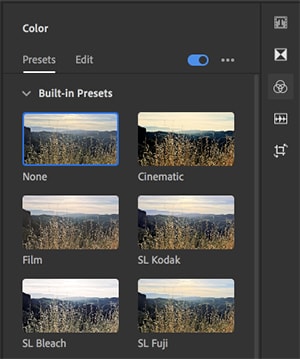
Make sure that a clip on the timeline is selected, then open the Color panel and browse through the Preset tab to explore the color correction options the Adobe Rush app offers.
Clicking on a preset will automatically apply it to the clip, and at the bottom of the Preset tab, you'll be able to see the Intensity slider that enables you to determine the intensity of the preset you added to the selected video clip.
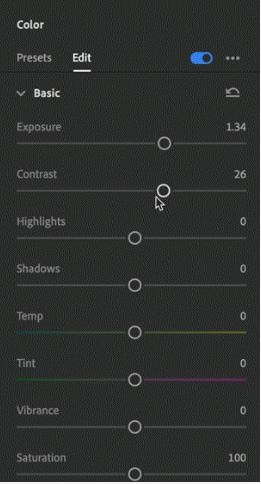
Click on the Edit tab to gain access to color correction tools such as Exposure, Contrast, Highlights or Shadows, and drag each slider in order to make the colors in your video look more natural.
The Edit tab also offers some advanced options like Sharpening or Vignette that can be used to improve the visual quality of your footage. After altering any of the Preset values or performing a color correction manually you can create your own preset you can later use in different projects.
Despite a decent amount of color correction tools Adobe Rush provides, using a more powerful video editor like Filmora will enable you to have more control over the color correction process.
Performing Color Correction/Grading in Filmora
Apply Filters and Overlays
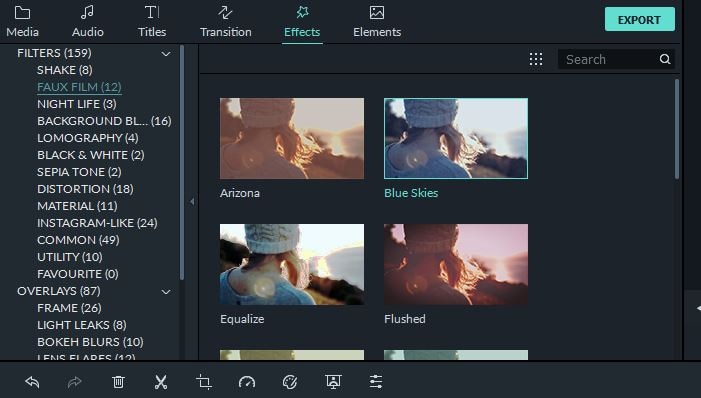
The software's Effects library contains hundreds of effects that can be added to videos with a single click. You can access the Effects panel by clicking on the Effects icon and choose which filter or overlay you're going to add to your video. Simply drag and drop the effect you selected from the Effects panel to the clip you placed on the timeline.
Basic Color Correction
Clicking on the Edit icon in the software's toolbar and then opening the Color tab will enable you to perform color correction manually. The tab contains White Balance, Tone and 3D LUT submenus that allow you to adjust settings such as Temperature, Tint, Saturation, Contrast or to select one of the 3D LUT Presets.
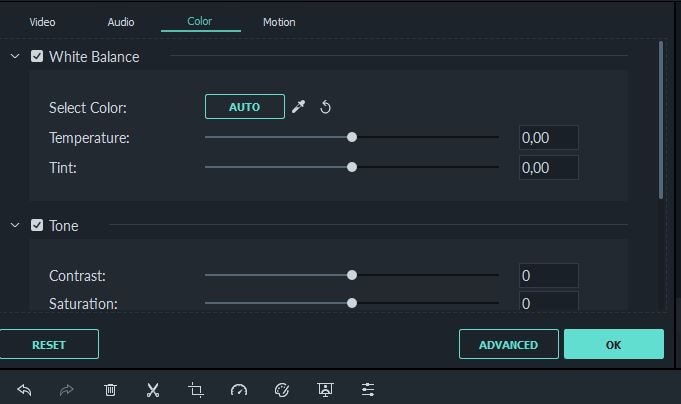
You can also click on the Advanced Color Tuning icon if you want to gain instant access to the software's advanced color correction tools.
Advance Color Correction
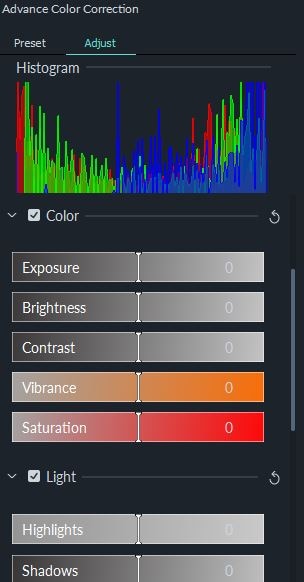
Hitting the Advanced button in the Color tab will bring up the Advance Color Correction window that lets you fine-tune Exposure, Highlights or Vibrance values from the Adjust tab. You can also control the Hue, Saturation and Luminance levels for each color in the video separately if you want to tone down or highlight a particular color.
By clicking on the Preset tab you will gain access to a huge collection of color correction presets you can add to a video by simply right-clicking on a preset you like and choosing the Apply option.
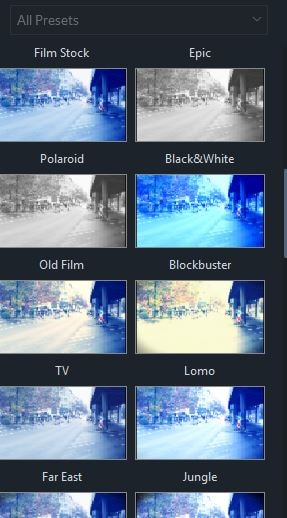
You can save all color values you used in a video as a preset, by simply clicking on the Save as a Preset button in the Advance Color Correction window. Hit OK to confirm the changes you've made to the footage and then proceed to perform color correction on all clips in your project.
Conclusion
Balancing or desaturating colors, adjusting their vibrancy and contrast is going to make the videos you share online look much more visually attractive. That's why you need a video editing software that grants you total control over the color correction process. The Adobe Rush app lets you perform basic color correction tasks, but it doesn't offer advanced color correction tools you might need while working on a project. Wondershare Filmora features rich effects and presets libraries you can easily use to enhance to colors of your videos and it provides you with professional color correction tools.
Bring up your video to a professional level with straightforward tools.
Try It Free Try It Free


Liza Brown
chief Editor
0 Comment(s)