

How to Reverse Videos in Adobe Rush

Jan 04,2019• Proven solutions
Social media video producers often have to find creative ways of sparking the viewer’s curiosity, in order to get their full attention. Reversing a video clip is a simple, but effective video editing technique that makes your videos more entertaining. Mastering this technique shouldn’t take a lot of your time, because most consumer-level and professional video editors enable you to perform this action in just a few clicks. If you’d like to learn how to reverse video clips, you’ve come to the right place because in the article we’re going to show you how to accomplish this task effortlessly.
How to Reverse Videos in Adobe Rush
Adobe Rush can be purchased for $9.99 per month as a single app or as a part of the Creative Cloud subscription. If you choose to purchase Adobe Rush as a single app, you won’t be able to reverse videos, since the feature is not included, but all projects you create in Adobe Rush can be imported into Adobe Pro where you can easily reverse any video clip. That’s why choosing the Creative Cloud subscription that cost $52.99 per month is currently a better option than opting to get only the Adobe Rush app.
What’s more, the app is compatible with both macOS 10.13 or later and Windows 10 (v1709) or later, and you’ll have to update your OS in case you’re using an older version, in order to be able to install Adobe Rush to your computer. You can also use the app to edit videos from your iPhone, but the Android version of the app is still not available.
Alternatively, you can download and have a free trial for Wondershare Filmora 9. This is a very easy-to-use while powerful video editing software which offers a lot more than the reverse video option. It can help you make slow-mo (timelapse) video, green screen video, fade in/out audio files, and zoom in/out videos. Check this video below to see how to reverse video in Filmora:


How to Reverse Video in Filmora
1. Import video files into Filmora
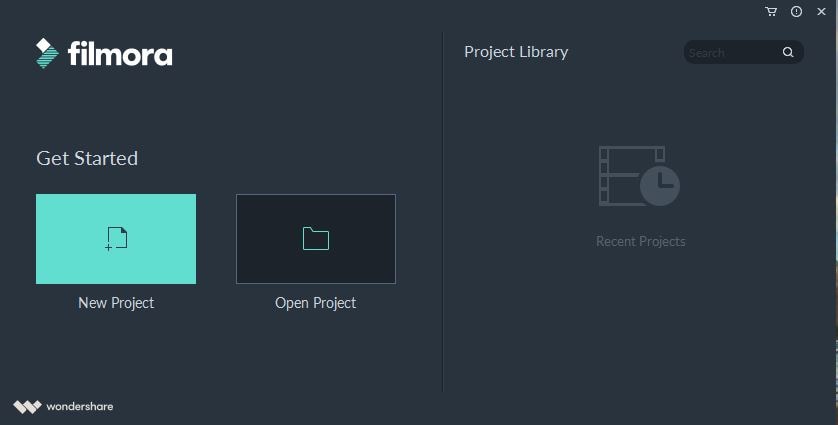
When you are ready to start working on your new social media video, you should launch FIlmora 9 and select the New project option in the welcome window. You can also browse through recent projects in the software’s Project Library, in case you’d like to continue working on a project you already created.
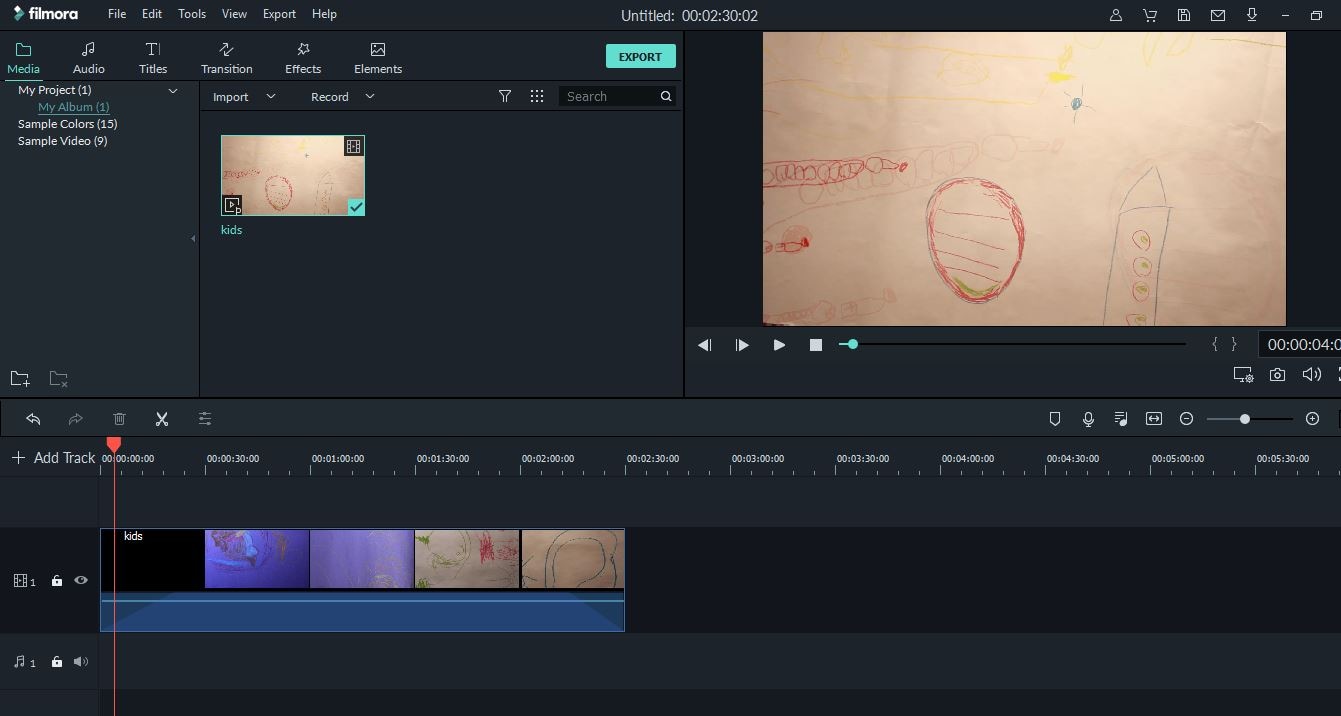
Afterward, you should click on the Import Media Files Here icon that is located in Filmora’s media panel. Clicking on the Import drop-down menu will enable you to choose between several different methods of importing media files into the software, so you can import an entire folder or a single file.

Drag and drop the video clip you imported to the timeline or click on the + icon that’s displayed when you hover the cursor over the asset located in the media panel.
2. Reversing video in Filmora
After adding a video clip to the timeline you should click on it to select it and then click on the Speed icon on the editor’s toolbar and choose the Reverse feature that will automatically reverse the clip you selected.
3. Adjusting video speed in Filmora
Right-clicking on the video and selecting the Speed and Duration option, will grant you the access to the Custom Speed window. Make sure that the Reverse Speed checkbox is marked and click the OK button to confirm the changes.
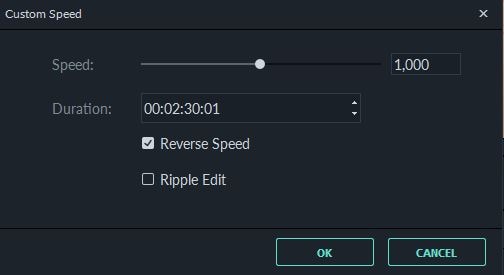
The video will be automatically reversed, and if you want, you can change the video’s playback speed at any moment by clicking on the Speed icon and selecting the Custom Speed option or using one of the Fast, Slow and Normal presets.
4. Export and Save
Click on the Export button and choose if you want to export the video to the destination on your hard drive or directly to YouTube or Vimeo.

Conclusion
The Adobe Rush’s recent addition to the Creative Cloud package attempts to make the video editing process easier for social media video creators, but it still lacks some important tools that YouTubers frequently use in their videos. At the moment Filmora is a much more affordable and powerful option if you’re looking for a video editor that lets you reverse videos in a few simple steps. What is your favorite method of reversing videos? Leave a comment below and let us know.
Bring up your video to a professional level with straightforward tools.
Try It Free Try It Free
Liza Brown
chief Editor
0 Comment(s)