How to Speed Up and Slow Down Video in Adobe Rush
Jan 04,2019• Proven solutions
When we're editing videos, being able to adjust the speed can be vital to creating a successful movie. Being able to fit what we need to into a time frame as well as add drama, humor and fun to our videos is a function we all love to use.
Speeding up video can get through an arduous task in no time. Think about those cookery clips you've watched, and how many of them were shown at high speed so you could get to grips with a recipe without having to sit through 20 minutes of someone baking.
Slow-mo effects can be a great way to add drama, or to allow viewers to see the beauty in things that normally happen too fast to pick out. Sometimes called a 'close up in time', slowing down footage of things running, flying, jumping or exploding can really kick our videos up a notch.
Speeding up and slowing down video in Adobe Rush
Everyone was excited to get a look at Adobe Rush. Aimed at home video creators, Rush promised to make professional video editing a breeze for even the novice videographer. Working across many platforms with direct sharing to a host of social sites, we couldn't wait to get our hands on this software.
However, although in some ways it does what it says on the tin, there are some drawbacks already surfacing with Adobe Rush. Only those who've invested in the latest hardware will be able to enjoy it (latest Windows version plus 8GB RAM, iPhone 7 or better) and even then, users are complaining it's pretty slow.
Aside of the poor performance and the high price, Rush has really let us down when it comes to speed tweaks. You simply cannot do it. Adobe have indicated its something they may (or may not) add to Rush at a later date, but for now you can only play video and audio at the speed it was recorded at.
Before you run away crying, there is an alternative. We'd like to introduce you to a snappy bit of software known as Wondershare Filmora9. Filmora9 is capable of everything Adobe Rush is, and much more, including speeding up and slowing down video.
In fact, with this software you can speed up video to 100x recorded speed or slow it down to 0.01x. Plus, its super easy to use. We'll explain how.
How to speed up and slow down video in Filmora
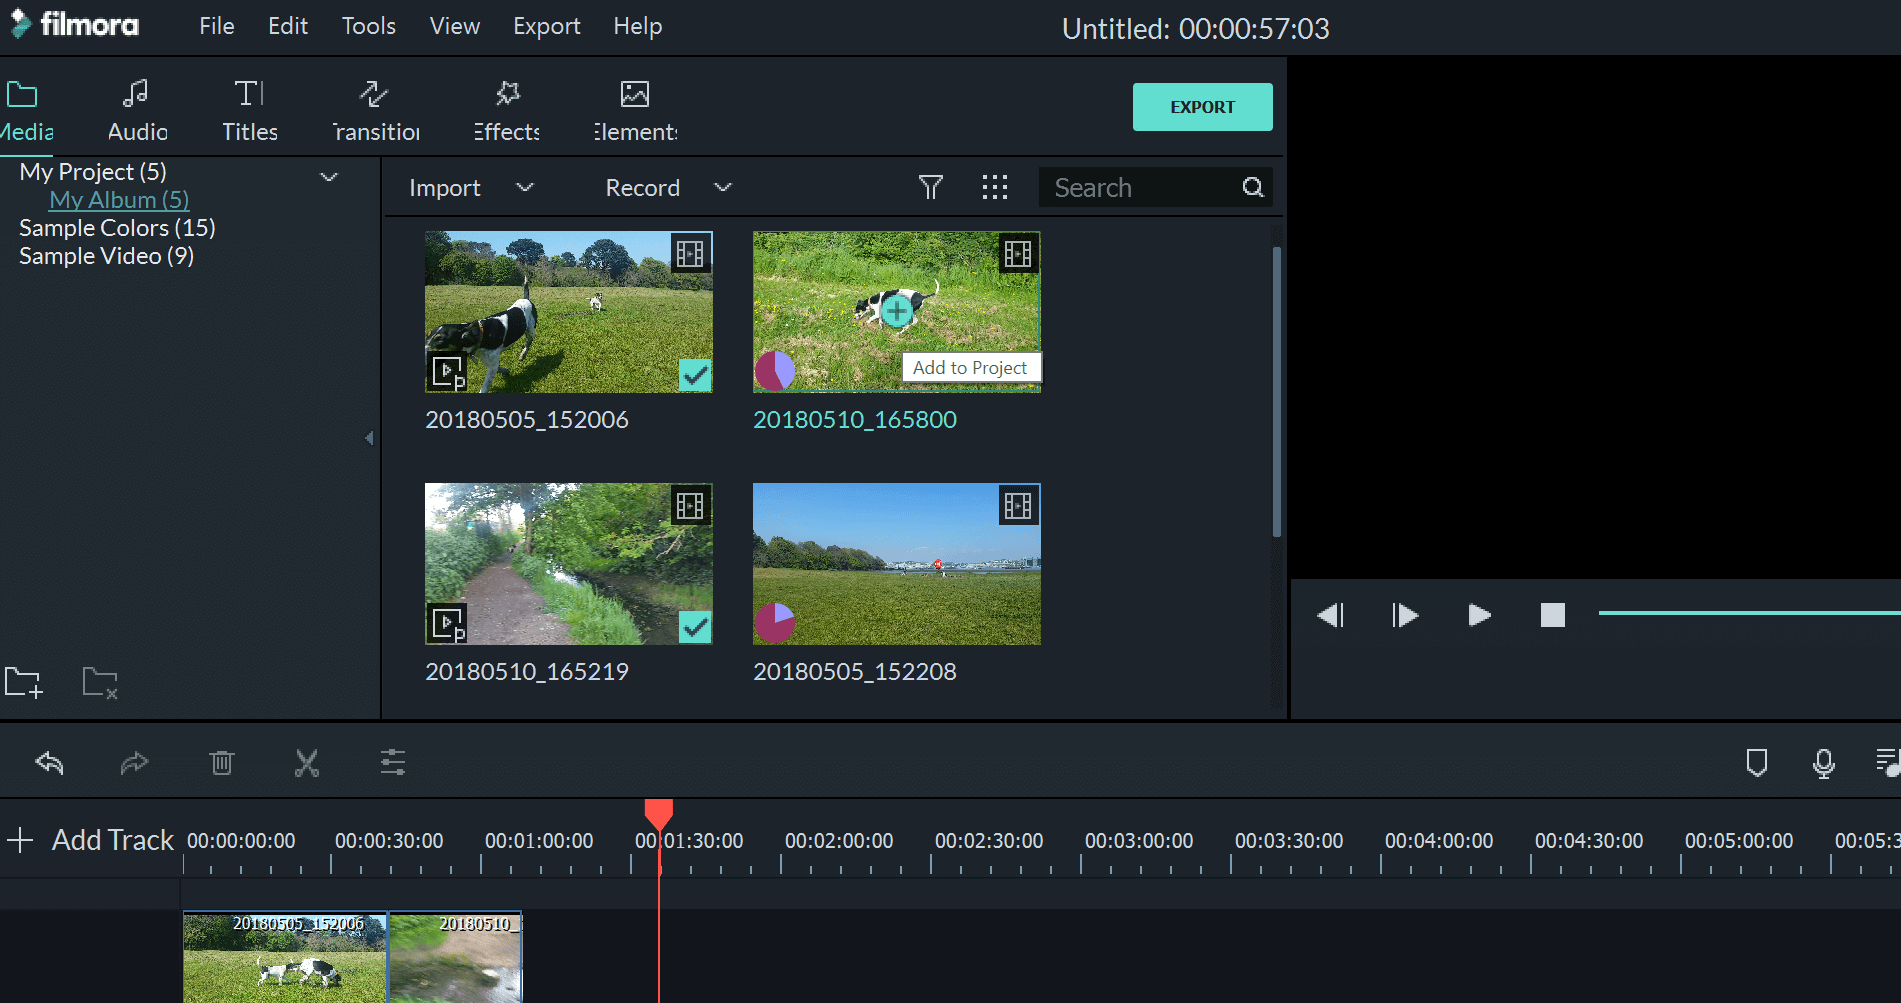
To get started, download and open Filmora on your device. You can then add media from your library either by navigating to it using the File>Import Media choice, or simply by dragging and dropping it onto the screen.

Filmora supports a wide range of file types, including MP4, AVI, WMV, FLV, VOB, MPG, 3GP and many more.
Once you've added all the media you need to make your movie, either drag and drop it onto the timeline, or click the blue plus (+) symbol to add it to your project.

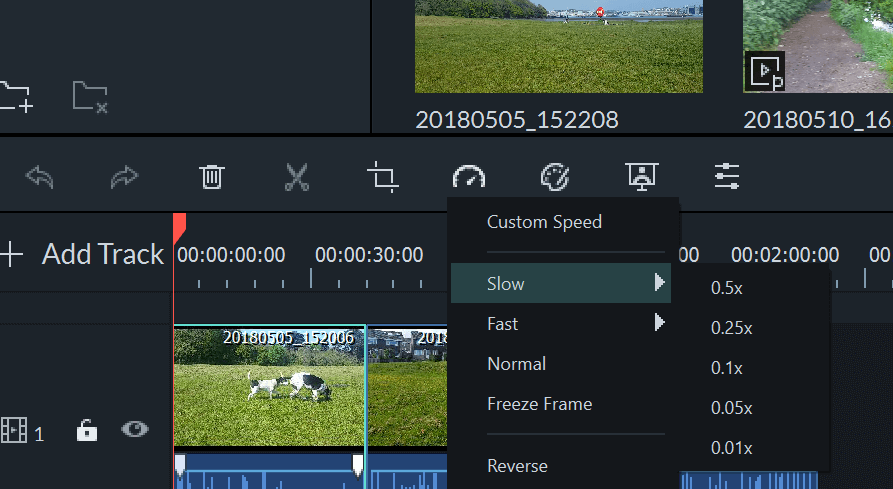
There are two ways in which you can alter the speed of your clip. Firstly, there is a menu in the speedometer dial which you can use to adjust the speed slower or faster by multiples. What these numbers mean are how many times the original speed you want the clip to play at, for example:
- 5 would be half the original speed
- 20 would be 20 times the original speed
- 2 would be double the original speed
- 1 would be a tenth of the original speed
As we mentioned earlier, you can go as fast as 100 times the original speed, or as slow as a hundredth (0.01) of the original speed.
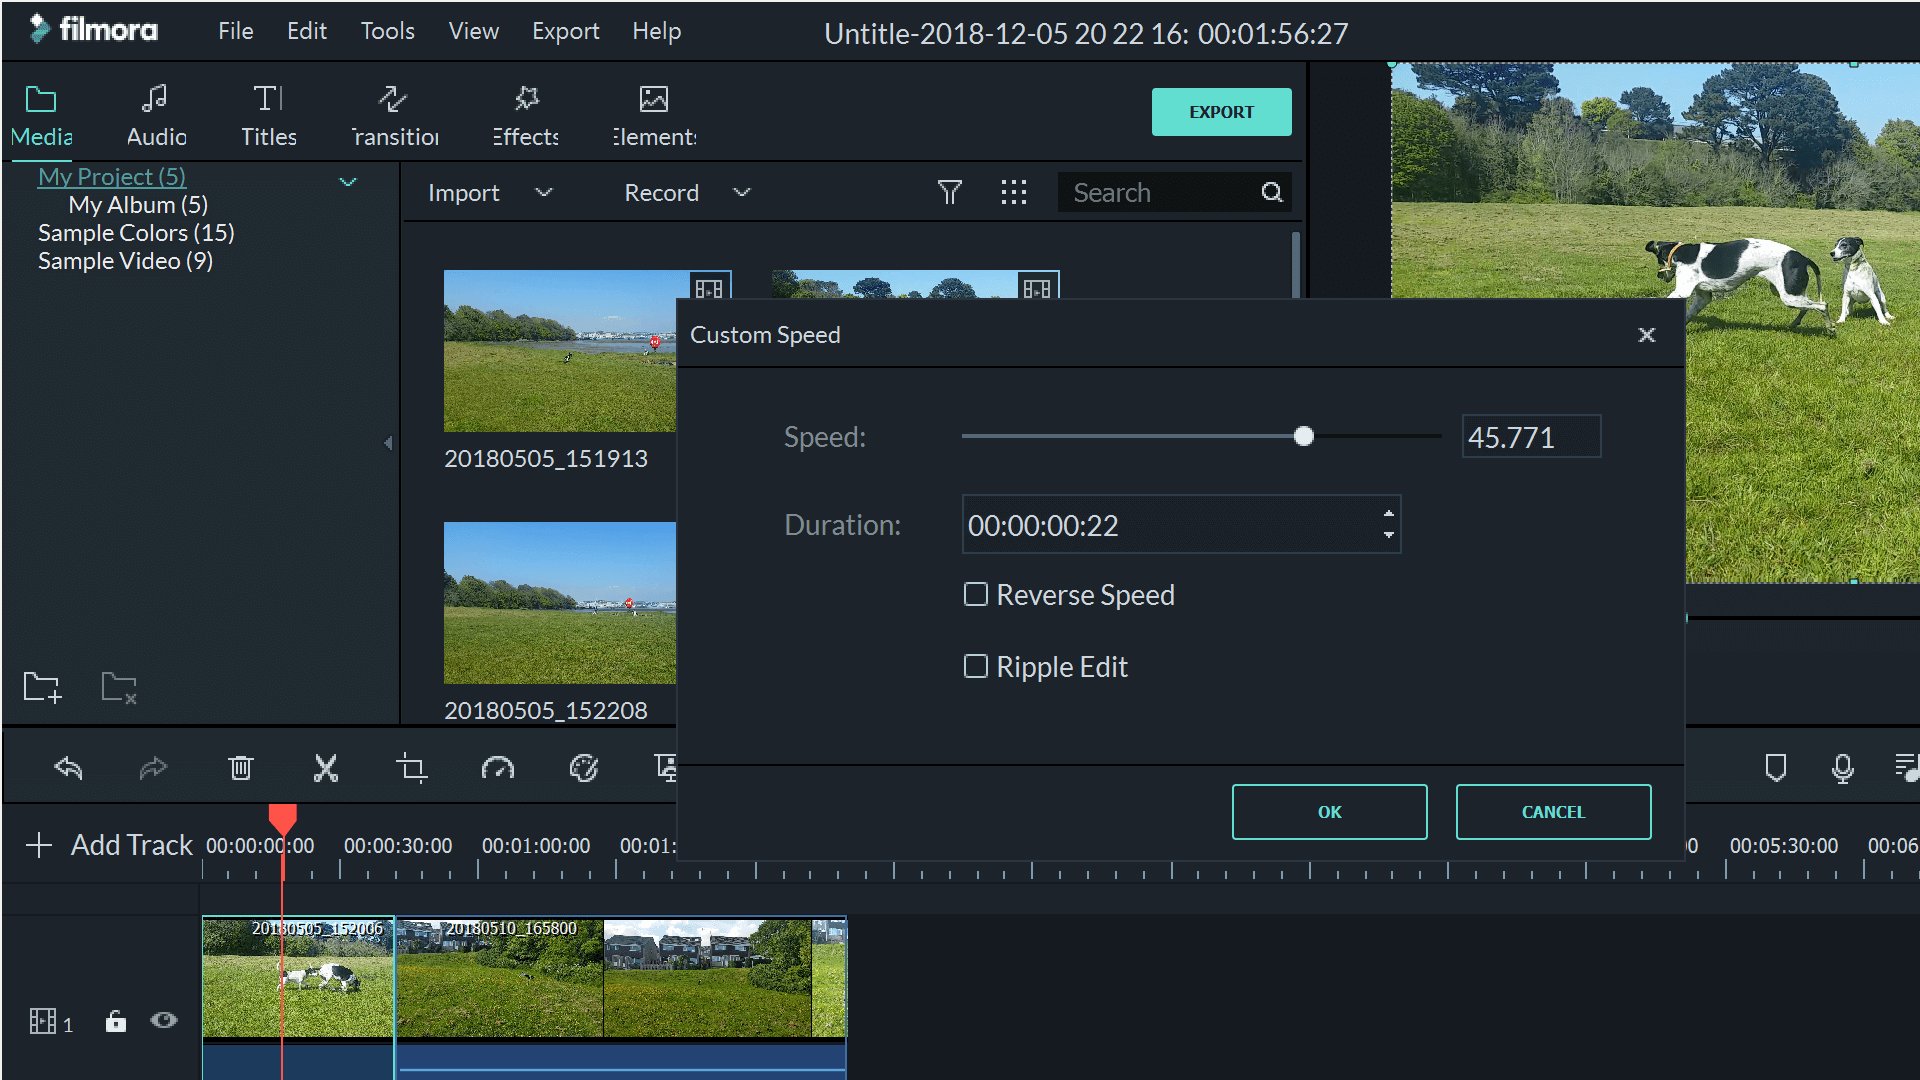
In this menu, you can also click on 'custom speed' which will bring up the speed and duration control panel.

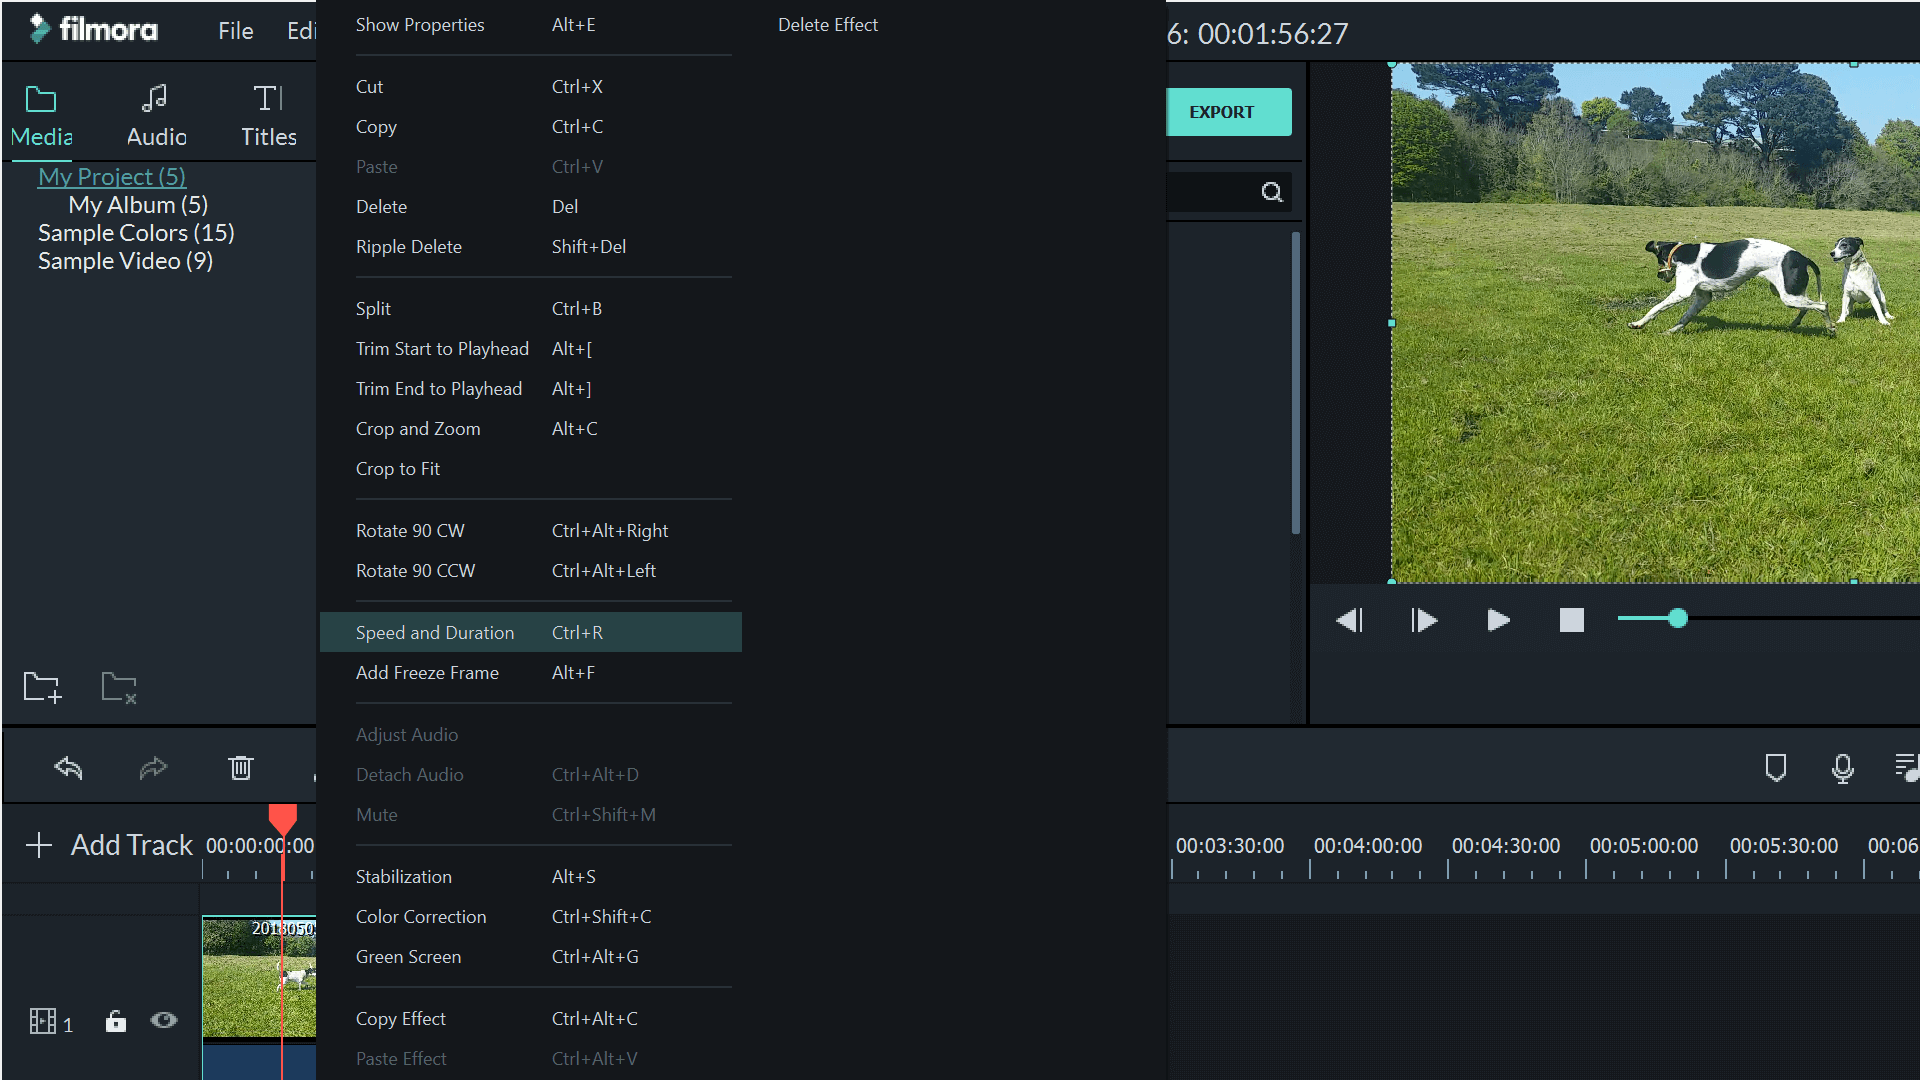
The second method is basically a faster way to get to this control panel. Simply right click on the clip in the timeline that you wish to edit and select 'Speed and Duration'. You can also use a keyboard shortcut to get to this box, which is ctrl+R.

If you just want to try out different speeds for effect, the first menu is adequate and makes it easy to adjust the speed. However, the second method with the control panel is also very useful, particularly if you're trying to create a film that is a specific duration.

As well as adjusting the speed with the slider, you can also set a specific duration, and Filmora will automatically adjust the speed to meet your required time.
The audio will automatically speed up or slow down along with the video. If you do not want this to happen, you can right click the clip and select 'Detach Audio' to edit the video footage separately from the sound recording.
Once you're happy with your video, you can easily export it in a variety of formats. These can be for iPods / iPads, for Windows, for Android and much more. You can also directly share your video to Vimeo and YouTube or burn it onto a DVD.
We think you'll love Filmora, so why not give it a try?
Bring up your video to a professional level with straightforward tools.
Try It Free Try It Free


Liza Brown
chief Editor
0 Comment(s)