How to use Adobe Rush – Adobe Rush Editing Tips
Dec 27,2018• Proven solutions
The world has been excited to see the launch of Adobe Rush. In general, Adobe are hailed as one of the best brands for visual media, with powerful tools in their Creative Cloud suite used by designers and content producers worldwide.
Slated as the video editing tool for the YouTube generation, we were excited to get our hands on a copy of the software. We've found that, unlike some Adobe products, it's not too hard to get to grips with at all and can produce some pretty passable results with very little time invested at all.
To help you get started with Adobe Rush too, we've put together a short step by step tutorial on how to use this software.
Getting started
Getting started with Adobe Rush is easy. To begin, first head on over to the Adobe Rush download page to get your download of the software started. You'll need to create an Adobe Creative Cloud account or sign in if you already have one.
The program is around 2GB in size, so might take a little time to come down depending on your connection. Once down, click the .exe file to install the program.
When you first fire up Adobe Rush, you'll be taken on a brief tutorial of the software. It's not the most complex of programs but the tutorial does fly by, so if you're feeling a bit lost, we do hope you refer to our step by step process below.
How to use Adobe Rush step by step
When you start Adobe Rush, any projects you've been working on will appear on the home screen. If you have not started a project yet, this will be blank. Look for the blue button telling you to 'Create a New Project'.

Clicking this button will take you on to the media interface, where you'll find all the sample media Adobe have helpfully included in their software. It's quite useful to have a play around with these files knowing you're not going to mess up your own video!
However, if you're ready to work on your own material, simply navigate to your media using the links on the left. Name your project right away, so you can find it again later and so that it can synch with your Creative Cloud account.
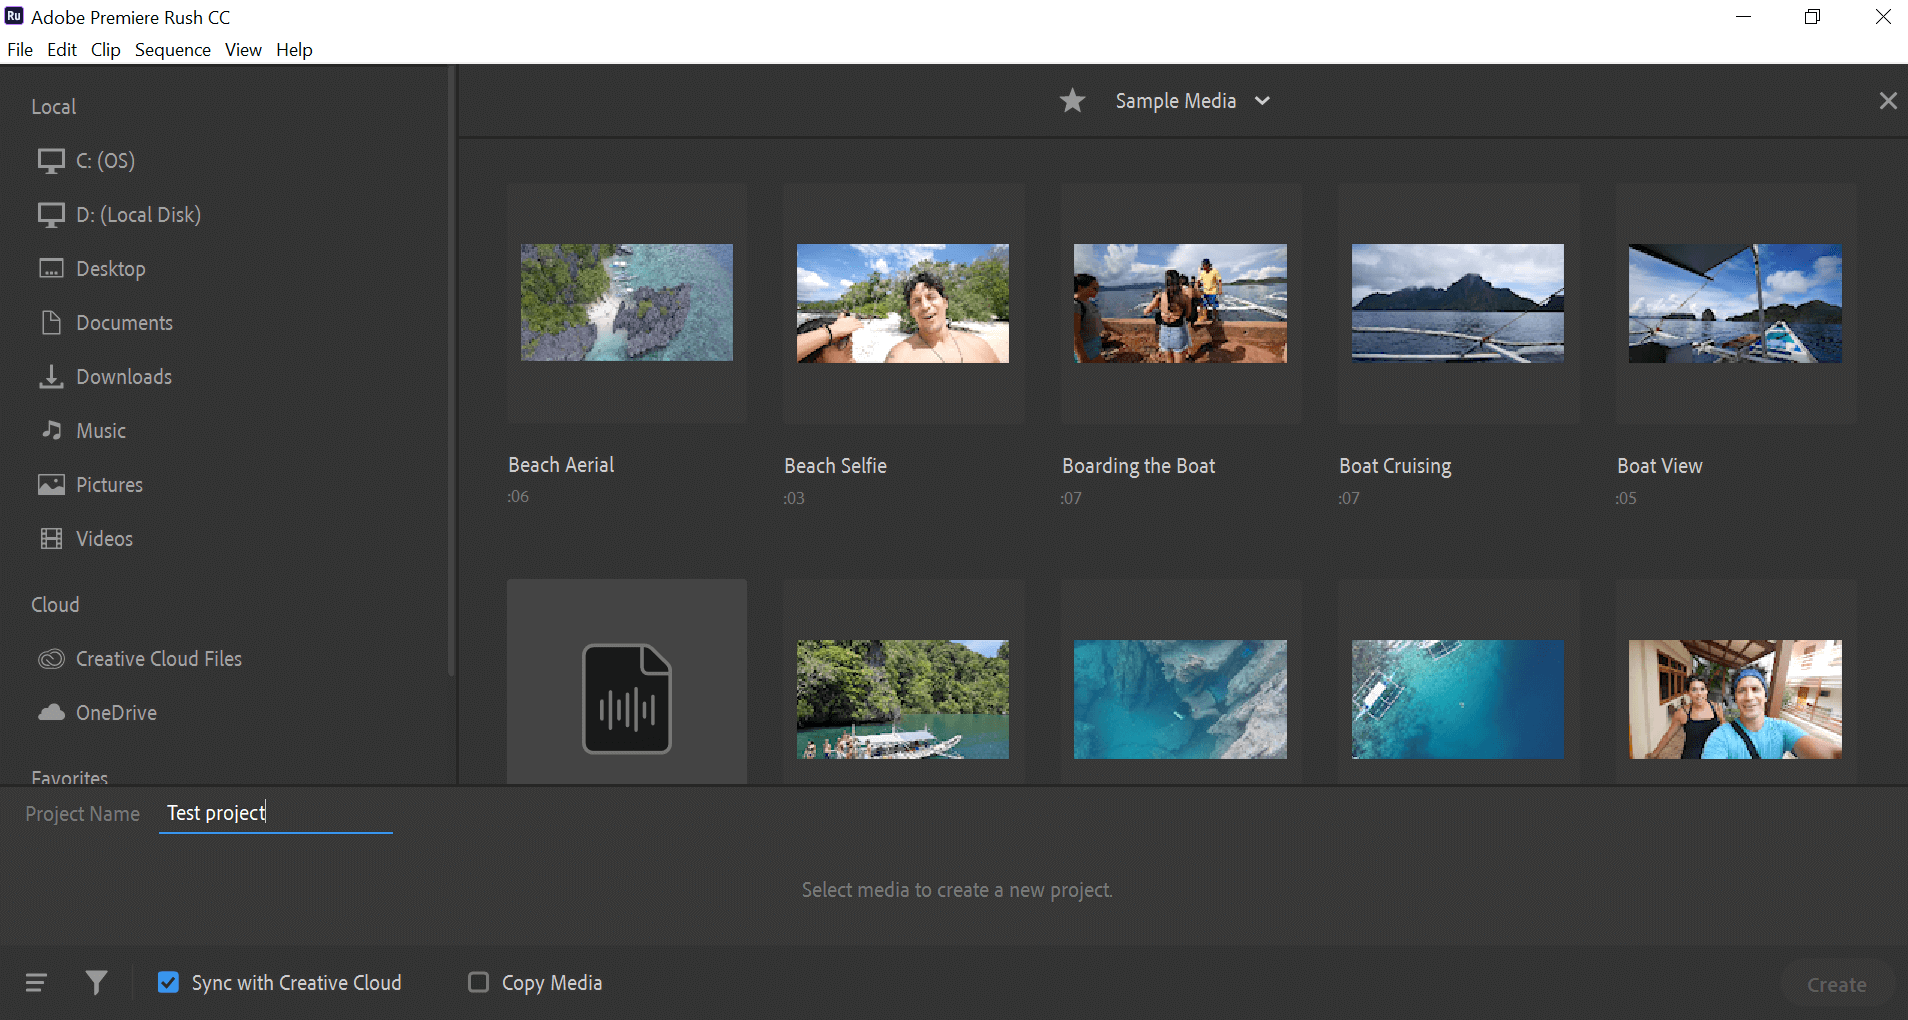
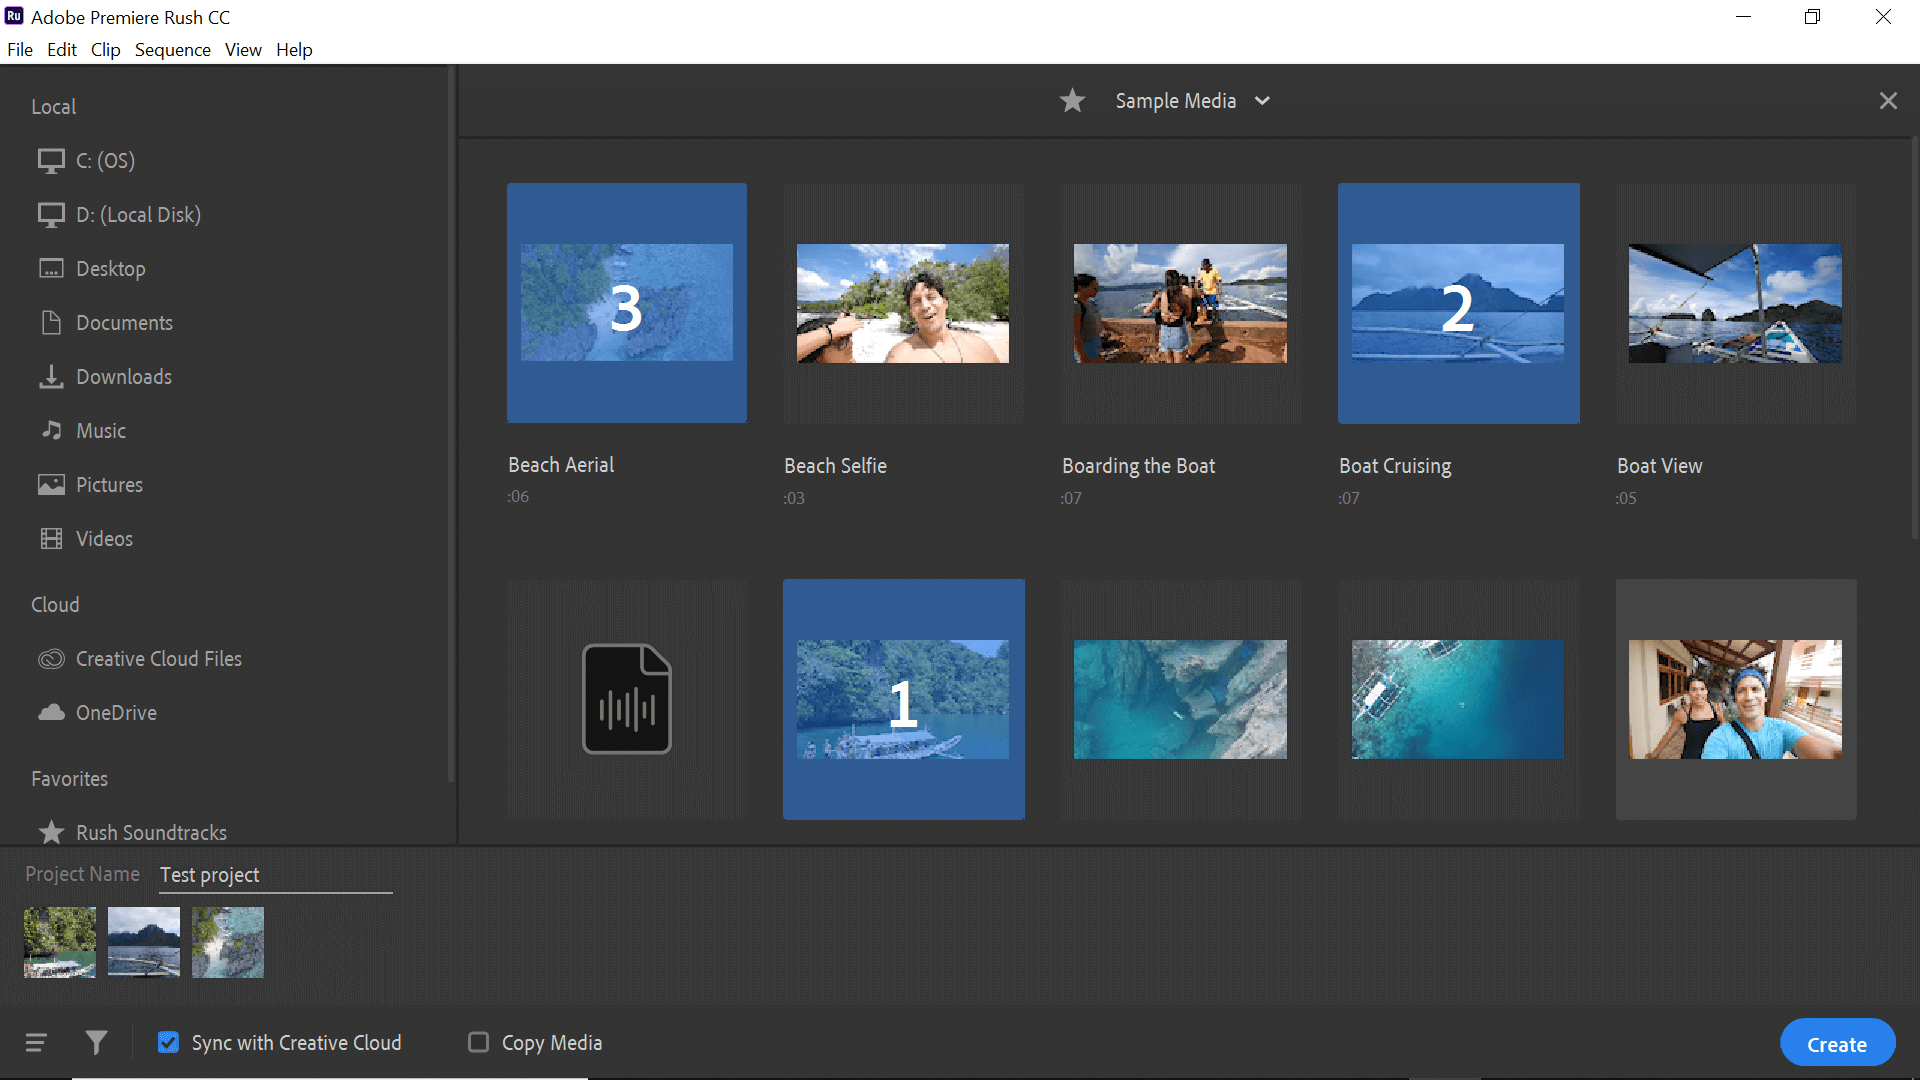
You'll need to select at least three clips in order to start making your video. Choose them by simply clicking on them to make a number appear, then hit the blue 'Create' button in the bottom right.
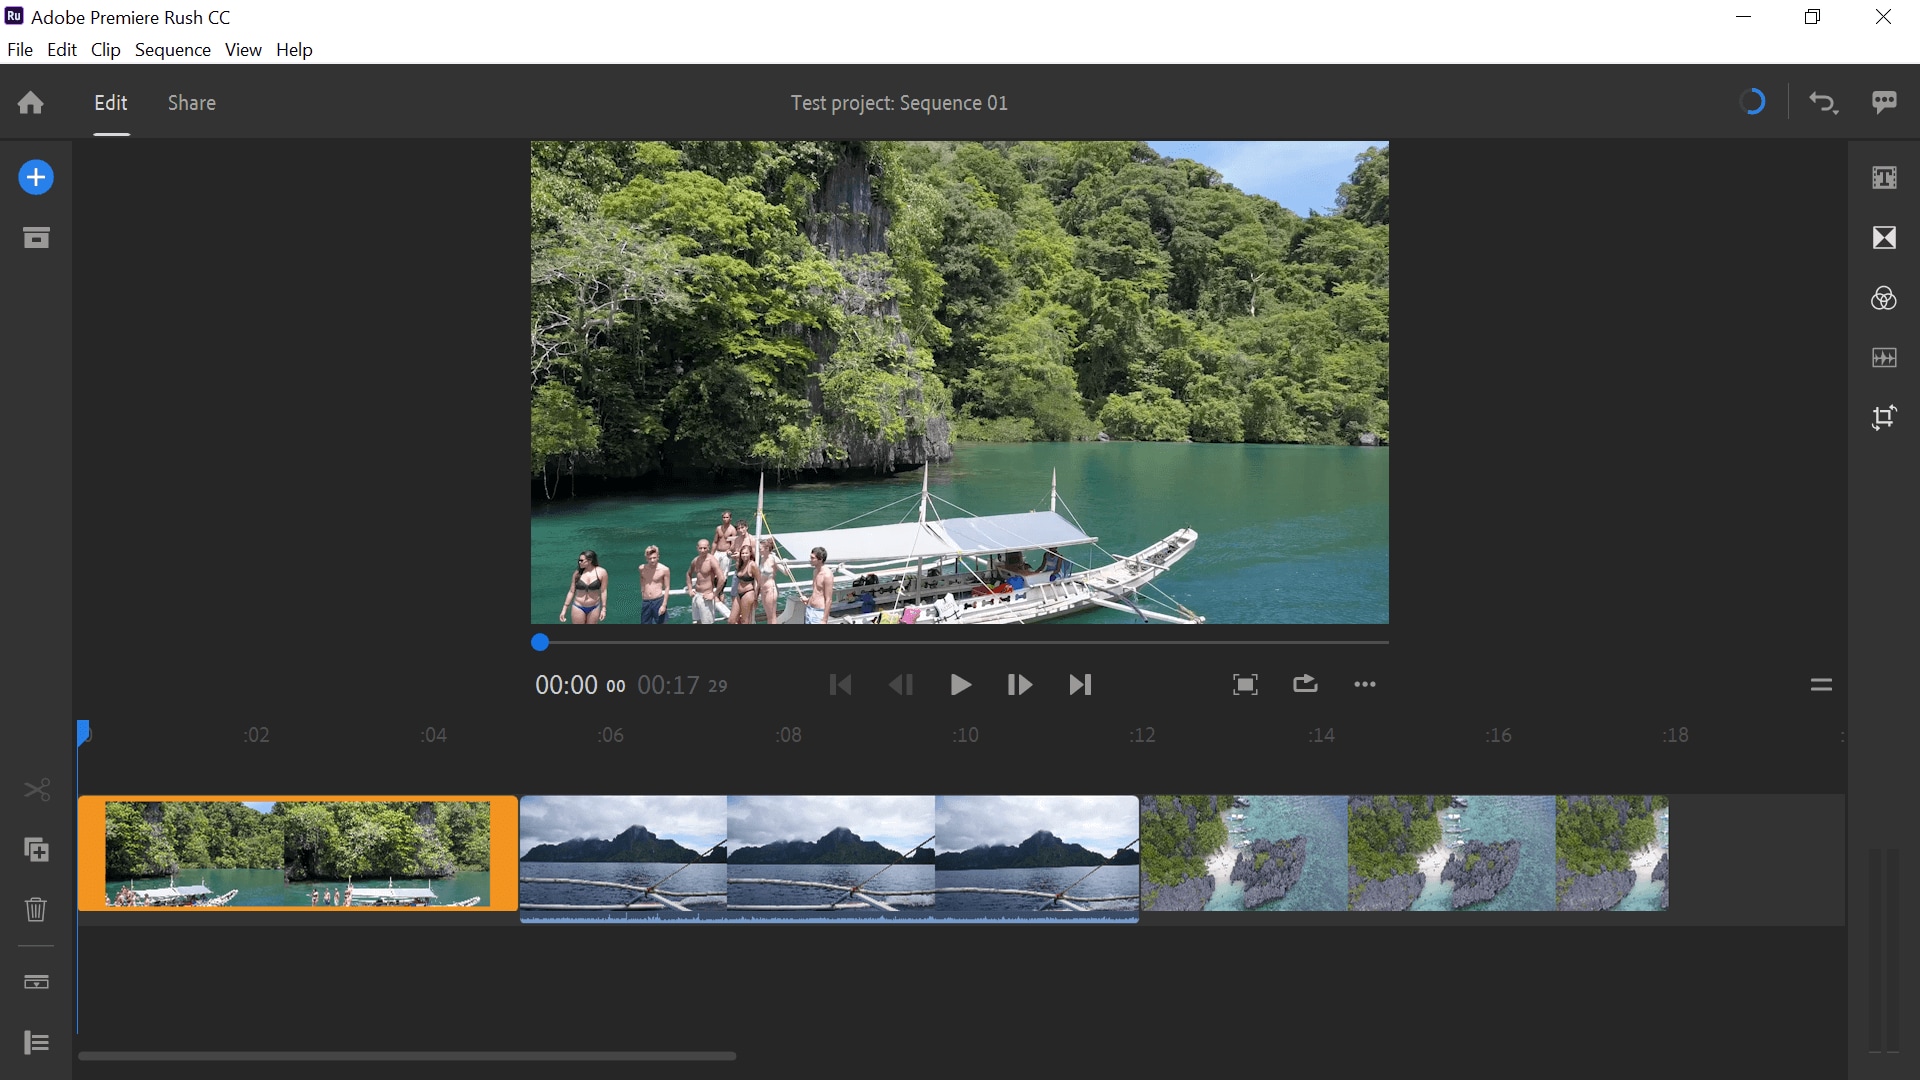
Your chosen clips will be entered into a 'track' on the editor. If they aren't in the order you want, you can simply drag them around to put them in the right order. You can also place the blue marker anywhere you want to split a clip and use the scissors tool to make the cut. If you want to make a clip shorter, just drag the orange bars to shorten the footage.
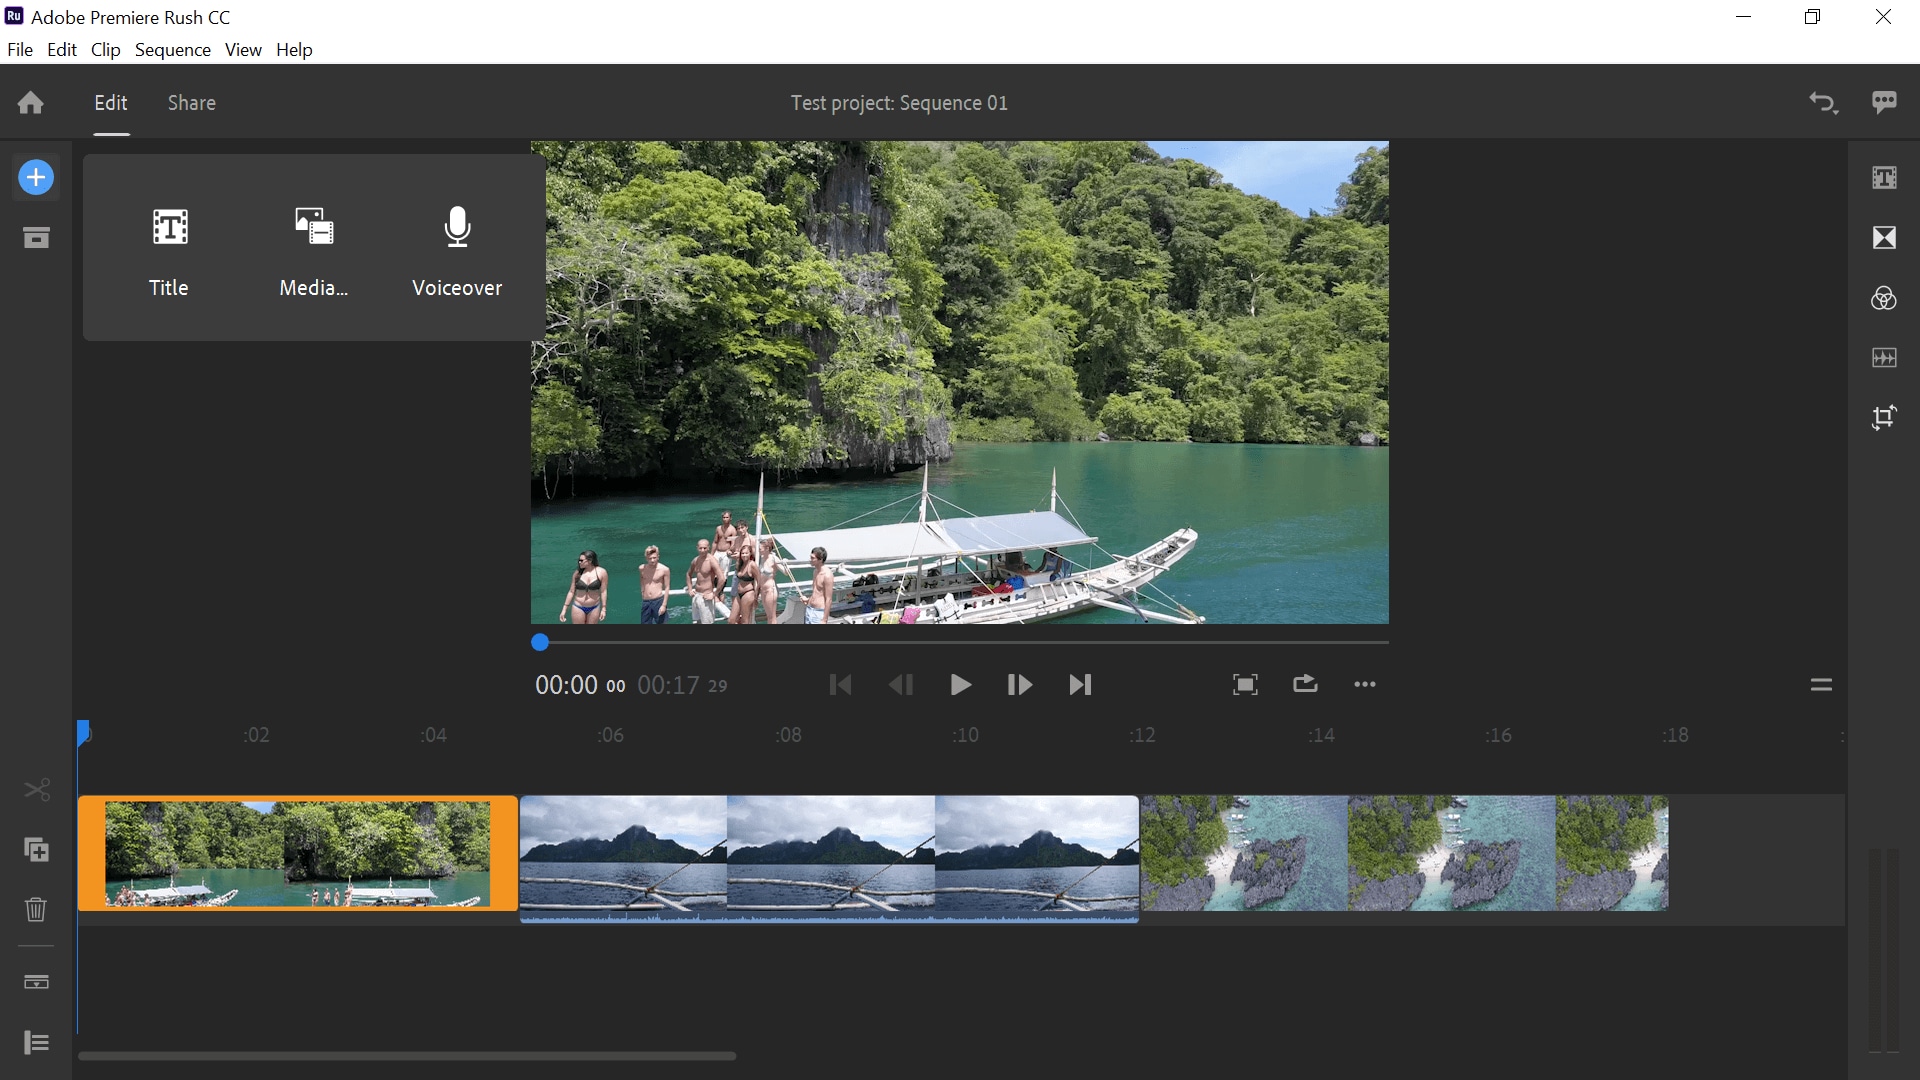
You'll probably need to add a title to your movie, which you can do by selecting the blue 'plus' in the top left-hand corner. This is also where you'll find the tools to add a voiceover or to add other media to your production. You can also select the title icon on the right to add your title.
Adobe has built in a number of pre-made title screens, complete with basic animations to add a touch of professionalism to your movie. Simply click the one you like to add it to your project, then drag it onto a new track in the place where you want it to show up.
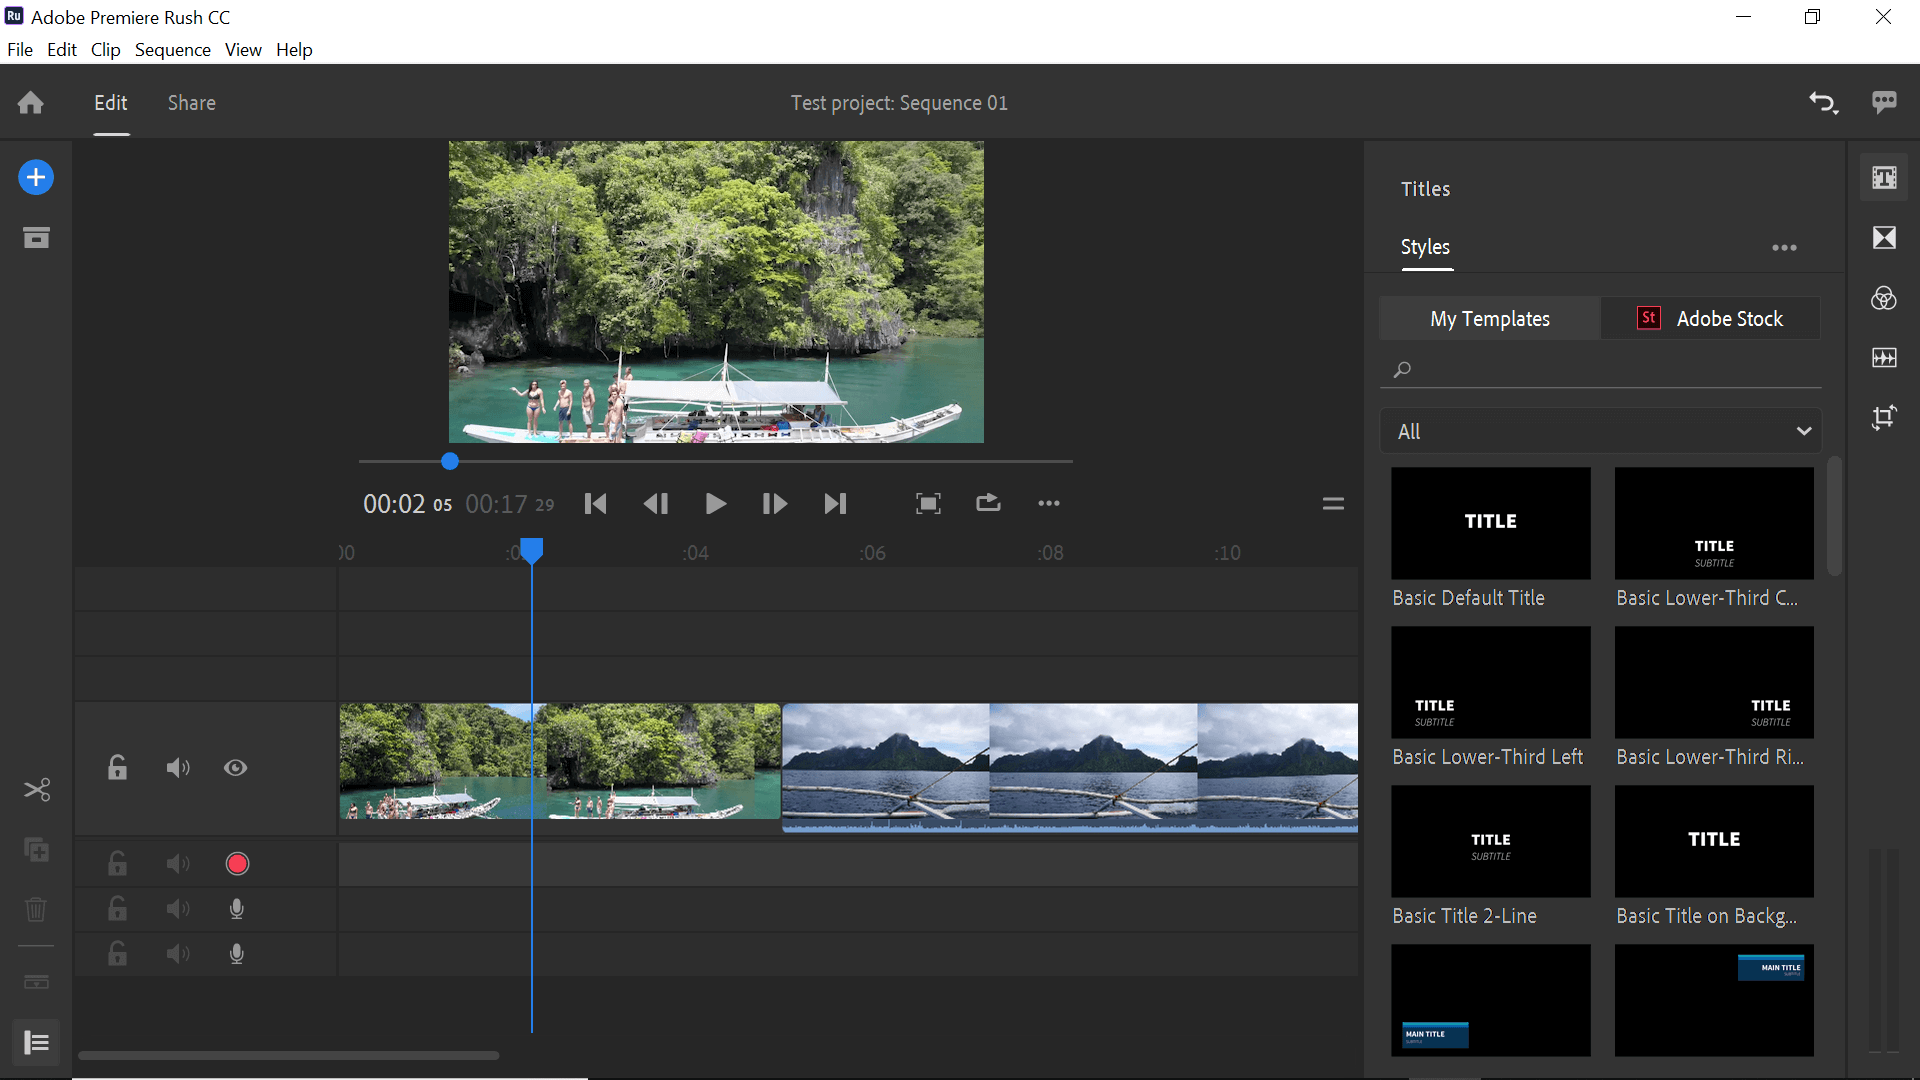
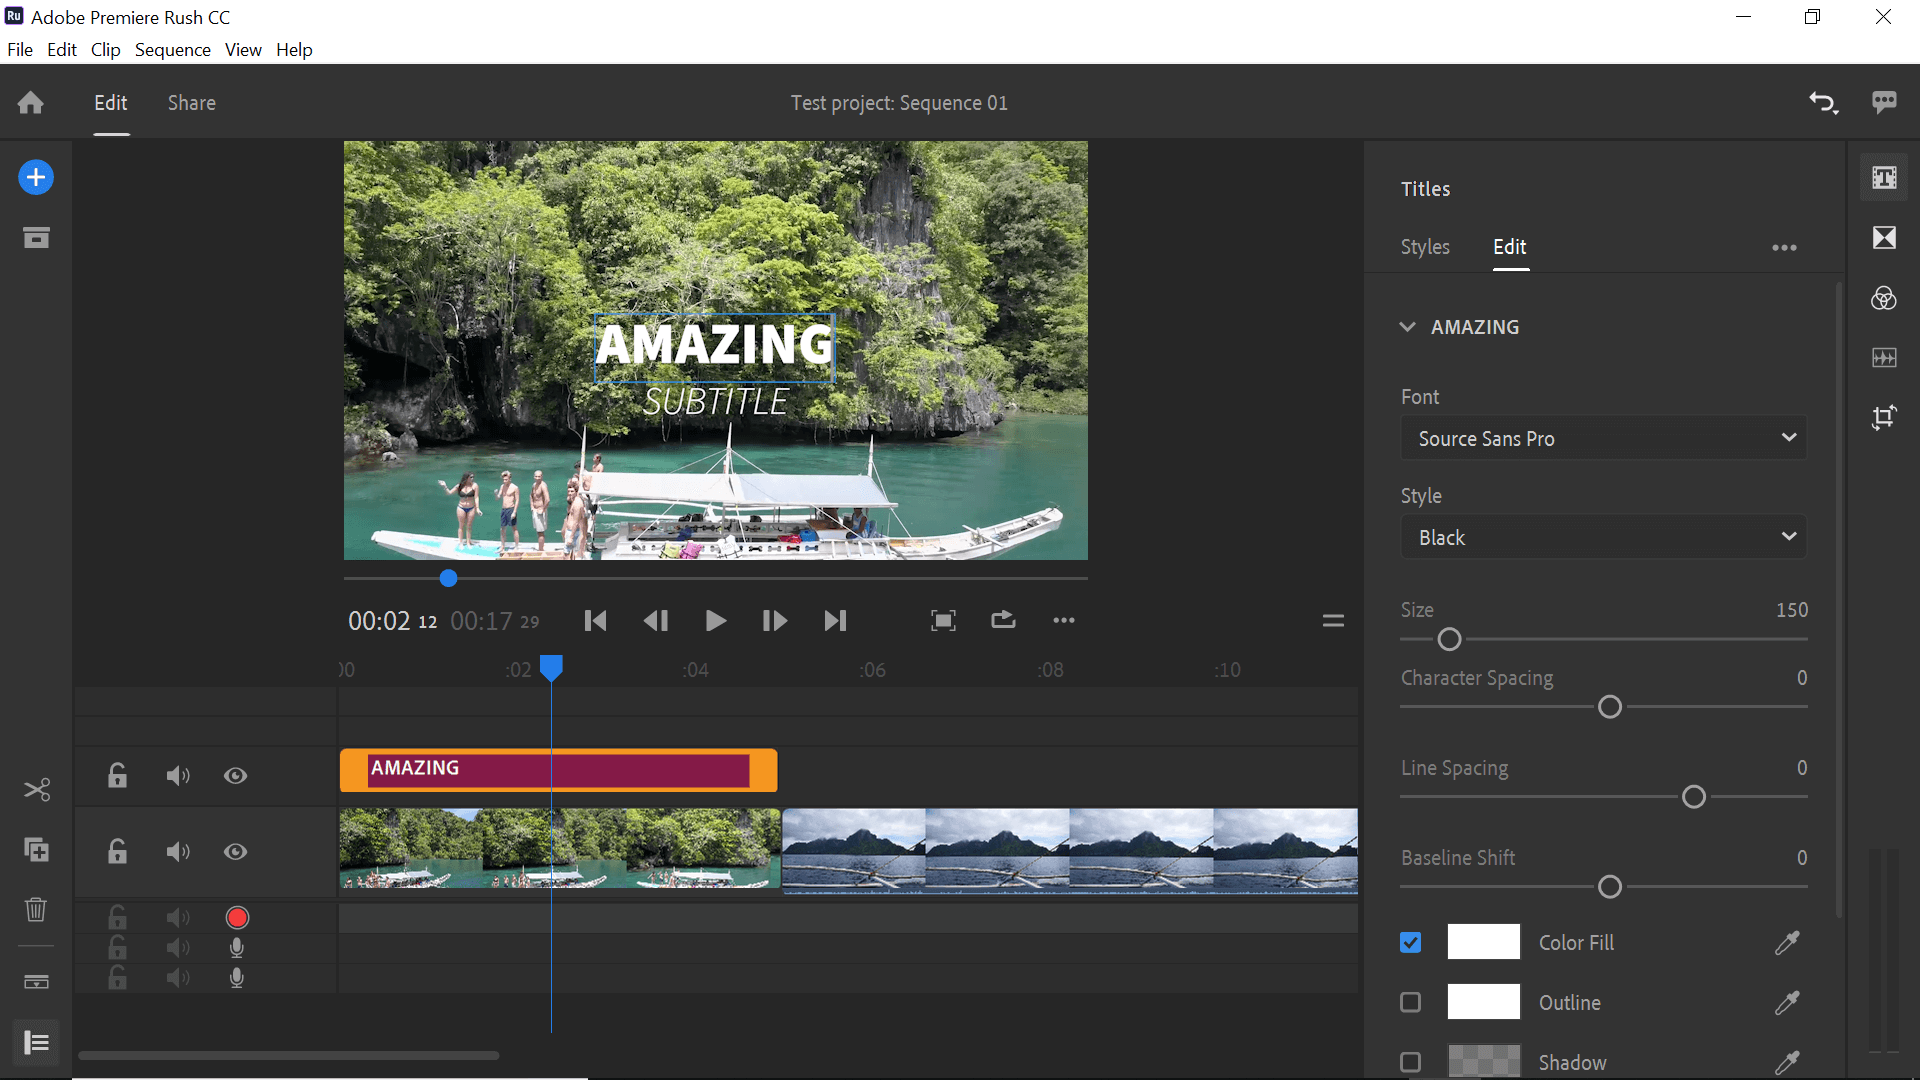
To edit the title, you can click on it in the video monitor. Simply type over the existing words with your own messages. On the right, an edit panel will open for you, which lets you adjust the color, font, size and other features of your title.
Now you've got your images in order and your title sorted, we can have a look at the image editing tools to make your footage look even better.
Transitions can help you move from one clip to another without an abrupt change of scene. Sadly, there are only three options in the current Adobe Rush; cross fade, fade to black or fade to white.
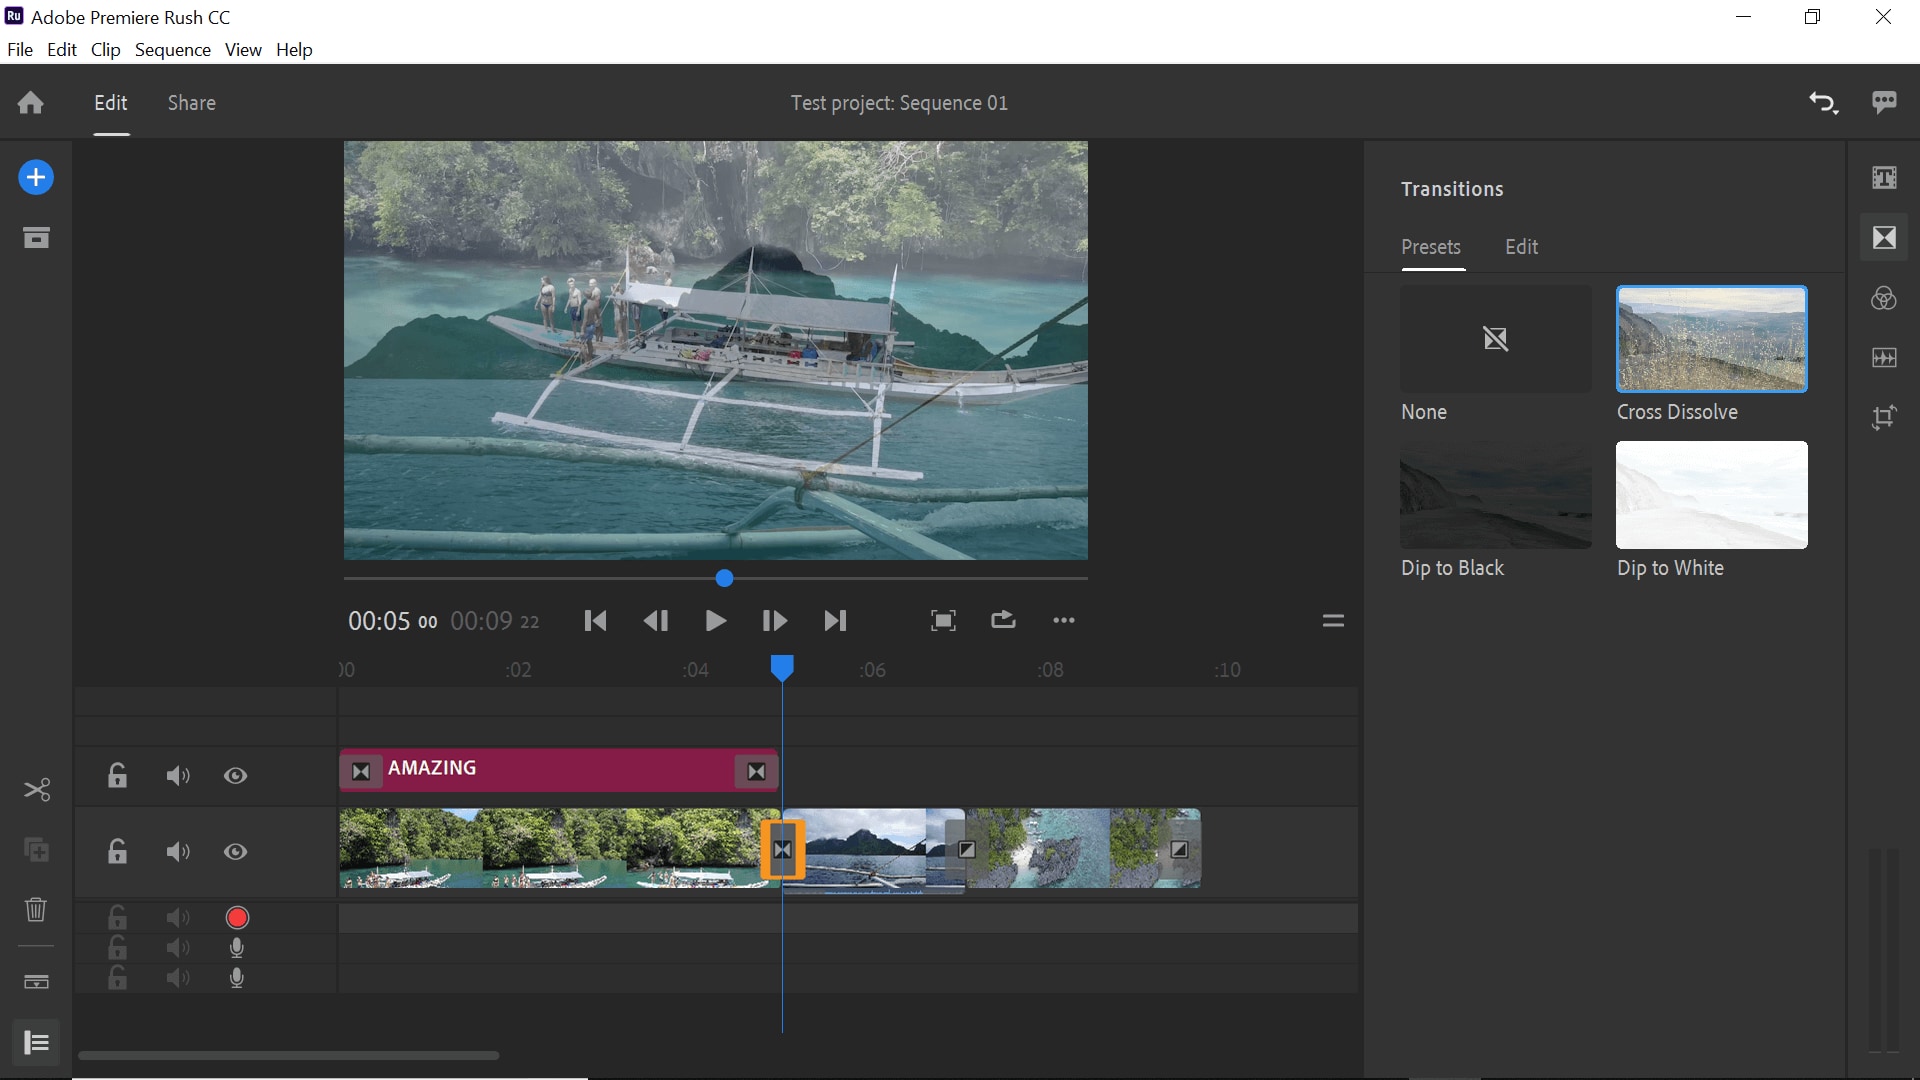
To add one, you'll need to put your marker in the place where the two clips meet. You can then add the transition.
On the right-hand side, you'll find the filters for your video. There are 12 effects in all, and each can be further adjusted using the edit tab at the top.

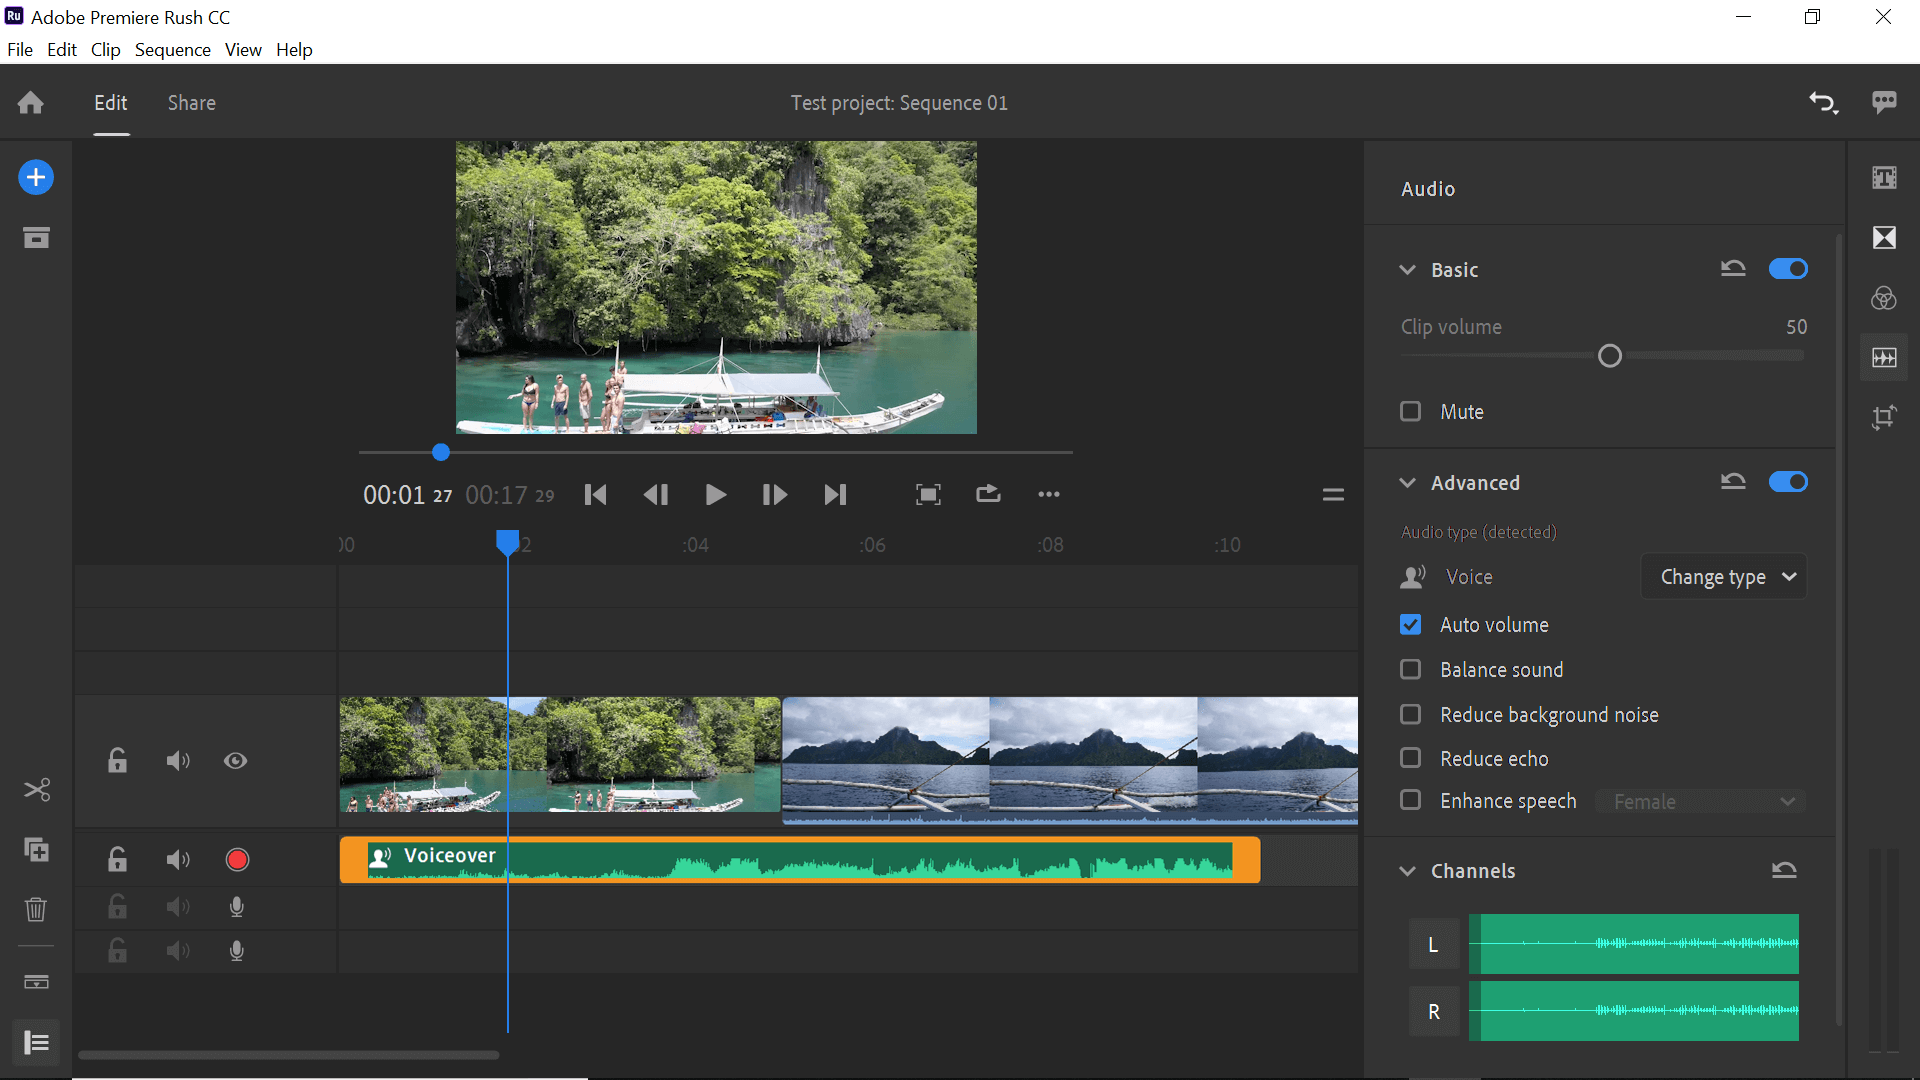
Once you're happy with how everything is looking, you can add a voiceover if you wish. This can be done either with the blue plus icon, or by simply clicking a mic button on any of the free tracks. The video will play as you speak your voiceover, so you can see what you're talking about in real time.
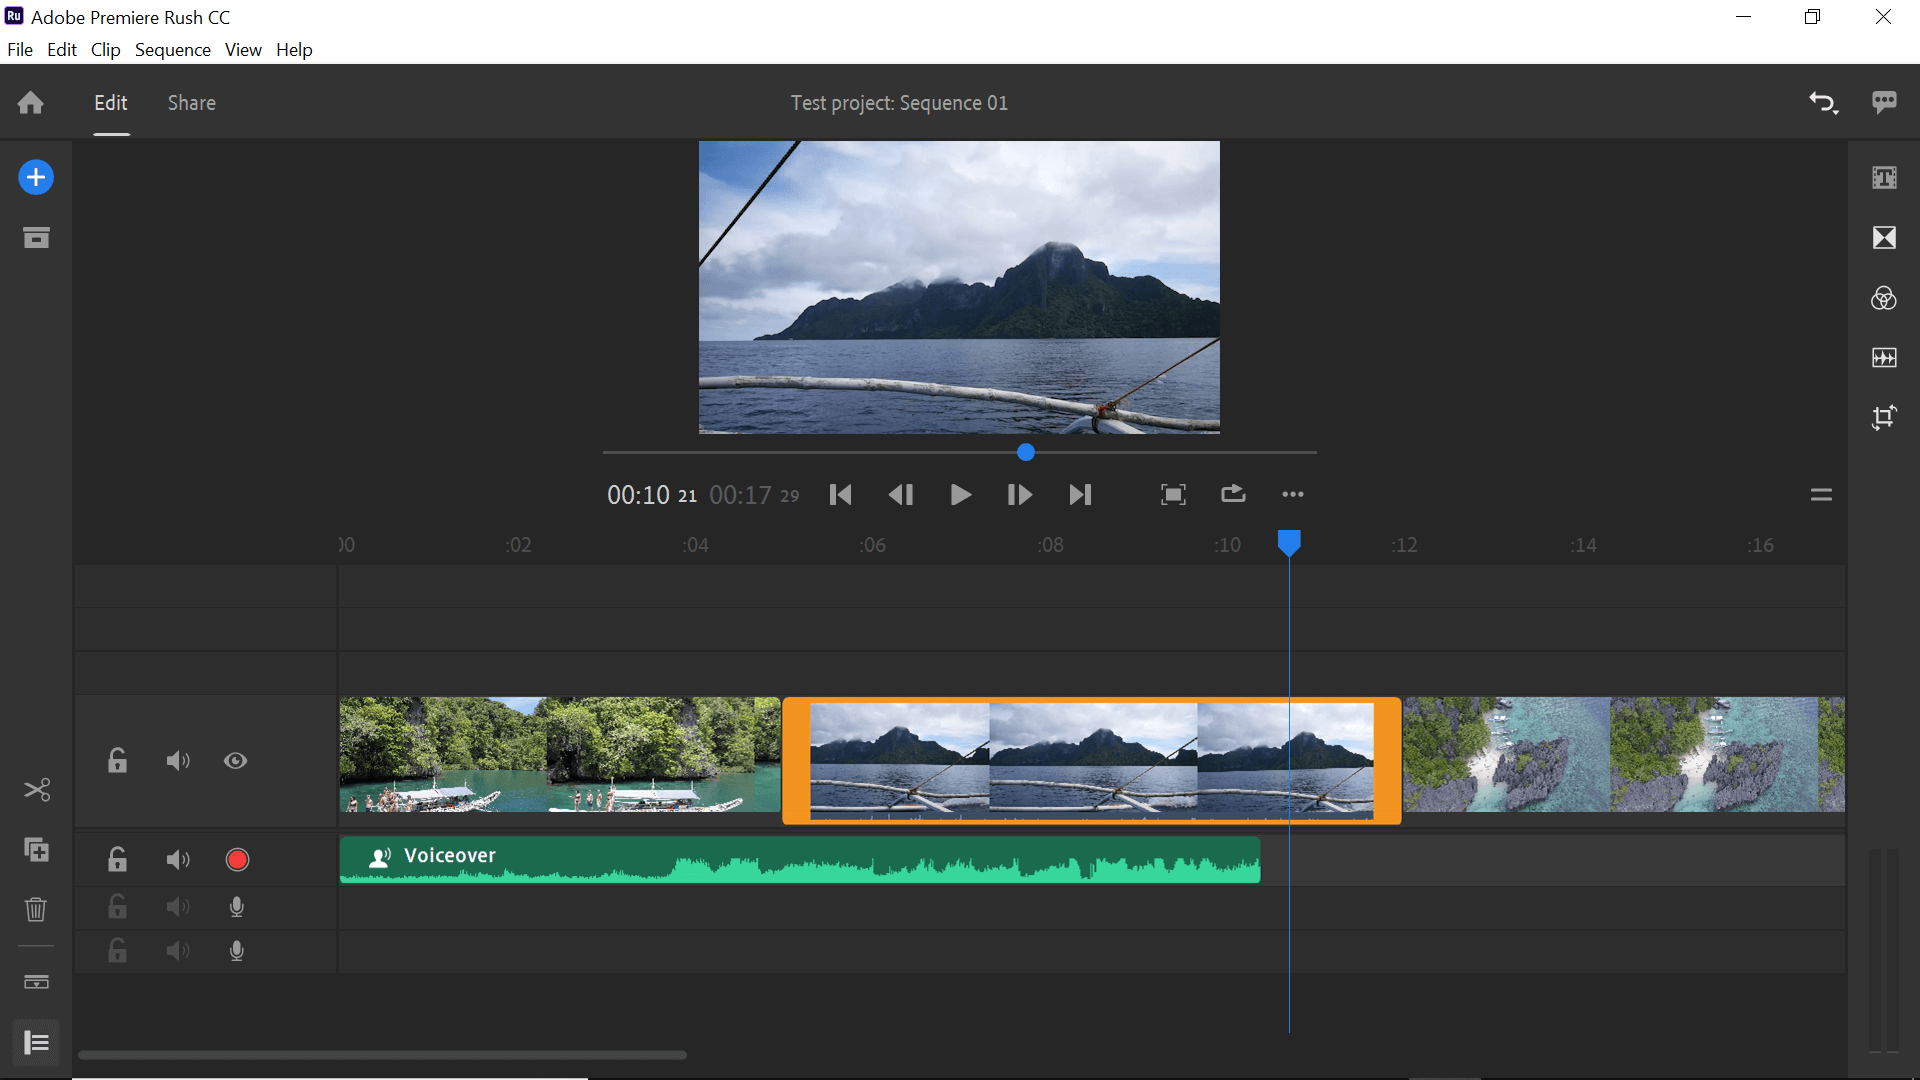
There's not a great deal of editing possible for your voiceover, but what there is will appear when you click on the track.
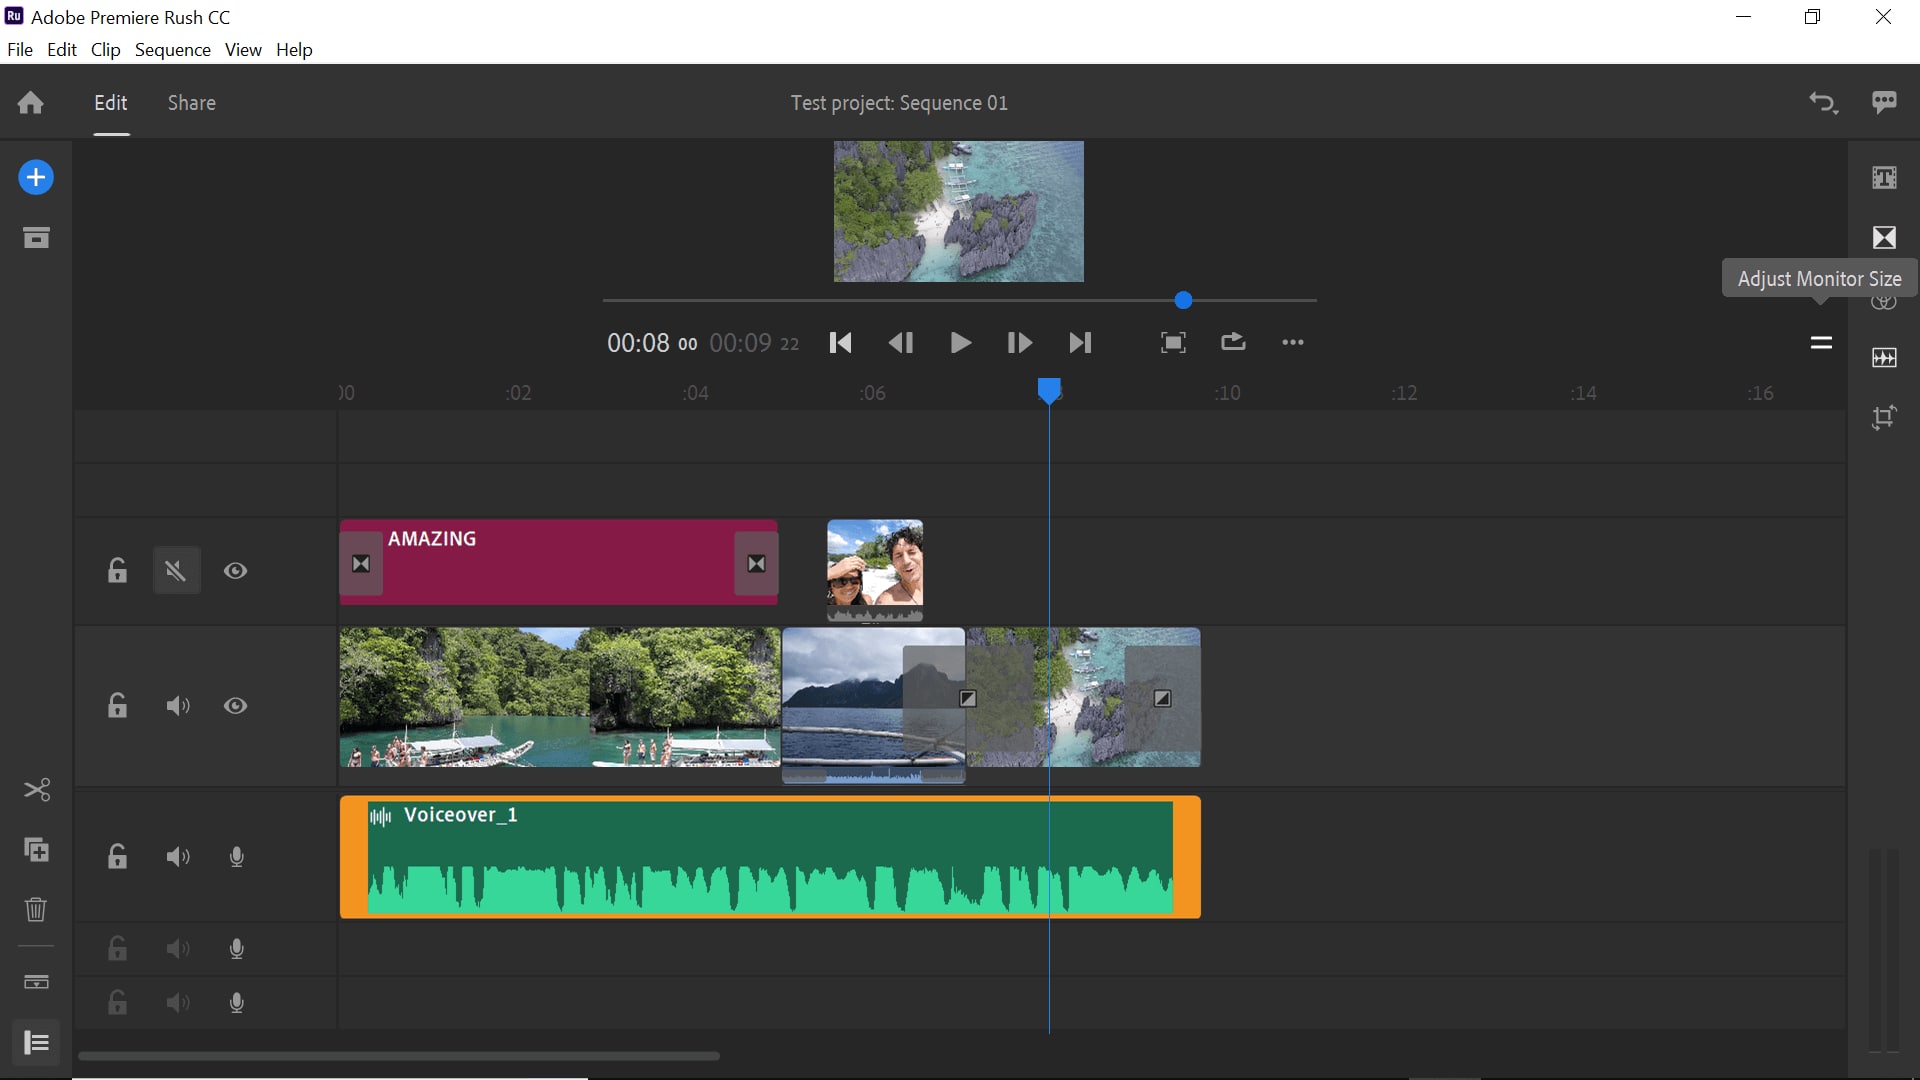
One of the coolest features of Adobe Rush (IMHO) is the picture-in-picture function. To use this, simply add some more media using the blue plus but add it to another track. You can then use the transform menu (bottom button on the right) to reduce it in size and decide on a placement on screen.
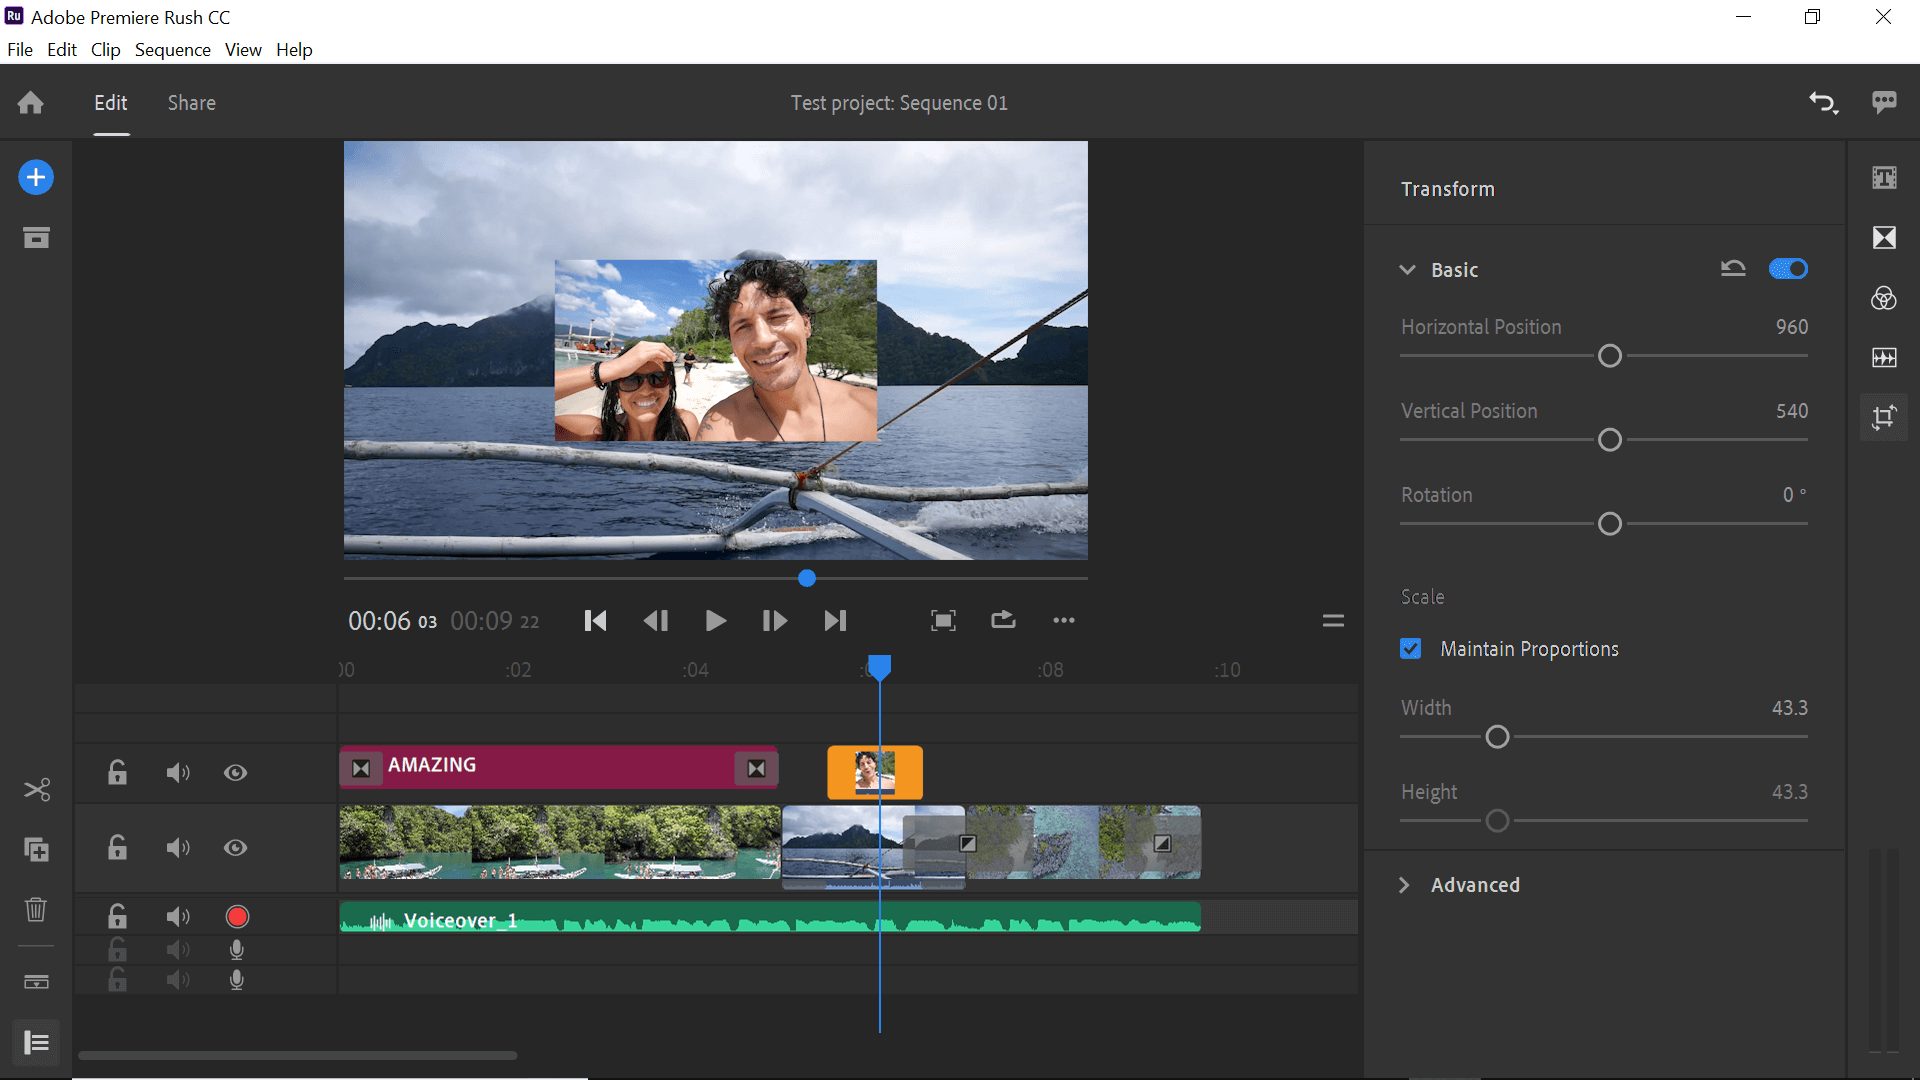
Once you've scaled, cropped and edited your picture, place it on its track wherever you want it to appear. It will appear overlain with the main image.
If you're happy with the finished movie, it's time to get it ready for export. To start this process, click the 'share' button at the top of the screen. This will bring up the export controls where you can set how and where you'd like to share it.
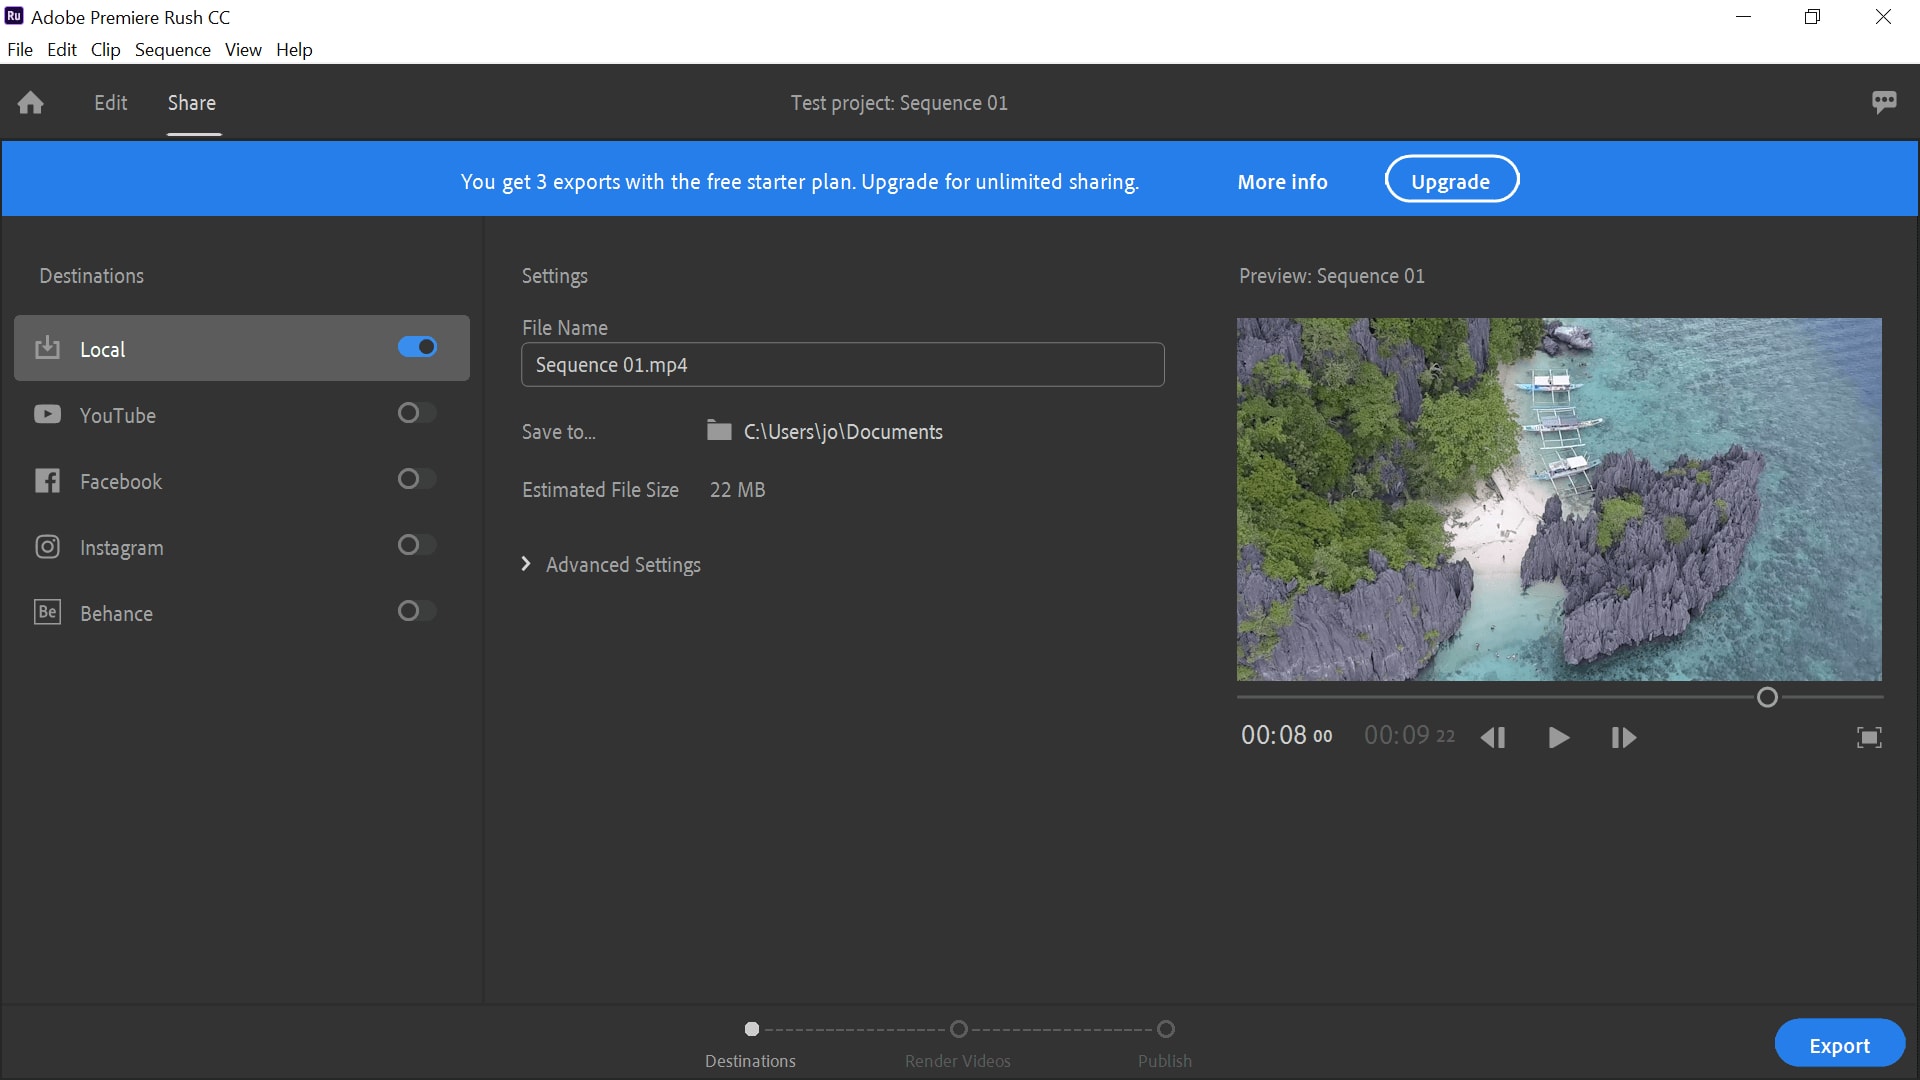
You can simply export it to your local storage, or you can link multiple social media accounts for instant sharing. Once you've chosen your location, click the blue 'Export' button to begin the process.
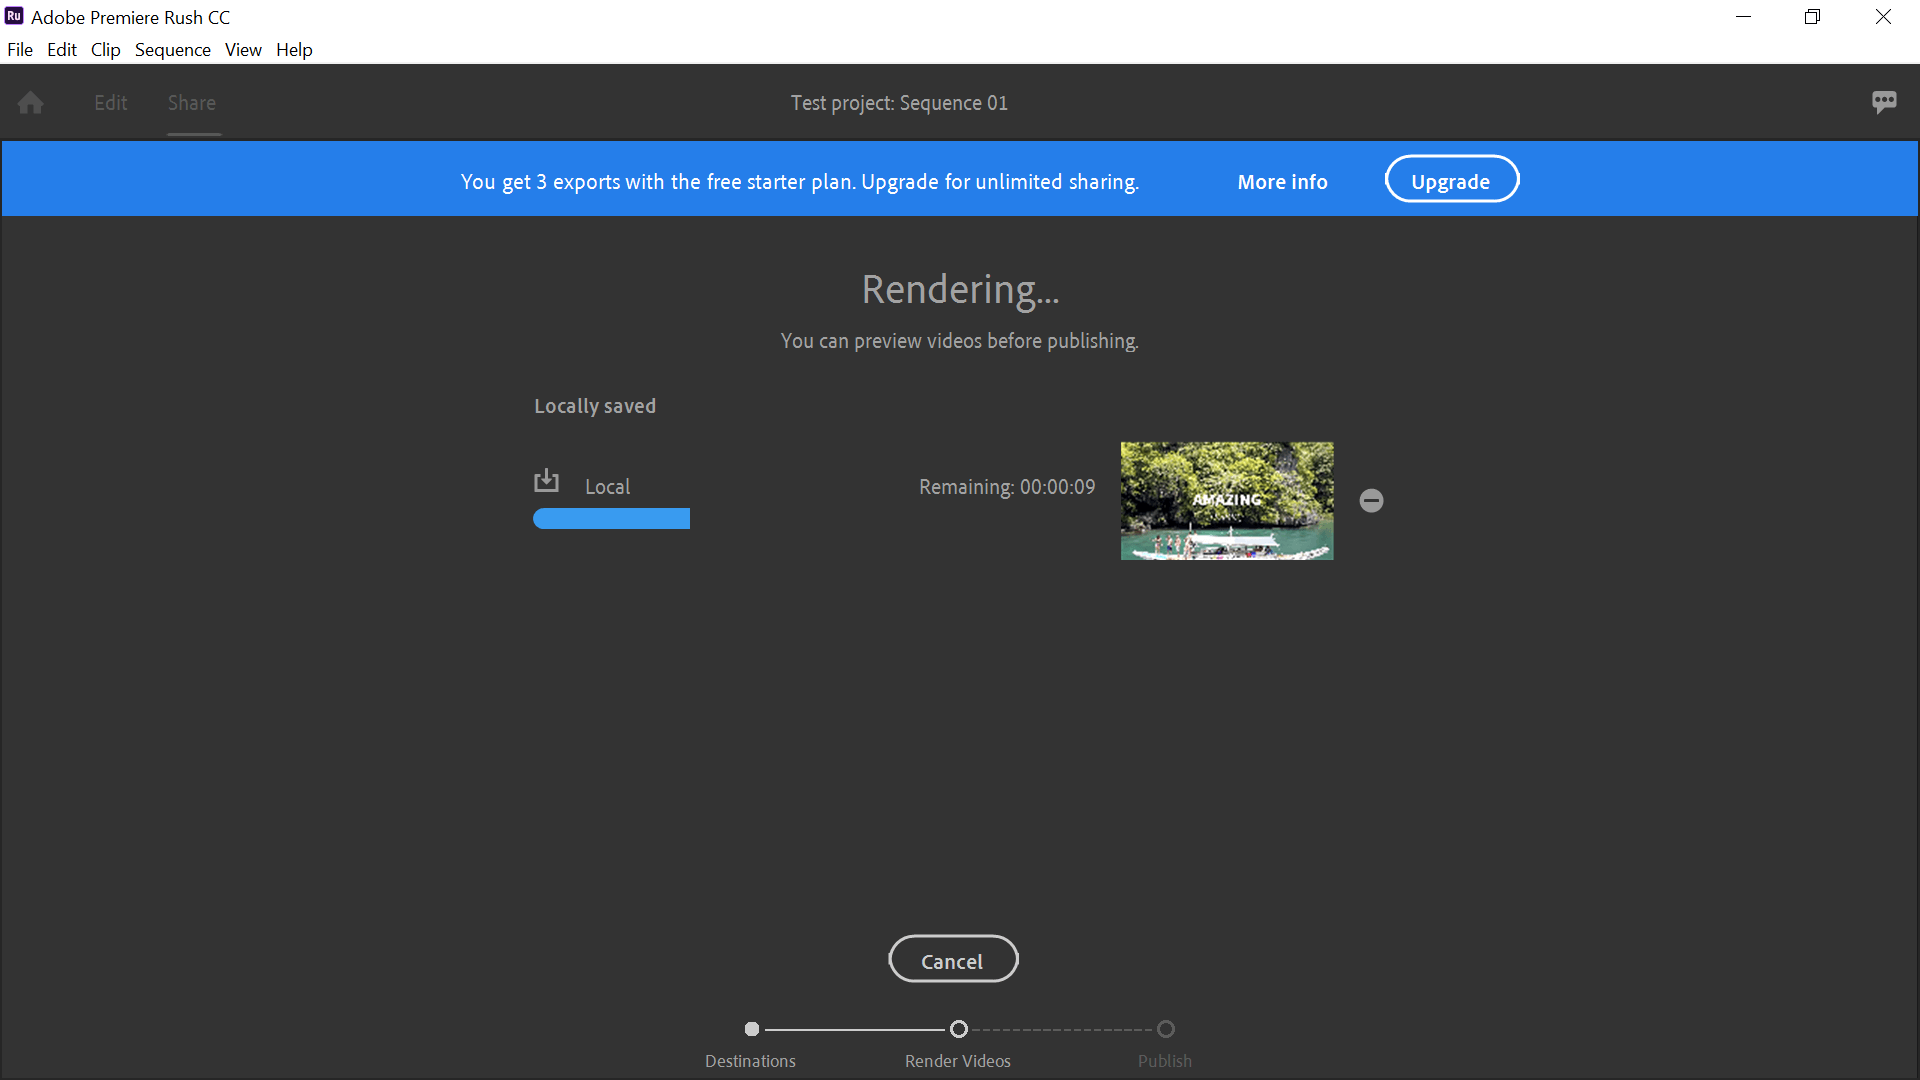
You'll need to wait for it to render, which some users have complained takes too long. Our test video took around 12 seconds to render, but considering it was only a 10 second movie, we can see how a long video could involve a frustrating wait.
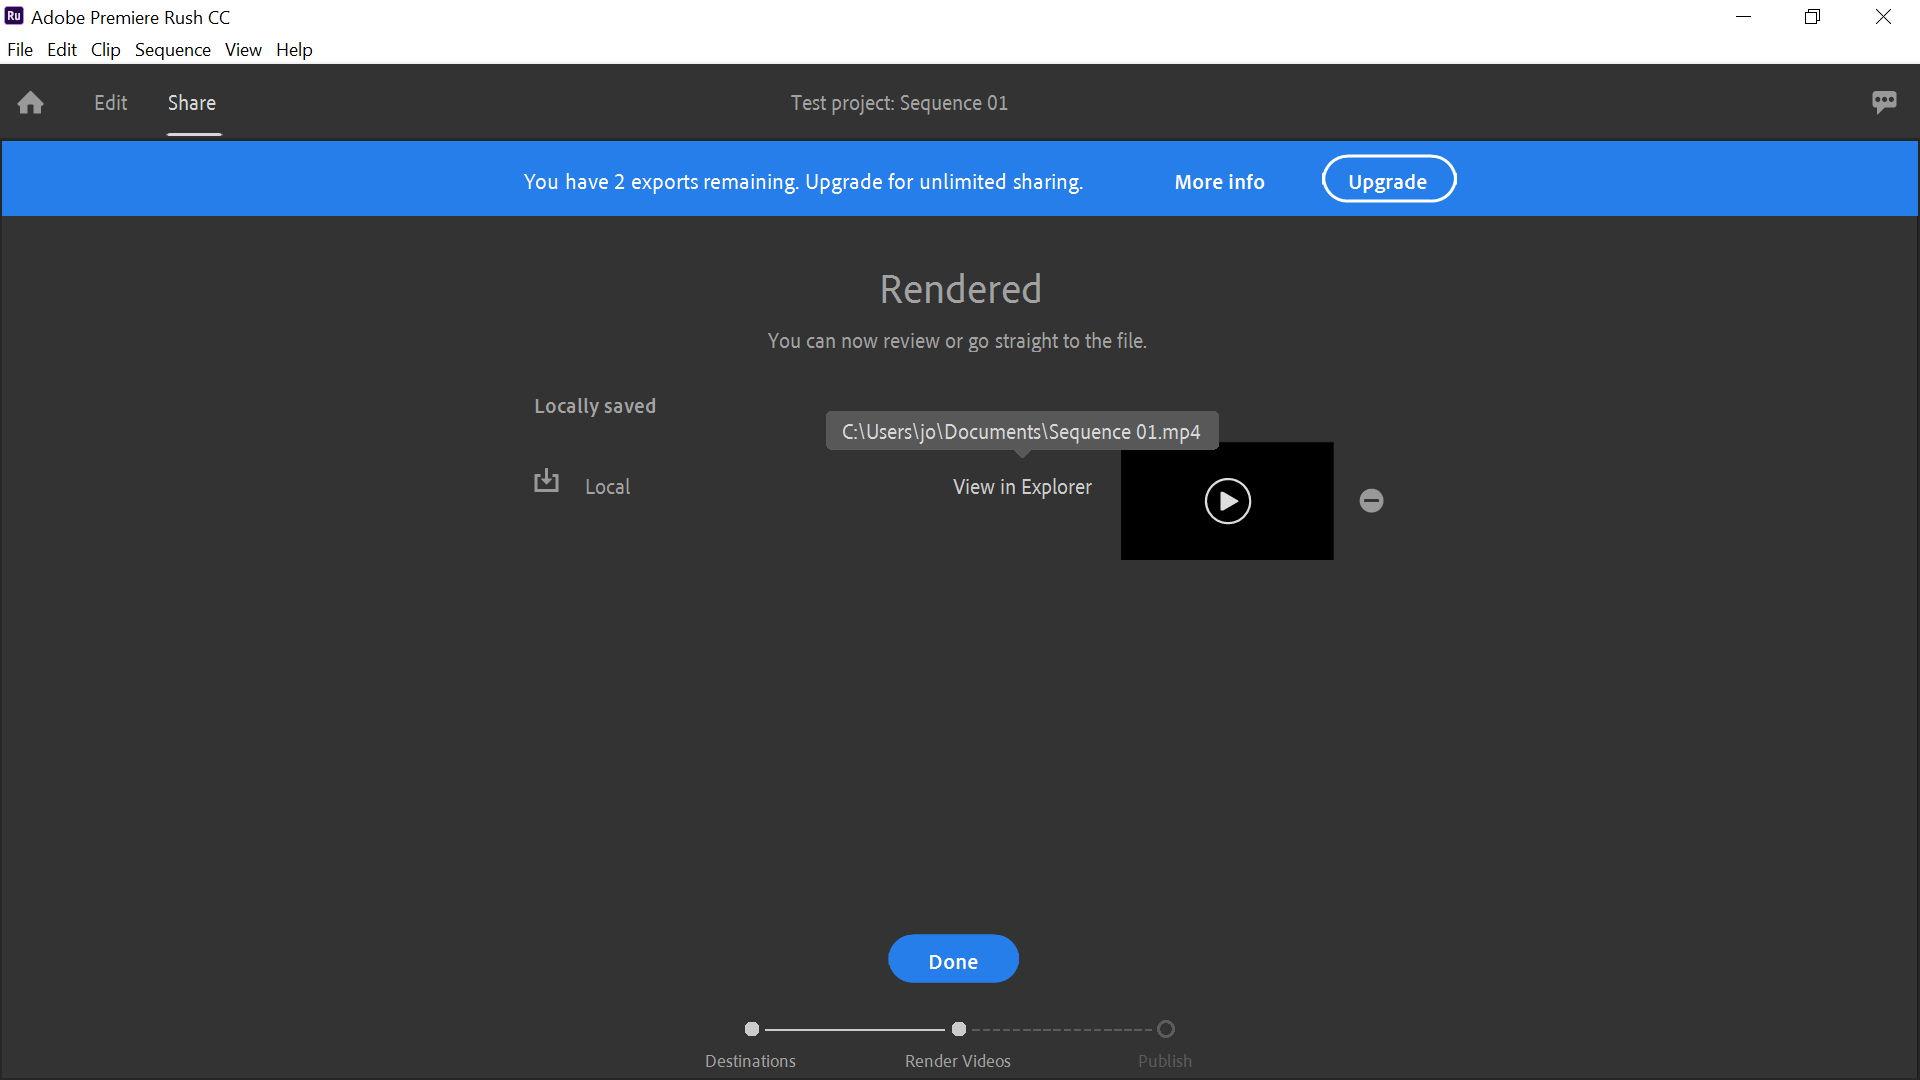
When it's complete, you can either simply click 'Done' to return to the home screen, or you can use the link on the page to find your production in its folder.
Top tips for better video editing with Adobe Rush
To help you get more out of your experience with Adobe Rush, take a look at our top tips below and step up your editing game!
- Avoid colorful titles. Either black or white looks just fine for most needs. Adding colors will make it harder to read them, not to mention looking like an eight-year-old made the movie.
- Make your transitions longer for a more professional finish. A fast transition will barely be noticeable. Use the 'Edit' function in the transitions control panel to extend them to around 1 – 1.5 secs for the best effect.
- Use the same filter throughout. With 12 to choose from, it can be tempting to add different ones to different sections of your film. However, this will result in a disjointed, amateur looking finish. We recommend keeping the same filter throughout.
- Adjust the monitor size. If you have the monitor very large, then editing the tracks is going to be hard because they're all squashed at the bottom. Use the two lines on the right to drag upwards, reducing the size of your monitor and increasing the space for track viewing.
- Maximize audio tracks. There's a handy button on the left which works to maximize the audio tracks. This can be very helpful for fine tuning accompanying music, for instance (see picture below)
- Find the undo button. The undo button will be your friend. Once you're confident you can put everything back the way it was if you need to, you'll be far more adventurous in trying out what this software can do.
Once you get used to Adobe Rush, you'll probably find it pretty limiting in terms of video editing. While it's great for tweaking a short flick of your family on holiday, it's not really in depth enough to produce professional looking films.
If you're a Creative Cloud subscriber, we would highly recommend perhaps using Adobe Rush as a quick fix initial editor, but then switching over to a more powerful software to perfect your masterpiece.
Bring up your video to a professional level with straightforward tools.
Try It Free Try It Free

Liza Brown
chief Editor
0 Comment(s)