


- Final Cut Tutorial
How to Create a Vignette in Final Cut Pro X?

Mar 20,2019• Proven solutions
Darkening the edges and highlighting the center of the image can make a shot you included in your video more dramatic, but if you use this effect in a wrong context you can easily ruin a shot. Learning when to use vignetting in your video may take some time and practice, even though there’s nothing complicated about the process of creating a vignette in FCPX or any other popular video editing app. In this article we are going to show you a few different methods of adding vignettes to your videos in Final Cut Pro X, so let’s get started.
- Part 1: How to Create Vignette Effects in Video in FCPX
- Part 2: Best Vignette Plugins for Final Cut Pro X
Adding Vignette to Video in a pro way with FilmoraPro
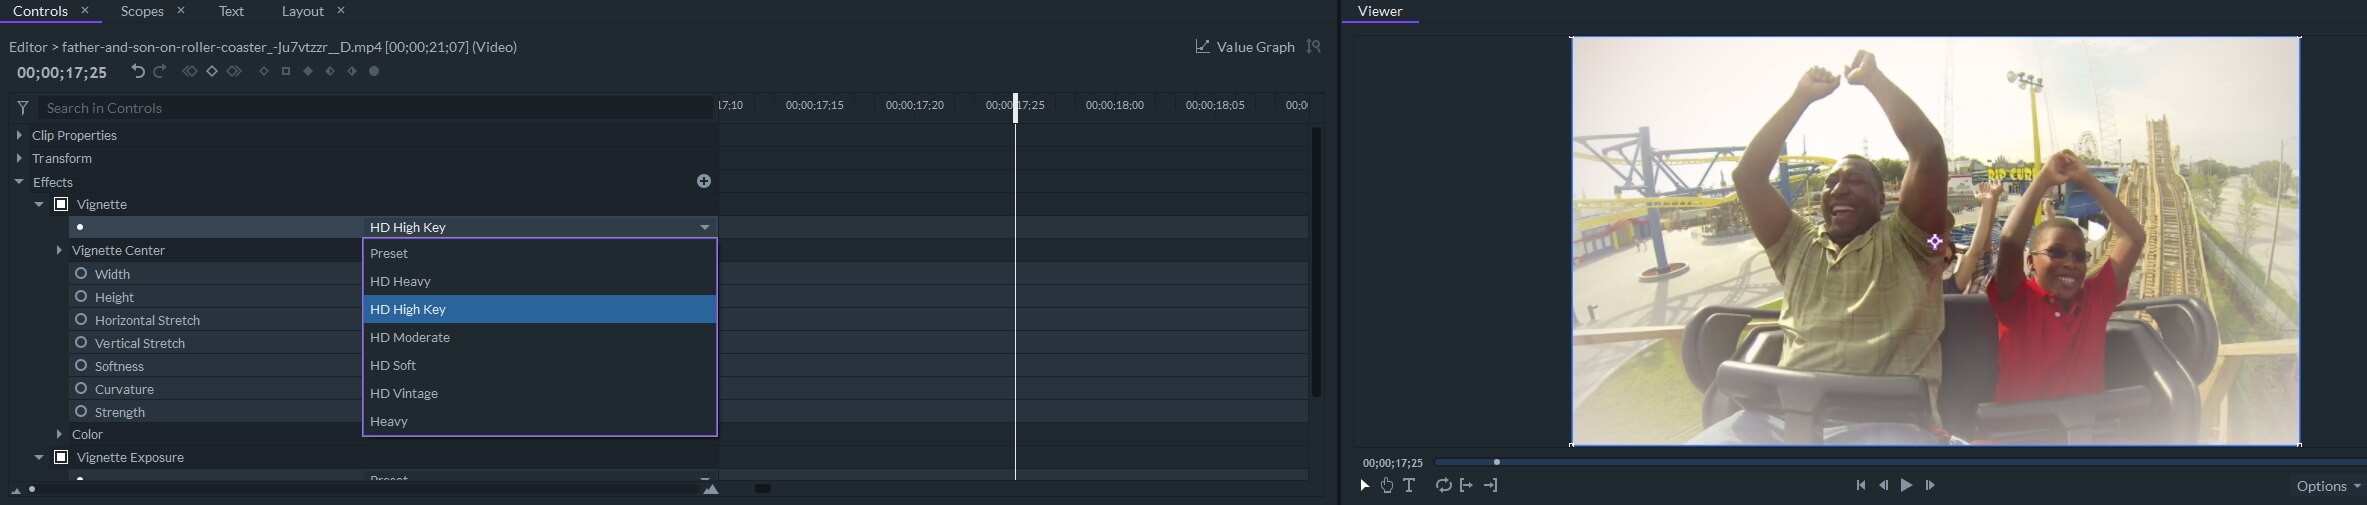
FilmoraPro allows you to add vignette and vignette exposure effects to video. You can apply the preset vignette effects such as HD Heavy, HD Moderate, HD Soft and HD Vintage and customize the settings such as horizontal stretch, vertical stretch, softness, curvature and strength settings. Click the Free Download button below and try FilmoraPro free.


How to Create a Vignette in FCPX
Vignetting is a process of darkening the edges of an image with the aim of drawing the viewer’s attention to a particular area of the picture. Nearly all video and photo editing apps offer more than one way to accomplish this, and if you chose to edit your videos with FCPX you can create this effect in just a few clicks. Surprisingly, FCPX doesn’t feature a Vignette effect in its built-in library of visual effects, which means that you must either download a vignette plugin or use a shape mask and the color correction effect to reduce the brightness, contrast or saturation around the edges of a shot.
Simply position a shape mask over the area of the image you’d like to highlight and then simply adjust the Color, Saturation and Exposure values for both inside and outside masks. You can control the Shadows, Midtones or Highlights individually for each of these settings and create the vignette effect that perfectly fits the footage. The exact values of Color, Saturation, and Exposure depend on the shot to which you’re adding a vignette, and in most cases, you’ll just have to reduce Exposure to create this effect, while in more complex shots you’ll also have to adjust Saturation and Color.
The Best Vignette Plugins for Final Cut Pro X
The number of options you’ll have at your disposal will be limited if you decide to create a vignette by combining a shape mask and the Color Correction effect. That’s why installing a vignette plugin is a much better choice if you often use this effect in your videos. Here are some of the best Vignette plugins for FCPX on the market.
1. Vignette Plugin from FCP Effects
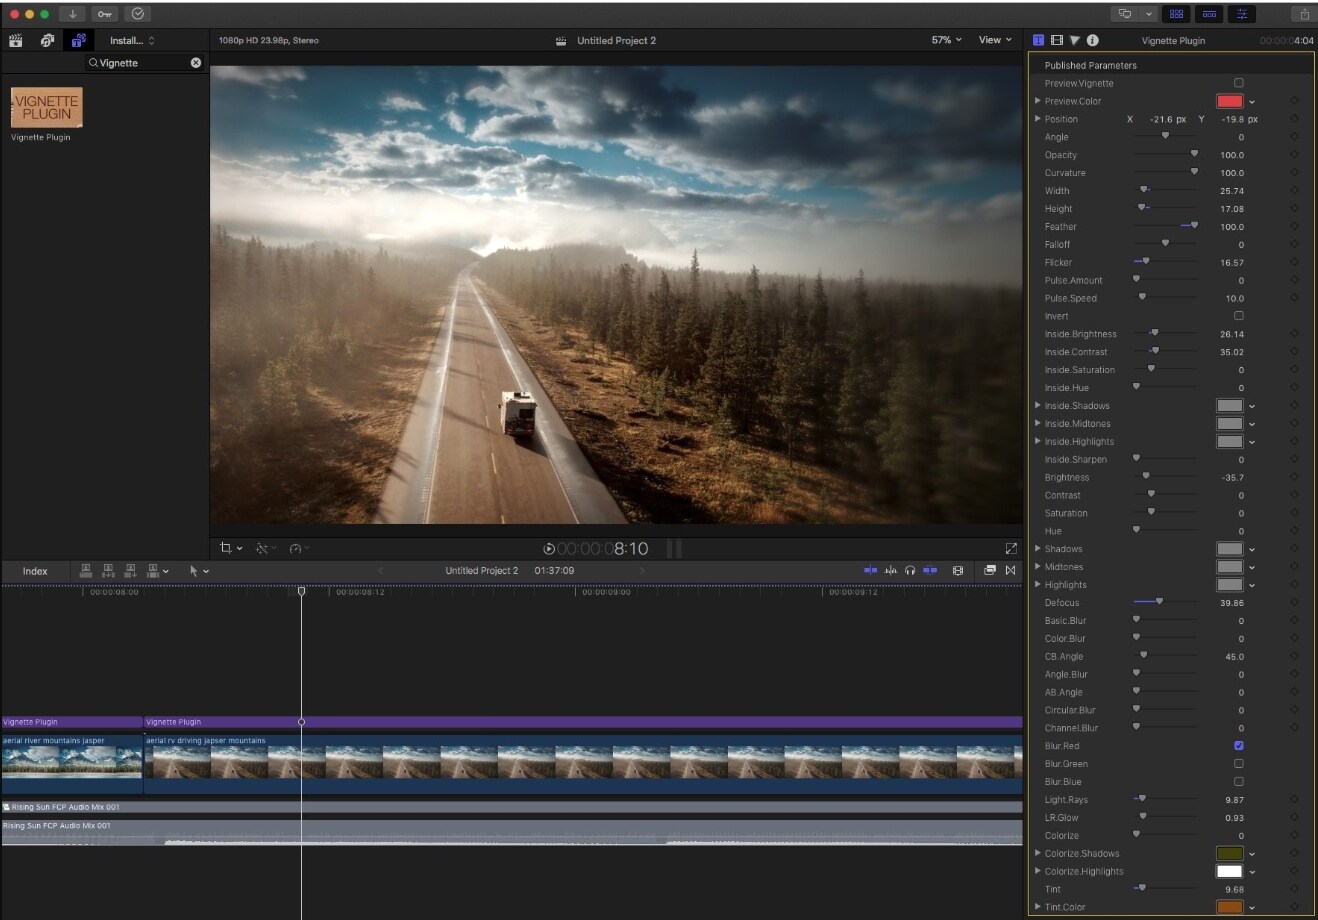
The level of control over the process of creating a vignette this plugin provides is staggering because you can adjust the Angle and Curvature settings, blur or sharpen the image or even colorize the shadows. Installing this plugin is relatively simple since you just have to follow the on-screen instructions to complete the installation. After you’ve installed the plugin you can easily find it from the Effects Browser and drag and drop it to the selected video clip on the timeline. You can then proceed to animate the vignette with keyframes or experiment with different settings to customize the effect in accordance with the demands of the project you’re working on. The Vignette Plugin can be purchased for $49 at a regular price, but if you’re lucky you can find it on weekly discounts for just $4.90.
2. FxFactory Pro
Besides FCPX, you can use the large collection of plugins FxFactory offers in Adobe Premiere Pro, Motion 5 and After Effects. The vignette effect lets you select the shape of the darkened area, change its aspect ratio or use the Softness slider to soften the edges of the vignette. Once you’ve installed the FxFactory Pro, you can access the plugins from the Effect Browser and add them to a clip by just dragging and dropping them to a specific location on the timeline. The FxFactory Pro costs $399, which makes it a bit expensive for non-professional FCPX users who don’t use Vignette or any other plugin very often.
Conclusion
Adding a vignette to a video clip is commonly used to emphasize an important detail in a shot, but how you are going to use it depends mostly on the project you’re currently working on. Creating this effect in FCPX is easy regardless of the method you choose, but recognizing the right context in which adding a vignette to a video is really effective requires practice. Which vignetting method in Final Cut Pro X do you like to use the most? Leave a comment and let us know.
Bring up your video to a professional level with straightforward tools.
Try It Free Try It Free
Liza Brown
chief Editor
0 Comment(s)