- Premiere Tutotial
How to record voiceover with Adobe Premiere Pro
Jan 04,2019• Proven solutions
Adobe Premiere as we all known, is a powerful video editing software. This software also provides the feature to add voiceover to the videos. Although it is not that simple but we will try to help you out with a simple step-by-step guide that will help you to add voiceover to any video clip easily.
This is a basic tutorial about Adobe Premiere, professional video editing software. However, if video editing is new to you, consider Wondershare Filmora, which is a powerful but easy-to-use tool for users just starting out. Download the free trial version below.
Using Filmora, you can add voiceover by using very simple steps.
- Import the Video Clip.
- Drag the Clip to the timeline.
- Click the Add Audio button right above the timeline.
- Record the audio and when finished, stop the recording.
- Drag the track in the right position of your video.
- Watch your video play with the voiceover.
How to record voiceover with Adobe Premiere Pro CC
Step 1: Import the video clip that you what to add voiceover to. And drag it into the timeline. Delete or Mute the sound if the original video has.
adobe-premiere-mute-audio.jpgStep 2: Add an audio track. Just right click the timeline header, and choose "Add tracks". And you will be finding a voice-over record icon located at the audio track header, if don't, you can right click the header, choose "Customize..." and select the voice-over record icon./p>
![]()
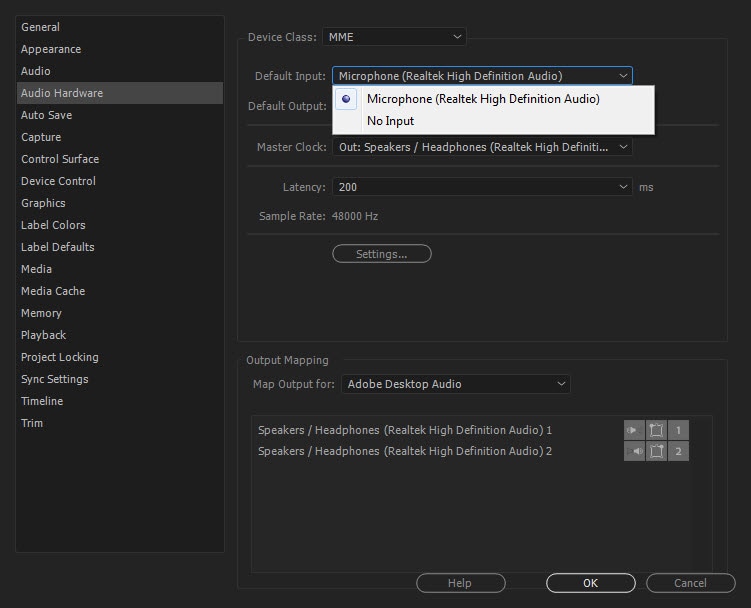
Step 3: Making sure your propre microphone is well set.

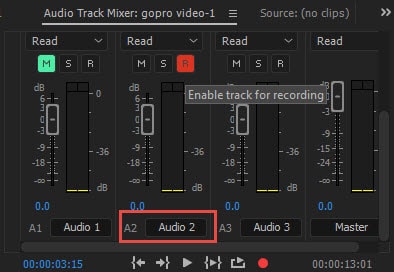
Step 4: Go Audio Pannel > Audio Track Mixer, find the audio track which you're going to add voice over to. Enable track for recording by clicking the "R" button

Step 5: Place the playhead at where you want to start the recording. Right click the header agian, and choose "Voice-over record setting" and a live tracking of how your voice sound will be shown, so you can make sure whether your voice is normal.
![]()
Step 6: Click the Voice-over Record button in the audio track's header to begin recording. A status message "Recording..." appears in the Program to indicate that recording is on.

Step 7: Complete the recording and click the stop recording button when you are complete, it can also be done by pressing the space button.
Step 8: This file can now be placed with the video clip and be played at the same time. Adobe Premiere Pro will also join these two together.
Bring up your video to a professional level with straightforward tools.
Try It Free Try It Free


Liza Brown
chief Editor
0 Comment(s)