How to Get the Look & Feel of The Blair Witch Project
Sep 11,2019• Proven solutions
The Blair Witch Project is a cult classic, but what made the movie famous, aside from its use of suspense, was the style in which it was filmed. The entire film looks as if it was shot on an old camcorder with all the shaky and film grain you could want in a horror film.
In the Halloween version of Filmora Video Editor, we’ve added a number of elements such as film glitches, camcorder overlays and TV distortions that will give you the same look and feel as the Blair Witch Project. If you haven’t downloaded this version, you can try it for free by clicking the button below.
Filming Tips
Before we get to the editing part, we have some tips for you to film your Halloween movie. You can always use filters and techniques to make your videos look scary when editing. But you can also get this look when filming it.
One thing that’s super easy to do is to take a couple short videos and images using your phone. That will give your movie that extra flair. For example, in this video, we turned our flashlights on at night and simply walked next to a group of trees for the clips. We’ve also used our phone’s flashlight to take a couple of images by holding the phone under our chins so it shines up in our faces. It only takes a few minutes but it really adds to the look and feel of the movie.
Now let’s start editing!
Step By Step Tutorial to Make the Blair Witch Inspired Video
1. Import Media:
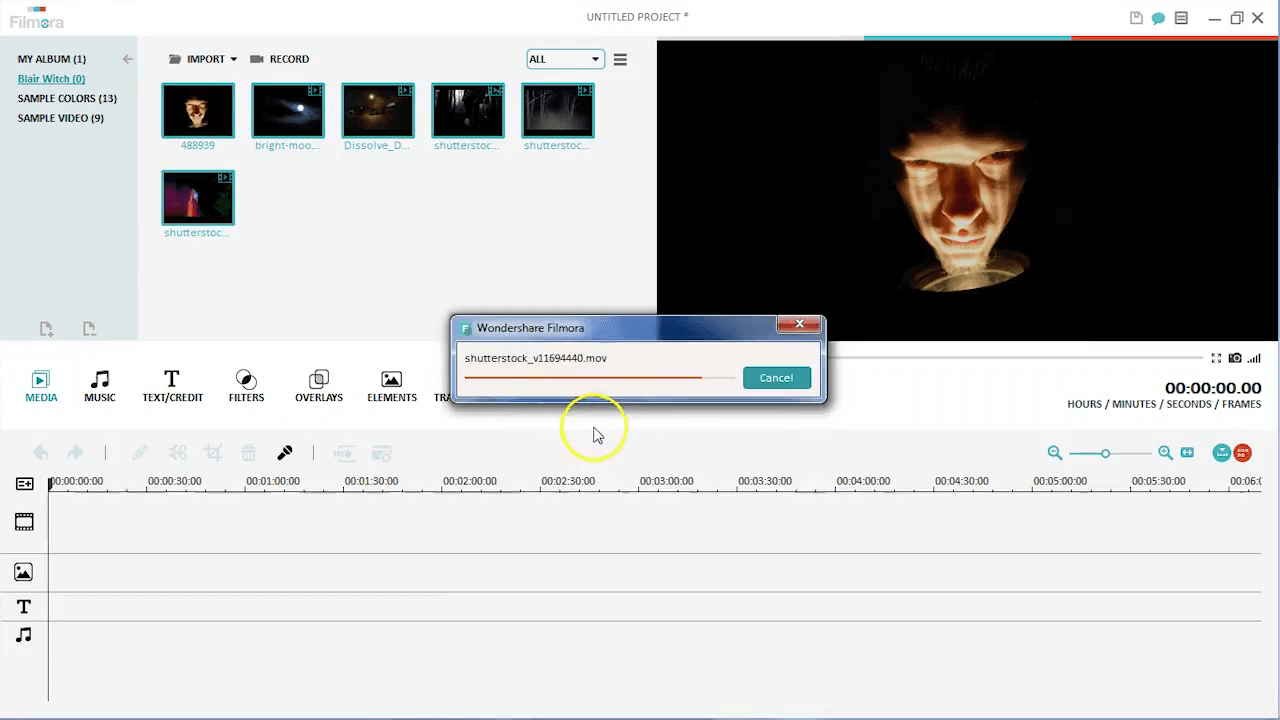
Open Filmora in Full Feature mode. You can make a new folder and name it “Blair Witch”. Then import all the media including videos and images into this folder.
2. Trim Clips
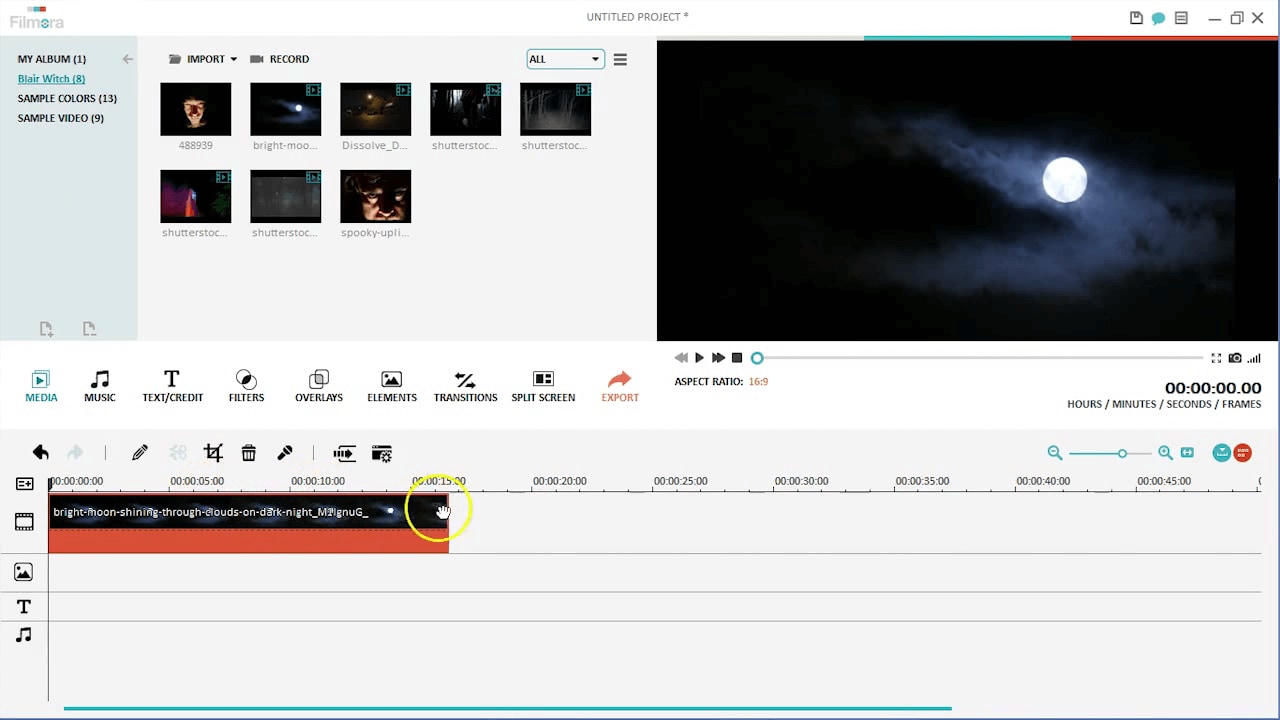
After you have imported the footage, drag and drop it in the timeline and trim each clip so you have just the right footage. A good rule of thumb is to keep each clip at 3 to 5 seconds.
3. Add Titles
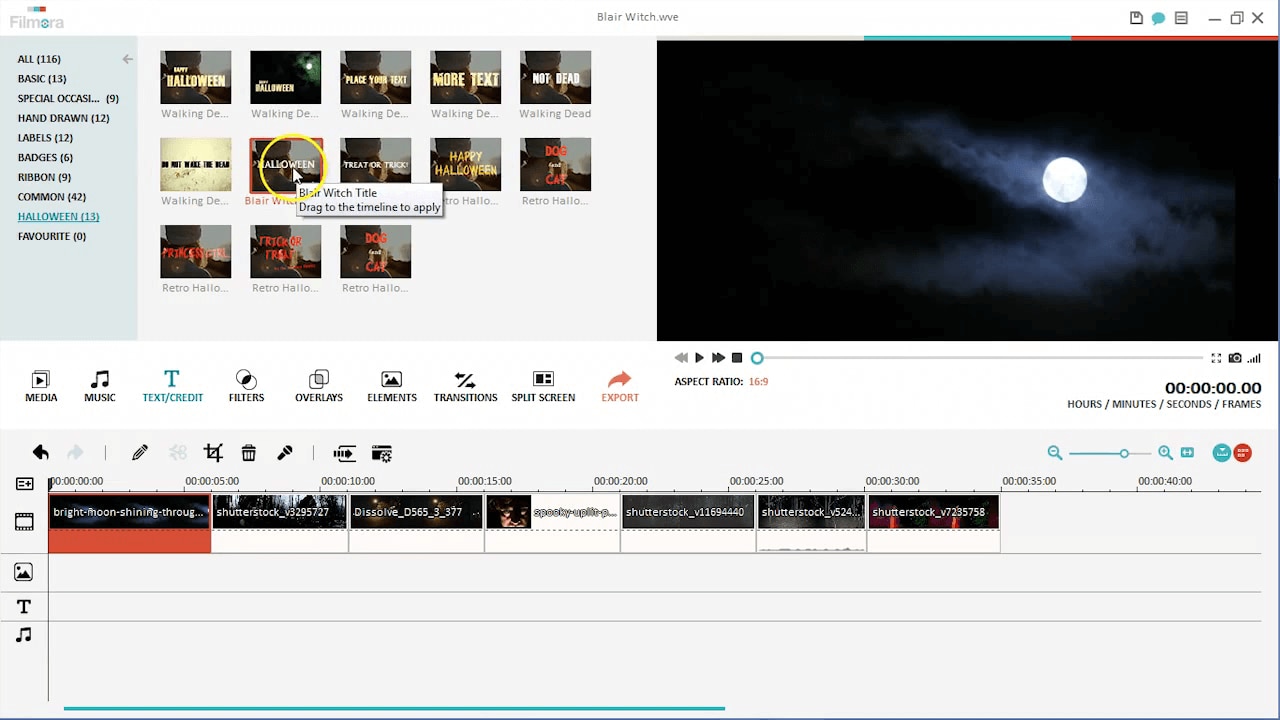
Click on the Text/Credit tab and choose Halloween from the submenu. There are a lot titles to choose from. I’ve used the “Blair Witch Title”. Drop it onto the timeline, and you can change the text and color by double clicking it.
4. Add Music
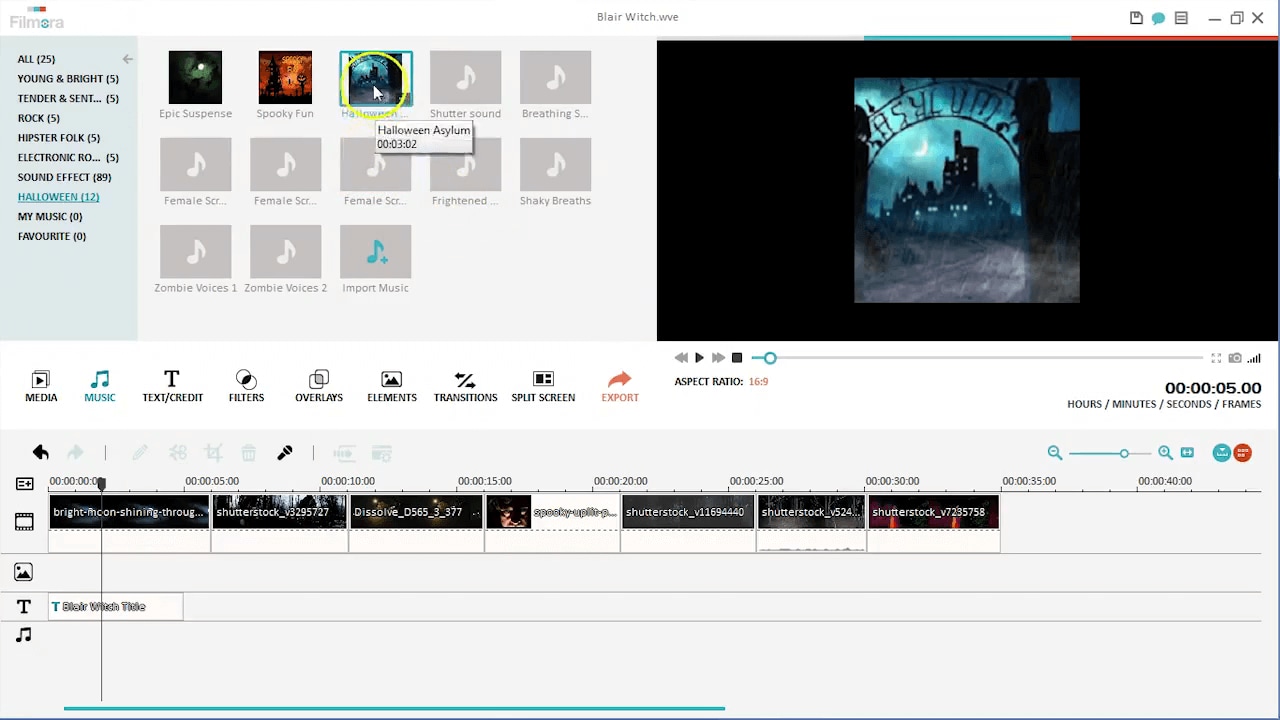
Open the music tab, under Halloween submenu you will find a number of music tracks and sound effects. I’ve used the one called “Halloween Asylum”.
After you drag it to the timeline, you can see right away from the audio indicator that this particular track takes a long time to build. You can trim the first 10 seconds or so off the beginning so it doesn’t take so long to get to the suspenseful part of the song.
You can also add a couple sound effects. It might be cool to add some kind of a shaky fast breathing sound effect to the movie. You can do this by opening the track manager and adding a new music layer. Then just drop the selected sound effect onto the timeline. If you find that either the music or sound effect is too loud, you can always double click it to adjust the volume as per your preference.
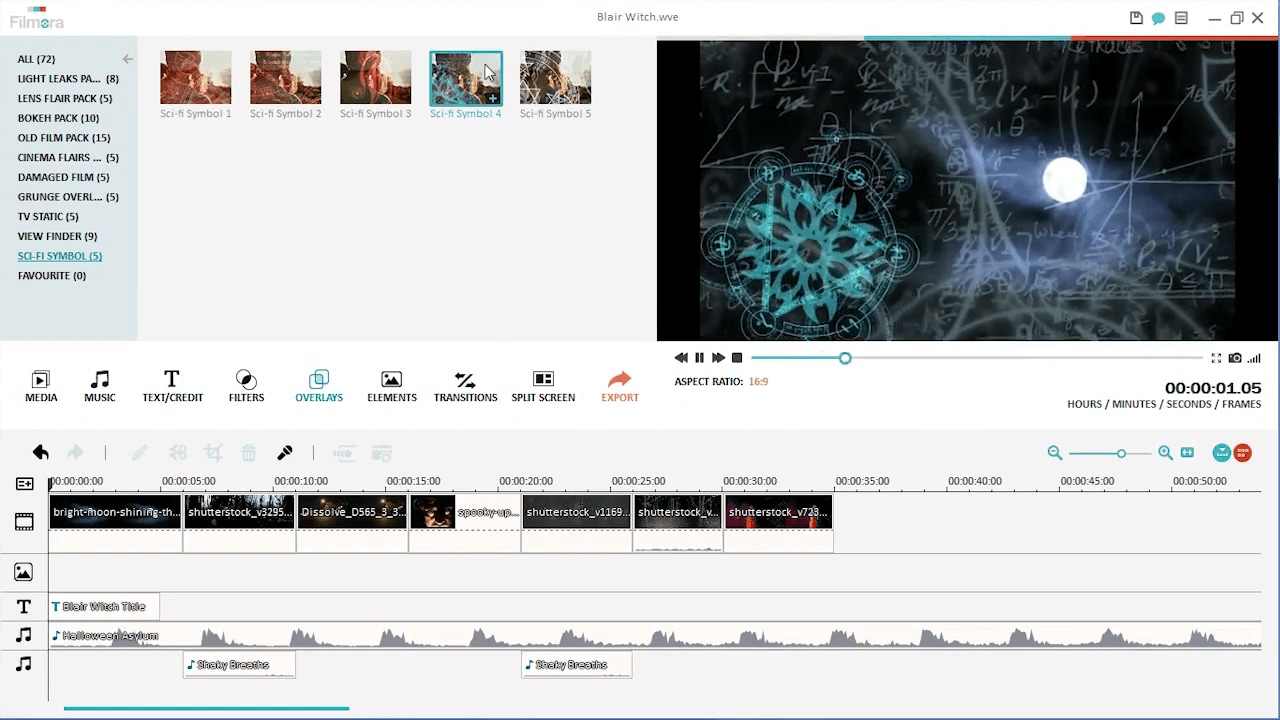
5. Add Sci-Fi Symbols
I’ve also added a couple Sci-Fi symbols to the beginning of my film.
Often times, if you have a few still images in your videos, they can look a little dull next to your video clips. So it’s nice to spice it up a little bit by adding the Sci-Fi symbols. Click on Overlays and choose Sci-fi Symbols. There are a few to choose from. Add the desired one over a couple of your still images, and it will give the images a more dynamic look.
These symbols might look a little too strong. You can make them a little more transparent by double clicking them on the timeline and reducing the alpha channel down to 50% or so.
6. Add Camcorder Overlays
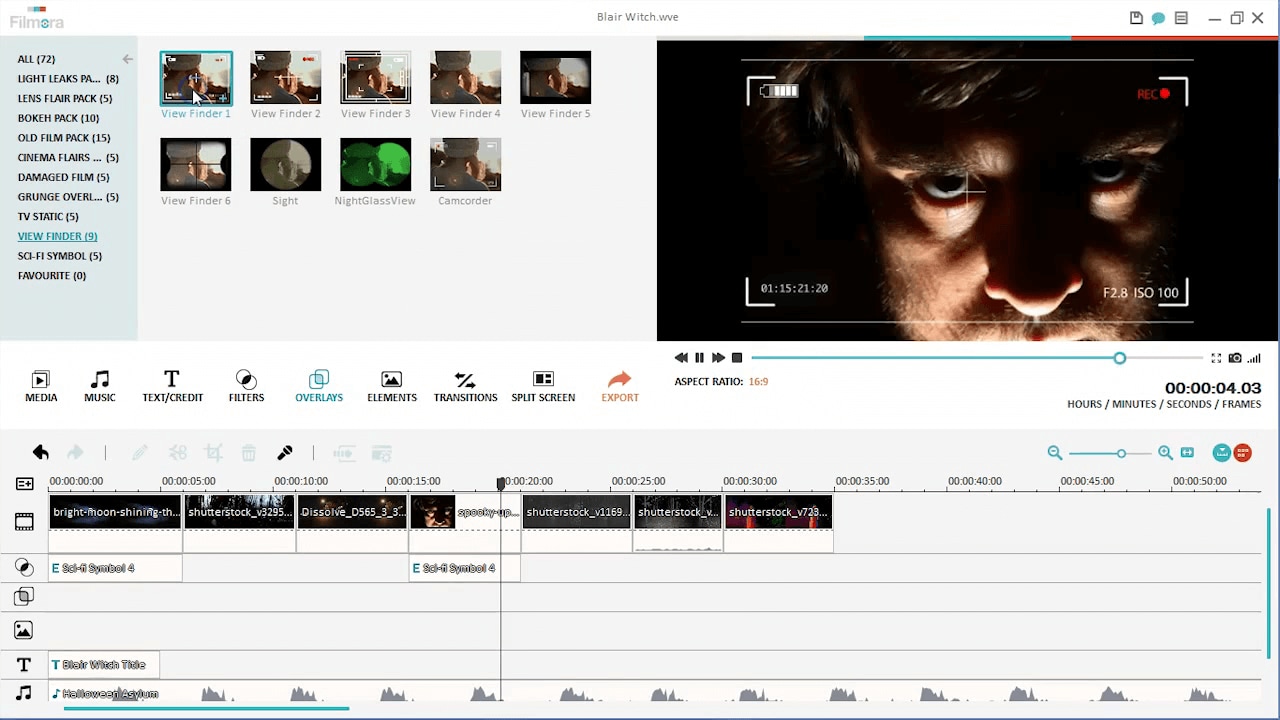
You can add a few overlays that make this film look like it’s shot on an old camcorder.
We have a few options in Filmora under Overlays. You can use the damaged film overlays under Damage Film in the left sidebar, a view finder overlay under View Finder or the TV Static overlays. Any combination of these will give you the look you want. So feel free to have fun experimenting whatever kind of combination you prefer.
I’ve used the TV statics at the very end of each clip as a transition effect. I’ve also added the “Camcorder Viewfinder” overlay over all my footage.
7. Add More Effects
The final clip in my film is a skeleton costume limping towards the camera. I think it would be fun to end the movie with a little scare. So I’ve placed a screaming sound effect at the end along with a quick negative filter. You can find this filter under Filters, Halloween. I’ve also applied the glitch distortion filter over the whole clip. Lastly, I’ve made a sharp cut away to a TV static to give it a fun ending.
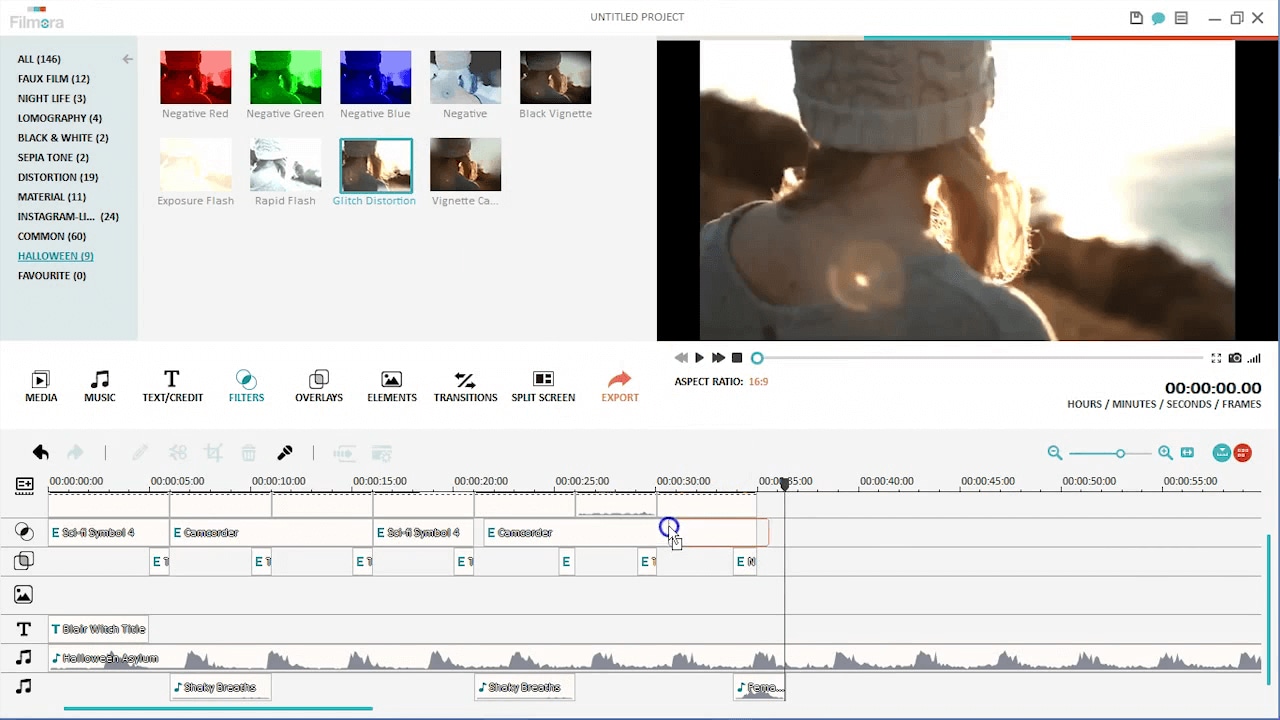
That’s how I make this Blair Witch inspired video. Isn’t this simple? Here is a list of effects I’ve used in this tutorial. You can use whatever you want when you are making your videos.
Text/Credit > Halloween > Blair Witch Title
Music > Halloween > Halloween Asylum
Music > Halloween > Shaky Breaths
Overlays > Sci-Fi Symbol > Sci-fi Symbol 4
Overlays > View Finder > Camcorder
Music > Halloween > Female Scream 3
Filters > Halloween > Negative
Filters > Halloween > Glitch Distortion
Bring up your video to a professional level with straightforward tools.
Try It Free Try It Free


Liza Brown
chief Editor
0 Comment(s)