How to make a Christmas video for free and post to YouTube

Mar 27,2020• Proven solutions
Christmas is upcoming and many of you may be thinking of doing something new and different on this special occasion. Creating your own Christmas videos is one of the best ideas regardless the video is yours, which you want to share with your friends or any other video just for having fun and entertainment. Here, we are listing some of the video tools by using which you can create the Christmas videos for free.
1. ElfYourself
ElfYourself enables you to create the hilarious Christmas videos in your own voice. You can record own voice; add any picture, or any of your facial features like lips, mouth or full face; and make the video. With the options of adding music or other voice effects you can create just funny videos that would make everyone laugh endlessly.

2. Free Video Dub
It is a video editing tool in which you can create the video by trimming and merging small short videos. You can select the starting and ending points of the video, trim it and then use with the other video clip you want. One of the best features of this software is that it will retain the same video quality regardless how much trimming is done.
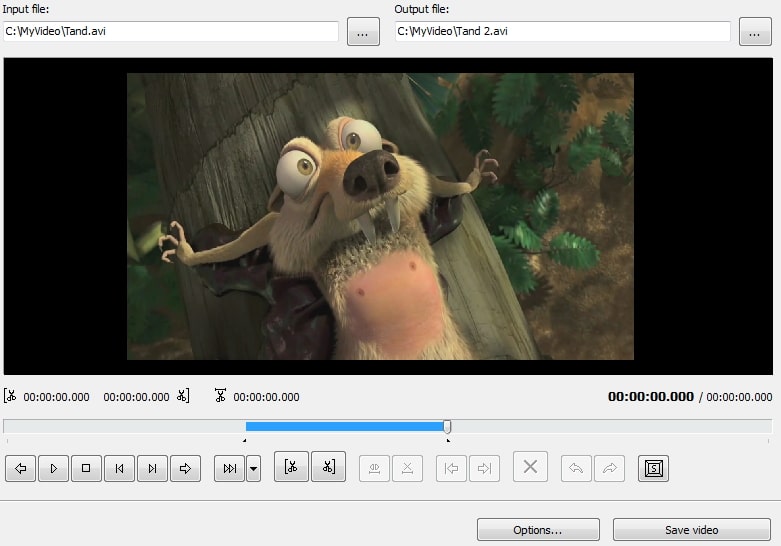
3. Avidemux
It is an excellent tool for video making and editing, but you need to spend some time to learn its working. You can select the video clips, cut and join them together and can add any of the available filters which includes Crop, Resize, Flip, Rotate, Remove noise, Sharpen, Colour Contrasts, Tweak Brightness and more. With the sound effects and fine control options, you can give the excellent finish to your video.

4. Recommended Christmas Video Maker - Filmora9
Apart from the above given softwares, Filmora9 is the best tool to create attractive videos. It is an amazing video editing software that enables you to create high quality videos with just simple functions. This software is specially designed for the new users who have the least or at all no knowledge of video editing.


Whether you want to create a new video from various short videos or want to edit the existing one, Filmora9 will help you to complete the task efficiently. With just drag and drop, you can design the attractive videos by adding special effects, music, text, images or other elements that you want to add.
Filmora9 can be used to edit the videos captured by any type of camcorder, digital cameras or mobile device. This software can be used for trimming, merging or cropping the video, audio or image files along with adding the other effects.
In this context, we are going to explore the whole process of editing the video with Filmora9.
- Importing the videos: First of all you need to import the video files. Open the program and click on the IMPORT button. Then choose and add the files that you want to edit or merge. To get basic editing options, drag and drop the video files from the media library to the timeline given below. You can further divide the video into parts by using the scissor or can select the portion of video that you want to display.
- Adding music: Adding music to the imported videos is extremely easy. You just need to click on the Audio tab at the top and the media library will show all the music files. You can select the one of your choice regardless it is a music file or any other audio sound. Once you have selected the file you need to drag and drop that file to the timeline for further editing.
- Adding text: Filmora9 also enables you to add the animated text to the video. The process is same for that too. Click Titles tab and choose the text that you want to add. Drag and drop it to the timeline and you can adjust the time up to which you want to display that text in the video. After you are done with writing the new text, you can select the video timing for which you want to display the text.
- Adding effects-Filters and Overlays: You can click on the Effects tab and you will be provided with the available files. Select any file and drag and drop it to the timeline. Filters can be used to change the effects or duration of a particular incident and the overlays can change the background effects like enlarging the background video.
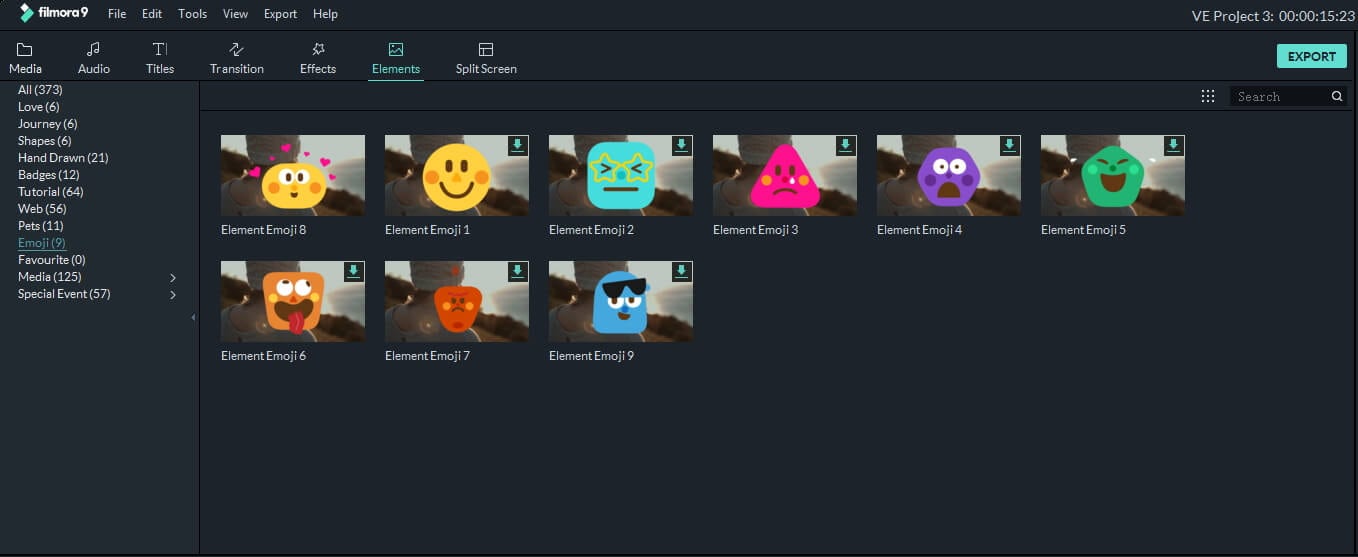
- Adding emotion elements and transition effects: Click on the elements and you will be available with the number of emotional elements. Select any of these elements and the duration for which you want to display. The Transition option enables the users to add up to hundred transition effects that will switch from one to the next according to the time limit you have given.
- Split screen:Split Screen option will divide the screen in two parts that can be used to display the different videos or to display the portions of the same video. It is up to you that how you use this feature and enhance the attractiveness of your video.
-
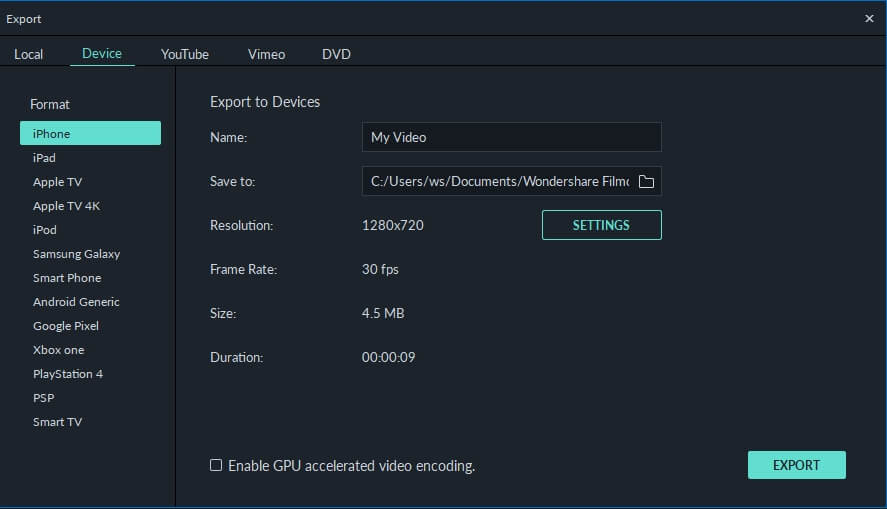
Exporting the video: Once you are done with editing the video; you are enabled with a number of ways by which you can share or save it. You can select the desired format from the given options in which you want to save your work or. More amazingly, you can choose the device type for which you want to save the video; it will automatically select format according to the device.
You can simply burn this video to a DVD or also there is a option to share the video directly to any of the social networks or any video sharing network like YouTube.


Bring up your video to a professional level with straightforward tools.
Try It Free Try It Free
Liza Brown
chief Editor
0 Comment(s)