8 Excellent Tips to Create and Generate Leads through Explainer Videos
Jul 05,2019• Proven solutions
When it comes to website analytics, we often overlook the average time spent on site and bounce rate metrics. For instance, if the average time spent on page for a lengthy blog post is about ten seconds, one can easily assume that the blog didn’t capture the visitor’s attention unless it was a robot reading.
There isn’t a golden number for bounce rate and average time spent on site. However, The Blink Test says that a visitor stays on a website for an average of 3 to 5 seconds before abandoning. If you don’t capture your visitors within those 5 seconds, you are done!
Don’t panic. There is a more refreshing and a more natural way to capture your visitor’s attention which you haven’t thought.
Explainer Videos!
Video increases the average time spent on site, piques interests and improves memory recall. Therefore, passing the dreadful blink test is a piece of cake if you include explainer videos on your website. Here is the proof!
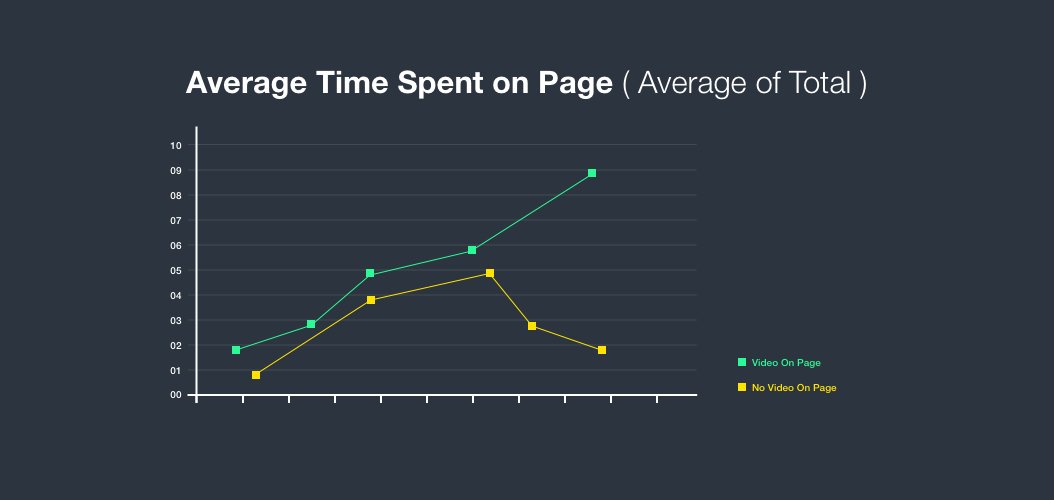
Source: Net Solutions
According to Hubspot, 97% of marketers claim that videos help customers understand the product. When there is so much said, why wait? This blog will dive into how you can create an explainer video and grow your business effectively.
What is an Explainer Video?
An explainer video details what your business offers and how it engagingly solves your customer’s problems. Explainer videos are usually appealing with attractive visuals that grab visitor’s attention.
Explainer videos are informational and educational that run for a maximum of one minute.
By placing an explainer video on your website, you can quickly increase the average time spent on site, thereby reducing bounce rates.
When To Use Explainer Videos?
- To compel your audience to find out more about your business by giving that first impression.
- To explain a boring idea without sounding boring. Humourous explainer videos work in this case.
- To push your potential customer to purchase by showing your product/service in action.
- To explain a solution to a customer issue in a detailed fashion. Customer support executives - take heed of this!
Types of Explainer Videos
There are different types of explainer videos that you can create, but you have to figure out which kind of video will suit your business and target audience.
There are whiteboard and animation explainers that you can try if you want to appeal to your target audience visually or you can do a screencast if you’re going to show how your product or service works.
Let’s drill into each type of explainer videos in detail:
Screen Recording Explainers or Screencast
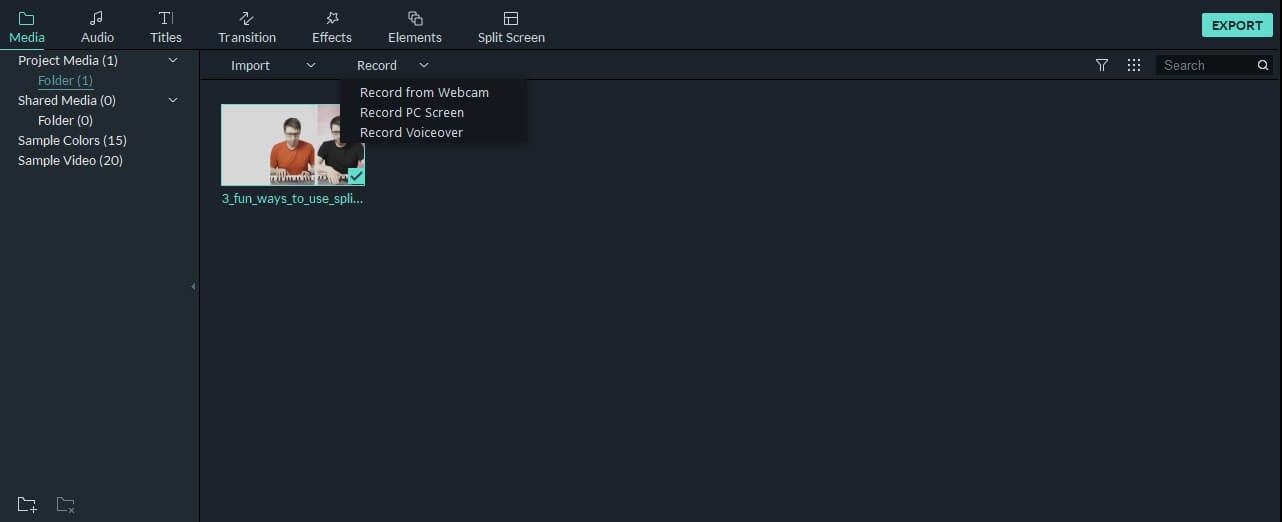
A screen recording video is an easy way to get started with explainer videos. You can create a screen capture in a matter of seconds with online screen recording software like Filmora9.
Through screencasts, your audience will be able to see your product in action which eventually builds trust in trying out your product. Your audience sees their pain points being resolved right in front of their eyes. Most of the screen recording software allows you to add voice-narration to the video you record and gives you viewer-friendly benefits in the form of markup tools. You can highlight, focus a specific region on the screen, and track the mouse pointer to help you explain your workflow better.
Source: Filmora9
Animation/Whiteboard Explainers
Animation can be a bit tedious, but it’s one of the most popular types of explainer videos.
Thankfully, there are lots of DIY software available that allows you to click and choose, drag and drop scenes and characters to create an animation video. You don’t have to go to big studios and spend like crazy to get your animation video. DIY Softwares can be a great alternative by comparison.
If you’re good at sketching or know someone who can sketch, you can consider creating a whiteboard animation video. You can sketch each scene one by one while recording them with the time-lapse function on your phone.
Dissecting the Structure of an Explainer Video
Now you know the different types of explainer videos, and you would have probably selected the best one that works for you. The next step is to go about creating one.
An explainer video naturally follows a simple but effective format.
- Define Pain Points
- Reason for Solving
- Give Solution
- End with CTA
Here’s how an explainer video will look like:
Explainer videos start by defining the pain points, then they explain the problem, and finally, it presents your product’s unique selling proposition as the appropriate solution (all within sixty seconds). Explainer videos usually end on a call to action (CTA) such as signing up for a free trial/demo, subscribing to the blog or responding to type forms.
Lead Generation Through Explainer Videos
Lead generation is the process of finding information about your prospective customers (leads) in the form of email id, phone number, name, etc. This information can be used to kick off a business relationship with your prospective customers. Generating leads is essential as it fuels your sales pipeline and therefore your business. There is only one way to generate leads through videos; that is by adding a call-to-action or a lead generation form at the end of your video content to allow the viewer to give their information and take the next step.
8 Excellent Tips to Create and Generate Leads Through Explainer Videos
Here are eight excellent tips to strengthen your video marketing strategy with explainer videos.
1. Writing a Killer Script
A short and engaging script will keep your viewers hooked on to your video and lead them to click on your CTA.
Say too much, and you risk ending up with higher bounce rates, missing the all-important call to action!
Don’t stress out too much in writing the script. Be honest with your offerings and start jotting down key points such as the benefits of using your product, the problem-solving features, and what sets your business apart.
Keep writing as many copies as you can think. You can always shorten the script if it ends up being too long.
When you are done writing the script, read it out loud. You’ll get a much better feel on how it will sound to other people.
2. Sketching Ideas on a Storyboard
If you’re doing whiteboard animation, you can sketch your idea for each paragraph. Even if you plan to use ready-to-use animation, characters, and sketches, you will still benefit from a storyboard.
Why shouldn’t you skip framing a storyboard?
- It helps to visualize your ideas among team members.
- Acts as a sketched plan that keeps your video flow organized.
- Helps you to pick animation and graphics needed for the video.
- Helps you to decide on the pacing of your videos.
- Helps in choosing appropriate images and voice-over.
The more you plan out your video, the better it will be.

Source: UX Planet
3. Length of the Video Matters
Explainer videos are designed to deliver a quick, powerful message, so there is no time for more in-depth content. When explaining your product or service, try to cover a few pain points and its solution, don’t try to talk about your entire product. You can attract your viewers to learn more about your business with a call to action.
If you cover more than one topic, your video will probably be too long, and it becomes hard for your customer to find what they need.
4. Edit with Perfection
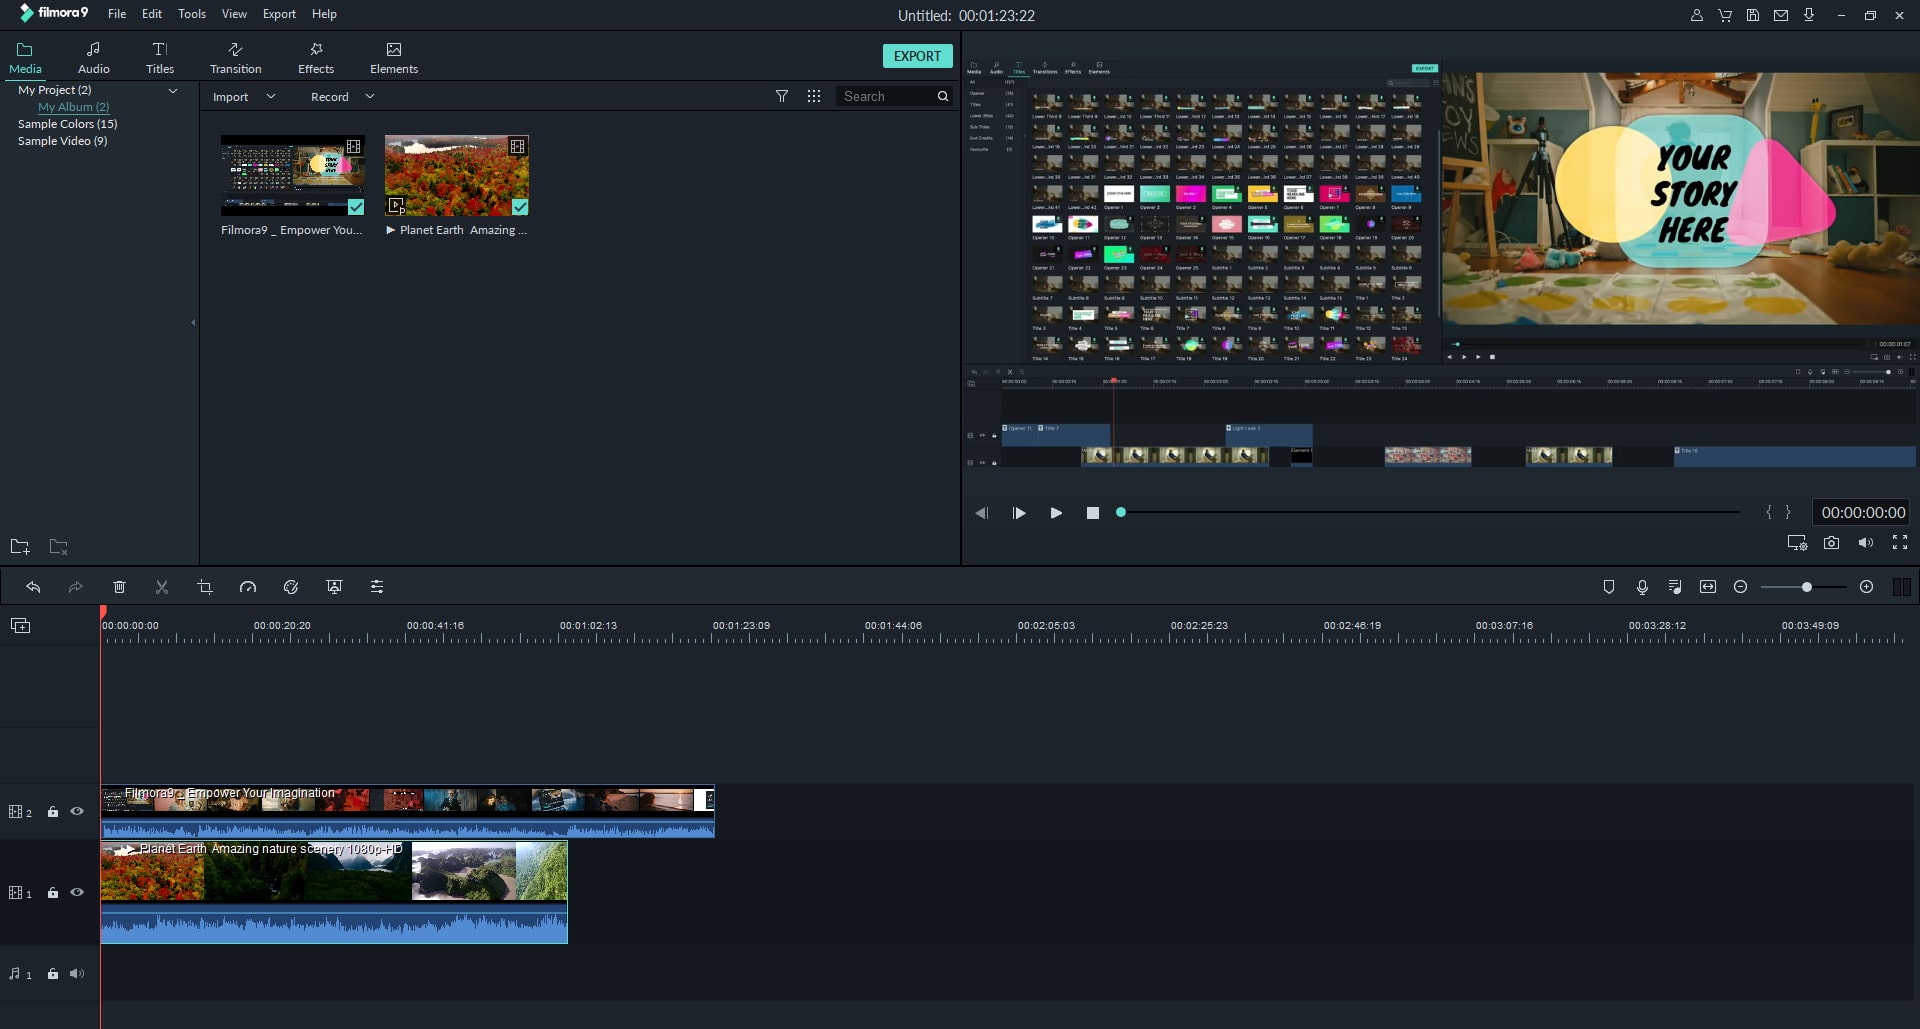
Not all explainer videos will come out the best in the first shot, so it’s often a good idea to get your video edited before it goes live. You can get feedback from your team members and make final adjustments as needed. You can trim the start and end screens of your videos, crop the video, add text, blur sensitive data present (if any), etc.
Professional video editors like Filmora9 provides excellent support. You can easily add voice-over or background music from the stock audios available with the help of editing tools.
Source: Filmora9
5. Choose the Type of Voice-Over You Want
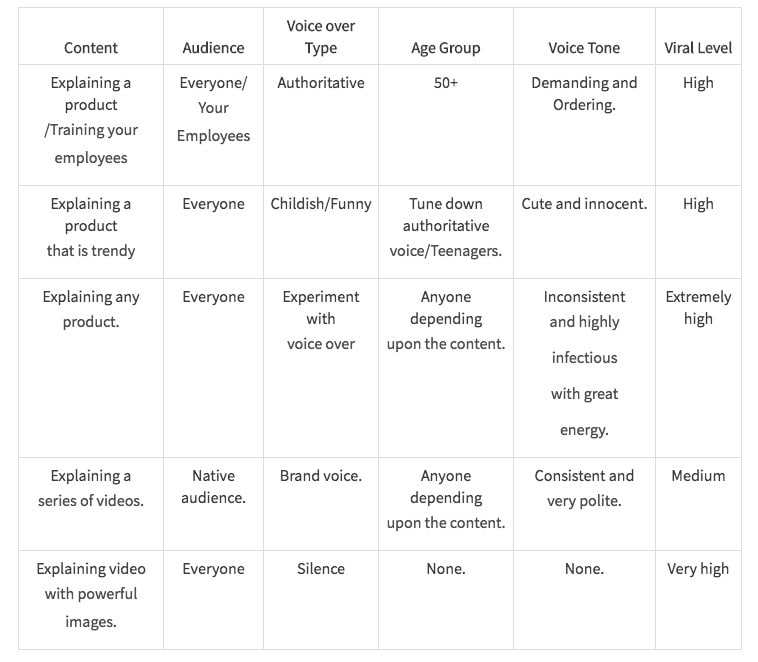
Another essential element while creating your explainer video will be the tone of the voice-over.
There are different types of voiceovers from authoritative to funny. The image below details what kind of voice will suit your business needs.
Source: Animaker
6. Pick Soothing Music and Eye-Catching Visual Elements
Visuals are as crucial as the professional voice-overs in the video. However, you don’t have to stress out much in bringing out amazing visuals. You can always keep your visuals simple.
Paying too much attention to visual effects might sometimes distract your viewers from understanding the actual message. I prefer Pexels and Flickr to buy appealing stock images and Audio Jungle for royalty-free audio tracks.
7. Frame a Suitable Video Marketing Strategy for Explainer Videos
You have an excellent video ready to launch. The immediate step is to find the best video marketing platforms available to host your videos. When I say Video hosting, I bet you will think of YouTube or Vimeo. But using such video hosting platforms has their disadvantages. They have low searchability, exposure and not suited for business purposes.
If you are looking for a customizable video player, with more functionalities built for business, you should be looking at Hippo Video.
A successful video launch consists of three things:
- Player Branding
- Lead Generation
- Video SEO
Share your video on social media and embed the video on your website. Wherever you embed it, it should have the look and feel of your brand.
There are tons of player customization options that you can do for your video like,
- Uploading your logo
- Changing the theme of the player
- Customizing the thumbnail
- Custom domain and favicon
- Adding a title and end screen
By customizing your video player, you can easily cut through the noise and be heard by your viewers.
You can add a call to action, annotation, lead generation or CRM form, quiz or poll at the end of your video to entice your viewers to take appropriate action. This way you can never leave your viewers hanging.
Search engines will crawl the title, description, and thumbnail of the embedded videos on your website and enhances the probability of ranking top in the search results.
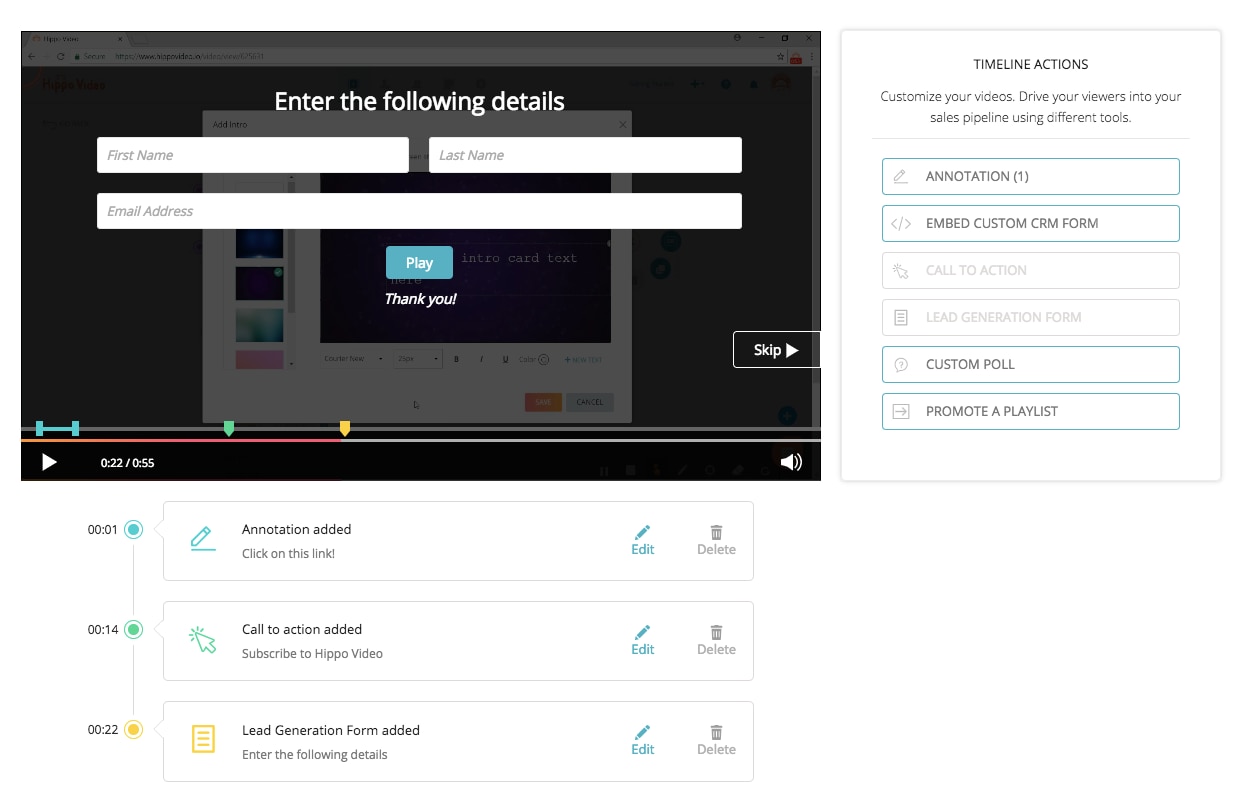
Source: Hippo Video
8. Launch and Track Video Performance
After the successful launch of your video, it’s time to start tracking its performance.
By tracking your video’s performance, you can get profound insights into how your video is impacting your prospects or customers. You can nurture your leads by sending out targeted follow-ups based on the video analytics.
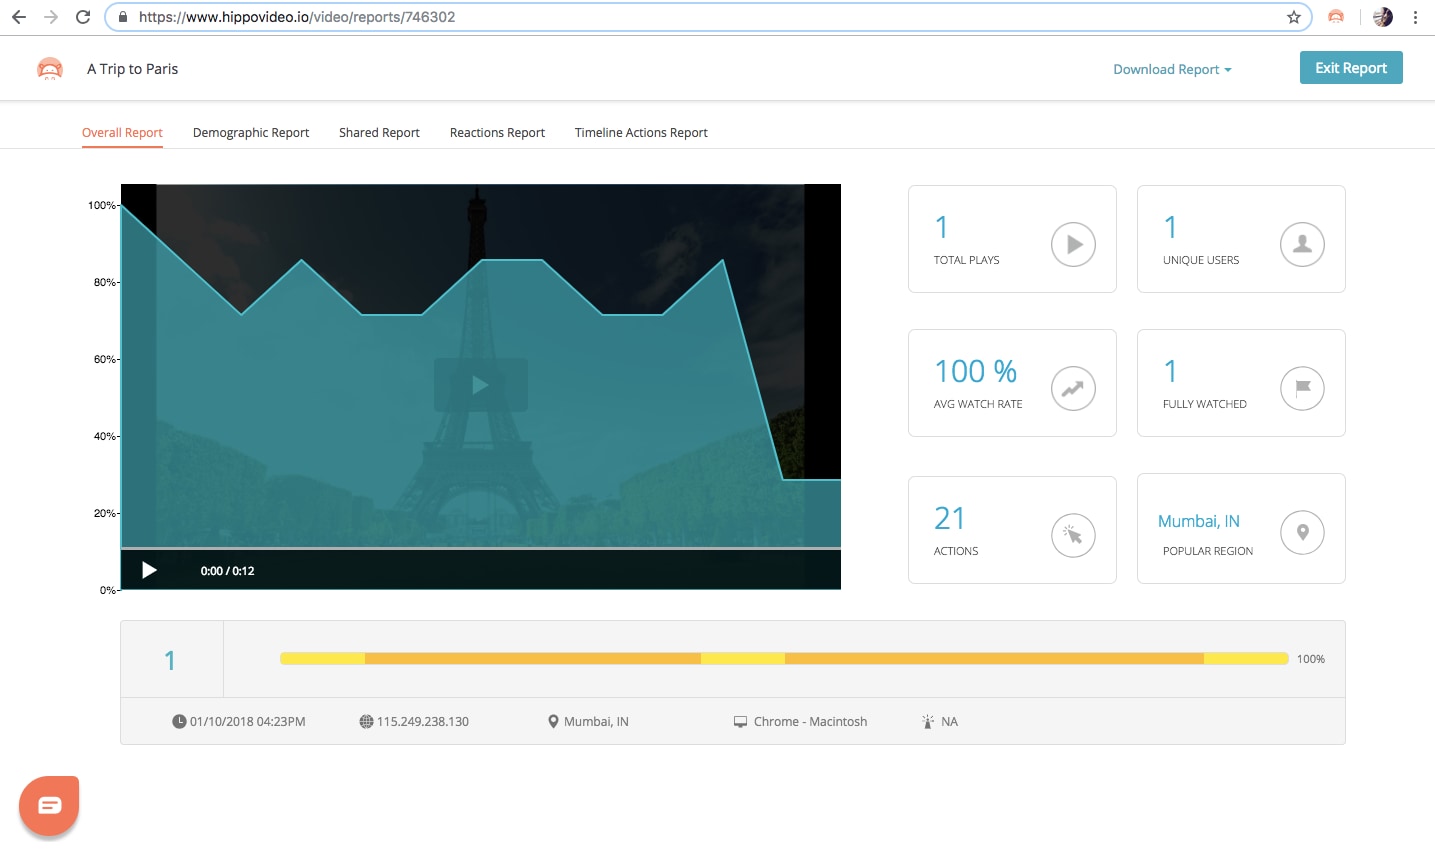
Source: Hippo Video
Start creating great explainer videos with these tips and watch your business grow!
This is a guest post written by Sanjana:

Sanjana works as a Product Marketer at Hippo Video and frequently writes about Video Marketing Strategies, Video Tools, SaaS, CRO, and EdTech. She is a foodie, movie buff, an avid reader, and loves to travel.
Bring up your video to a professional level with straightforward tools.
Try It Free Try It Free

Liza Brown
chief Editor
0 Comment(s)